
As I stood in my kitchen, a tantalizing aroma wafted through the air, instantly transporting me to the sun-kissed shores of Hawaii. Hawaiian Butter Mochi is my go-to dessert when I crave a touch of island paradise. This delightful treat captivates with its unique chewy texture, sitting somewhere deliciously between traditional mochi and cake. What’s more, it’s gluten-free and a breeze to whip up, making it perfect for any cooking enthusiast looking to leave the fast-food routine behind. The marriage of rich coconut, buttery notes, and a hint of vanilla creates a harmonious flavor that’ll have everyone asking for seconds. Ready to indulge in this chewy dessert that turns any day into a mini celebration? Let’s dive into making your very own Hawaiian Butter Mochi!

Why Is Hawaiian Butter Mochi So Irresistible?
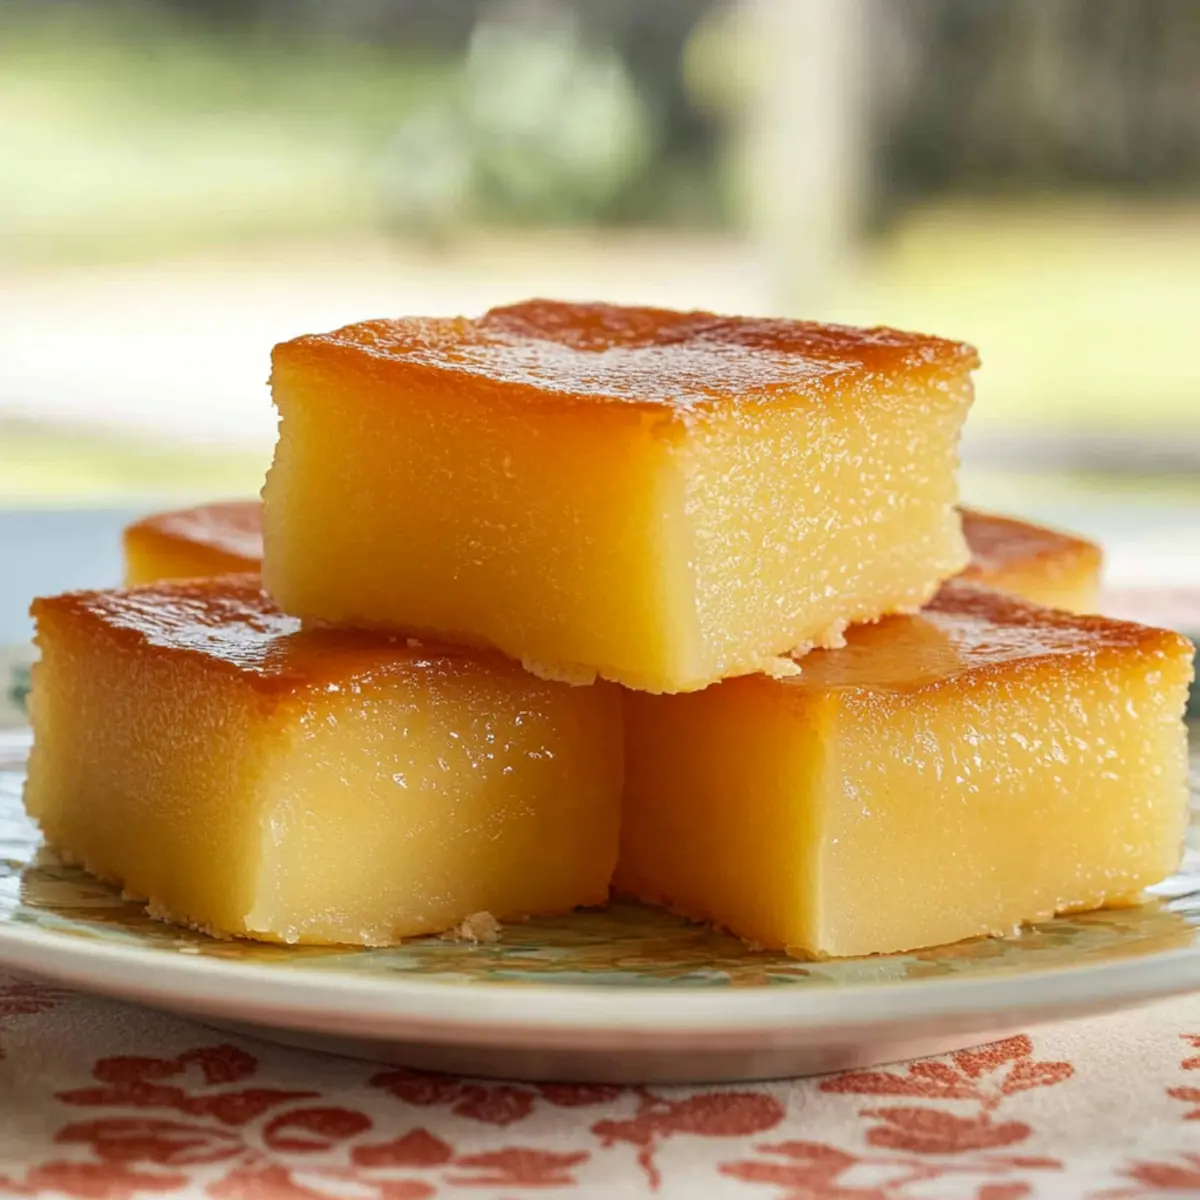
Texture Like No Other: The unique chewy texture of Hawaiian Butter Mochi is simply addicting, offering a delightful bite that feels luxurious.
Tropical Flavors: With coconut milk and a hint of vanilla, each square delivers a taste of paradise right to your home.
Effortless Baking: This easy-to-follow recipe means you can whip it up with minimal fuss, making it perfect for any cook!
Versatile Temptation: Whether enjoyed on its own or alongside a scoop of ice cream, this mochi shines in any setting. Try serving it warm for an extra indulgence!
Gluten-Free Goodness: Not only is it a crowd-pleaser, but it also caters to gluten-free diets, allowing everyone to savor the tantalizing flavors—even those avoiding wheat.
Whether you’re baking for a special event or just want something sweet, Hawaiian Butter Mochi is sure to leave everyone delighted!
Hawaiian Butter Mochi Ingredients
To create this chewy delight, gather these essentials!
For the Batter
• Mochiko Flour – This sweet glutinous rice flour gives the mochi its signature chewy texture; don’t substitute with regular flour.
• Granulated Sugar – Balances the richness of the dessert with a touch of sweetness.
• Baking Powder – Acts as a leavening agent to help create structure during baking.
• Salt – Enhances the overall flavor, making each bite more delightful.
• Large Eggs – Add richness and stability; ensure they are at room temperature for better mixing.
• Whole Milk – Provides moisture to the batter; non-dairy options can be used for a vegan alternative.
• Coconut Milk – Infuses the recipe with rich coconut flavor and adds moisture.
• Butter – Melted for easier mixing, enhancing the dessert’s richness.
• Vanilla Extract – A splash of aromatic sweetness elevates the flavor profile.
Feel free to explore the tropical bliss of Hawaiian Butter Mochi as you create your scrumptious masterpiece!
Step‑by‑Step Instructions for Hawaiian Butter Mochi
Step 1: Preheat and Prepare the Pan
Begin by preheating your oven to 350°F (180°C). While the oven warms up, take a 9×13 inch baking pan and generously butter it, then line it with parchment paper. This will help your Hawaiian Butter Mochi slide out easily once baked. Set the pan aside while you mix your batter.
Step 2: Combine Dry Ingredients
In a large mixing bowl, combine 2 cups of Mochiko flour, 1 cup of granulated sugar, 1 tablespoon of baking powder, and ½ teaspoon of salt. Use a whisk to thoroughly blend these ingredients together, ensuring there are no clumps. Once combined, you’ll have a light and airy mixture that sets the foundation for your mochi.
Step 3: Mix in Wet Ingredients
Crack 4 large eggs into the dry mix, followed by 1 cup of whole milk, 1 cup of coconut milk, ½ cup of melted butter, and 1 teaspoon of vanilla extract. Using a whisk, vigorously combine these ingredients until the batter is smooth and lump-free. The mixture will be fairly thick, so make sure to really incorporate everything for a delightful Hawaiian Butter Mochi.
Step 4: Pour into the Pan
Carefully pour the prepared batter into the lined baking pan, using a rubber spatula to scrape every last bit of the mixture in. Spread it evenly across the pan to ensure uniform cooking, allowing it to fill all corners. The smooth surface will soon transform into a wonderful chewy dessert.
Step 5: Bake to Perfection
Place the pan in the preheated oven and bake for 50–60 minutes. Keep an eye on your Hawaiian Butter Mochi, watching for a golden-brown top to form. A toothpick inserted in the center should come out clean when it’s ready, indicating you’ve achieved that perfect chewy texture.
Step 6: Cool and Slice
Once baked, remove the pan from the oven and set it on a wire rack to cool completely. This step is essential for achieving nice, clean cuts. After about an hour, you can slice your Hawaiian Butter Mochi into 24 squares. Their golden-brown edges and moist interior promise a treat that everyone will love!

Expert Tips for Hawaiian Butter Mochi
• Butter Blending: Ensure melted butter is fully mixed into the batter to prevent lumps. Cream it with sugar for the best incorporation.
• Cooling Time: Patience is key! Allow your Hawaiian Butter Mochi to cool completely before cutting; this ensures prettier and cleaner squares.
• Use Mochiko Only: Only use Mochiko flour for authentic chewy texture; other flours can lead to disappointing results.
• Add Texture: For an extra coconut kick, consider adding shredded unsweetened coconut to the batter for delightful texture and flavor.
• Storage Tips: Store any leftovers in an airtight container at room temperature for up to 2 days—refrigerating may cause it to sag.
Variations for Hawaiian Butter Mochi
Get ready to unleash your creativity in the kitchen! These delightful twists on the classic Hawaiian Butter Mochi will make your taste buds dance with joy.
-
Coconut Lover’s Delight: Add 1 cup of shredded unsweetened coconut for an extra layer of tropical flavor; it will enhance that delightful coconut experience.
-
Matcha Magic: Stir in 1-2 tablespoons of matcha powder to incorporate a gentle green tea flavor; it pairs beautifully with the coconut for a unique taste.
-
Chocolate Bliss: Mix in 1 cup of chocolate chips or chunks for a decadent treat that will satisfy your sweet tooth. Every bite will be a heavenly surprise!
-
Nutty Crunch: Add ½ cup of roasted macadamia nuts or pecans for a delightful crunch; these nuts will complement the chewy texture beautifully.
-
Fruity Fusion: Incorporate ½ cup of mashed ripe bananas or pureed mango for a fruity twist; this will bring a whole new layer of deliciousness.
-
Spiced Variation: Spice it up with a pinch of cinnamon or nutmeg; this adds warmth and depth to the mochi, perfect for autumnal cravings.
-
Peanut Butter Swirl: Drop spoonfuls of creamy peanut butter into the batter before baking for a nutty, rich flavor; each bite will melt in your mouth.
-
Citrus Zing: Add the zest of one lime or lemon for a fresh, vibrant flavor boost; this citrusy touch will bring a refreshing pop.
Feel free to mix and match these variations while making your Hawaiian Butter Mochi, and don’t forget to share your favorite tweaks! If you’re looking for more sweet ideas, check out my recipes for Peanut Butter Pie or French Butter Cake. Enjoy your baking adventure!
How to Store and Freeze Hawaiian Butter Mochi
Room Temperature: Store leftover Hawaiian Butter Mochi in an airtight container at room temperature for up to 2 days for the best flavor and texture.
Fridge: If you need to keep it longer, refrigerate for up to 5 days, but be aware that it may lose some of its delightful chewiness.
Freezer: For extended storage, wrap individual squares in plastic wrap and place them in an airtight freezer bag. It can be frozen for up to 3 months.
Reheating: To enjoy the mochi warm, simply microwave a piece for about 10 seconds. This will revive its chewy goodness without compromising flavor.
What to Serve with Hawaiian Butter Mochi
Elevate your dessert experience by pairing this chewy delight with complementary sides that bring out its tropical flavors.
- Coconut Sorbet: A refreshing, creamy treat that echoes the coconut notes in the mochi, making each bite a tropical escape.
- Whipped Cream: Light and airy, this classic addition enhances the mochi’s richness with a touch of sweetness, perfect for balancing flavors.
- Fresh Pineapple Chunks: Juicy and bright, fresh pineapple offers a burst of sweetness and acidity that cuts through the buttery texture. Enjoying these together truly brings a vibrant balance to your dessert plate!
- Mango Sticky Rice: This Southeast Asian favorite complements the mochi’s chewiness with its own unique texture and a delightful hint of sweetness.
- Almond Joy Ice Cream: Infused with flavors of chocolate and coconut, this indulgent scoop enriches the dessert’s tropical essence while adding a layer of decadence.
- Lychee Martini: For a whimsical twist, serve with this refreshing drink that mirrors the exotic essence of the mochi with its sweet and floral notes.
- Chocolate Ganache: Drizzling warm chocolate over the mochi creates a rich, decadent combination that’s sure to satisfy any sweet tooth.
- Flavored Teas: Pair with a citrus or herbal tea to cleanse the palate between bites, allowing you to fully savor the complex flavors.
- Macadamia Nuts: Their crunchy texture and lightly sweet, nutty flavor provide a delightful contrast to the mochi’s softness, enhancing the overall experience.
- Coconut Flan: Creamy and silken, this dessert echoes the flavors of the Hawaiian Butter Mochi while adding an elegant touch to your offering.
Make Ahead Options
Hawaiian Butter Mochi is an excellent choice for meal prep because it can be made ahead, making busy weeknights a breeze! You can prepare the batter up to 24 hours in advance; just mix the dry ingredients and wet ingredients separately. Refrigerate the batter in airtight containers to maintain its quality and prevent any moisture loss. When ready to bake, simply combine the two mixtures, pour them into the prepared pan, and bake as directed. Alternatively, you can bake the Hawaiian Butter Mochi and store it in an airtight container at room temperature for up to 2 days. This ensures you have a delightful treat ready to serve with minimal effort!

Hawaiian Butter Mochi Recipe FAQs
What type of flour should I use for Hawaiian Butter Mochi?
Absolutely, use Mochiko flour, which is glutinous rice flour, to achieve that authentic chewy texture. Regular flour won’t work as it lacks the characteristic stickiness needed for mochi.
How should I store leftover Hawaiian Butter Mochi?
Store any leftover Hawaiian Butter Mochi in an airtight container at room temperature for up to 2 days. If you need to keep it longer, consider refrigerating it for up to 5 days, although it may lose some of its delightful chewiness.
Can I freeze Hawaiian Butter Mochi, and how do I do it?
Very! To freeze, first cut the mochi into squares and wrap each piece tightly in plastic wrap. Then, place them in an airtight freezer bag or container. It can be frozen for up to 3 months. When you’re ready to enjoy, simply thaw and microwave for about 10 seconds to bring back that signature chewiness.
What should I do if my Hawaiian Butter Mochi turns out too dense?
If your Hawaiian Butter Mochi is too dense, it might be due to overmixing the batter or too much flour. Ensure you whisk the ingredients just until blended, which helps maintain the light and chewy texture. Also, make sure you’re measuring your flour correctly using the spoon-and-level method to avoid packing the flour, resulting in excess.
Is Hawaiian Butter Mochi gluten-free?
Yes, Hawaiian Butter Mochi is inherently gluten-free, as it uses Mochiko flour. However, always double-check other ingredients like milk and butter to ensure they meet gluten-free standards, especially if you’re serving someone with gluten sensitivities or celiac disease.
Can pets have Hawaiian Butter Mochi?
No, it’s best to avoid giving Hawaiian Butter Mochi to pets. Coconut and sugar can upset their stomachs, and the sweeteners might be harmful. Always stick to pet-friendly treats!
Delightful Hawaiian Butter Mochi: A Chewy Coconut Treat
Ingredients
Equipment
Method
- Preheat your oven to 350°F (180°C) and butter a 9x13 inch baking pan, lining it with parchment paper.
- In a large mixing bowl, combine Mochiko flour, granulated sugar, baking powder, and salt. Whisk until well-blended.
- Add eggs, whole milk, coconut milk, melted butter, and vanilla extract to the dry ingredients. Whisk until smooth and lump-free.
- Pour the batter into the prepared baking pan, spreading it evenly.
- Bake for 50–60 minutes until golden brown and a toothpick inserted comes out clean.
- Once baked, let it cool on a wire rack before slicing into squares.
Leave a Reply