
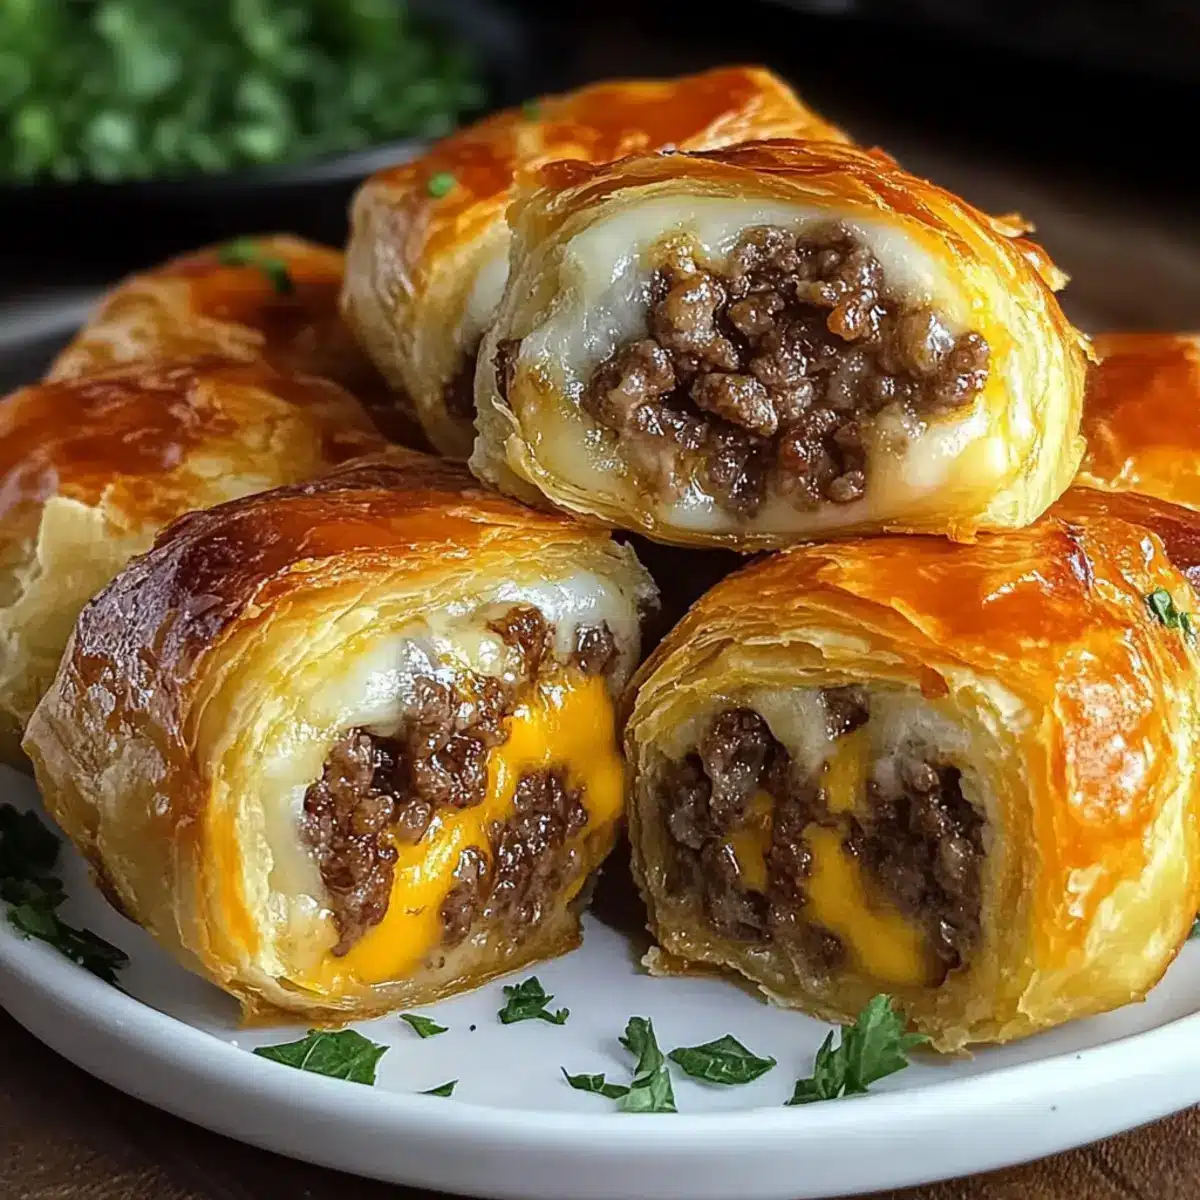
As I stood in my kitchen, the tantalizing scent of garlic butter wafted through the air, making my mouth water in anticipation. It’s incredible how a simple twist on a classic dish can elevate everyday meals, isn’t it? Enter my Garlic Butter Cheeseburger Rollups—a delightful fusion of juicy beef and melty cheese wrapped in buttery dough. Not only are these rollups a winning choice for an easy weeknight meal, but they also make the perfect comfort food for game nights with family and friends. Forget the hassle of grilling; this playful and shareable recipe will have everyone clamoring for more. Ready to indulge in a burger experience that’s just a bit more fun?
Why are these rollups a must-try?
Simplicity makes these rollups a breeze to prepare—perfect for busy weeknights or spontaneous gatherings. Irresistible flavors emerge from the combination of garlic butter, juicy beef, and creamy cheese, creating an unforgettable comfort food experience. Customization is key—swap ground beef for turkey or add your favorite veggies! Perfectly shareable, they make game nights a hit, bringing friends and family together over delicious bites. Don’t forget to serve them warm with a side of ketchup or ranch for an extra flavor boost!
Garlic Butter Cheeseburger Rollups Ingredients
For the Filling
• Ground Beef – Provides the savory protein base; use lean beef for less grease.
• Cheddar Cheese – Adds a melty, creamy texture and rich flavor; substitute with mozzarella for a different taste.
For the Dough
• Garlic Butter – Infuses the rollups with aromatic richness; easily made by mixing minced garlic into softened butter.
• Refrigerated Dough (e.g., crescent roll dough) – Serves as the base that encases the filling; opt for whole wheat dough for a healthier choice.
For Serving
• Ketchup/Condiments – Complements the flavors and adds moisture; feel free to customize with mustard or ranch.
Step‑by‑Step Instructions for Garlic Butter Cheeseburger Rollups
Step 1: Preheat the Oven
Begin by preheating your oven to 375°F (190°C). While the oven warms up, line a baking sheet with parchment paper to prevent sticking and make cleanup a breeze. It’s important to prepare your baking surface now, as this will be where your delicious Garlic Butter Cheeseburger Rollups will bake to golden perfection.
Step 2: Brown the Ground Beef
In a skillet over medium heat, add the ground beef and cook until it’s browned and no longer pink, typically about 6-8 minutes. Make sure to break up the meat with a spatula to ensure even cooking. Once browned, drain any excess fat to keep your rollups from becoming soggy, then set the beef aside to cool slightly before using.
Step 3: Prepare the Dough
On a clean, floured surface, roll out your refrigerated dough, like crescent roll dough, and cut it into rectangles or triangles. Aim for pieces that are large enough to hold a good amount of filling. This is an exciting step where the base of your Garlic Butter Cheeseburger Rollups begins to take shape, so don’t rush it!
Step 4: Add Garlic Butter
Now, take your prepared garlic butter and spread a generous layer over each piece of dough. The aroma from the garlic butter will start to waft through your kitchen! This step not only adds flavor but also forms a wonderful, crispy texture while baking. Be sure to cover each piece evenly to enhance the taste.
Step 5: Assemble the Filling
Evenly distribute the cooked ground beef and cheddar cheese across the dough, making sure to leave a small border around the edges. The savory beef and melty cheese will create a deliciously comforting filling for your rollups. This is where you can get creative by adding any extras like sautéed onions or peppers.
Step 6: Roll Up the Dough
Carefully roll each piece of dough tightly around the filling, starting at one end and tucking everything in as you go. Place the rolled-ups seam side down on your prepared baking sheet. Work gently to ensure they stay intact, as this will help keep the fillings secure during baking.
Step 7: Brush with Garlic Butter
Using a pastry brush, lightly coat the tops of each assembled rollup with any remaining garlic butter. This step will help achieve a beautifully golden-brown exterior and infuse even more delicious garlic flavor. Don’t skip this part—it’s the secret to a mouthwatering finish on your Garlic Butter Cheeseburger Rollups!
Step 8: Bake Until Golden
Place the baking sheet in your preheated oven and bake for 15-20 minutes, or until the rollups are golden brown and puffed. Keep an eye on them during the last few minutes to ensure they don’t overbake, as you want a soft, fluffy interior that complements the crispy outside.
Step 9: Cool and Serve
Once baked, remove the rollups from the oven and allow them to cool slightly on the baking sheet for about 5 minutes. This resting time helps them firm up a bit! Serve warm with your favorite dipping sauces like ketchup or ranch, and watch as everyone enjoys the comforting, cheesy goodness of your Garlic Butter Cheeseburger Rollups.
Variations & Substitutions for Garlic Butter Cheeseburger Rollups
Feel free to get creative and make these rollups your own. The flavor and texture possibilities are endless!
-
Turkey Twist: Substitute ground beef with ground turkey for a lighter option that’s still packed with flavor. You’ll get a deliciously savory rollup without the extra calories.
-
Cheese Medley: Experiment with a mix of cheeses, such as pepper jack for a spicy kick or gouda for an extra smoky flavor. Combine different cheeses; it heightens the cheesiness and adds depth to each bite.
-
Veggie Boost: Incorporate sautéed onions, peppers, or mushrooms in the filling for extra flavor and texture. This not only enhances your rollups but also makes them more nutritious!
-
Whole Wheat Option: For a healthier spin, use whole wheat dough instead of traditional refrigerated dough. This subtle change overlooks nothing, and you still get that delightful fluffiness.
-
Bacon Add-In: Add crumbled bacon to the filling for a smoky twist that brings a delightful crunch. A little bacon never hurts, does it?
-
Spicy Version: Mix in some diced jalapeños or a dash of hot sauce to kick up the heat. This brings a dynamic flavor profile that spice lovers will adore.
-
BBQ Flare: Drizzle some barbecue sauce inside the rollups along with the beef and cheese for a tangy twist. The sweet and smoky flavors will transport you to summer cookouts!
-
Mini Versions: Make bite-sized rollups perfect for parties by cutting the dough into smaller pieces. These mini treats offer a fun twist on the classic and make for great finger food!
Each of these variations not only brings something unique to the table but also ensures you can enjoy your Garlic Butter Cheeseburger Rollups in various delightful ways! And if you’re looking for other comforting recipes, don’t miss out on Honey Garlic BBQ or our creamy Cracked Garlic Steak for a delicious meal that your family will love.
Make Ahead Options
These Garlic Butter Cheeseburger Rollups are perfect for meal prep, allowing you to save valuable time on busy weeknights! You can prepare the rollups up to 24 hours in advance by assembling them and covering them tightly with plastic wrap before refrigerating. For longer storage, you can freeze the unbaked rollups for up to 3 months—just make sure to place parchment paper between each rollup to prevent sticking. When you’re ready to bake, simply preheat the oven and pop them directly from the fridge or freezer into the oven; add an extra 5-10 minutes of baking time if frozen. With these tips, you’ll enjoy delicious, comforting Garlic Butter Cheeseburger Rollups that are just as tasty as when freshly made!
Expert Tips for Garlic Butter Cheeseburger Rollups
-
Choose Lean Beef: Use lean ground beef to minimize grease, ensuring a cleaner and less soggy bite for your Garlic Butter Cheeseburger Rollups.
-
Even Garlic Butter Coverage: Spread garlic butter evenly across the dough to enhance flavor and achieve an irresistible golden crust during baking.
-
Watch Baking Time: Keep an eye on the rollups towards the end of baking to prevent overcooking; dried-out rollups are a common mistake you want to avoid!
-
Customize Your Filling: Don’t hesitate to add sautéed onions, peppers, or extra cheese to your filling for a personalized twist that enhances the overall flavor.
-
Roll Tightly: Ensure you roll the dough tightly around the filling, which helps keep everything secure during baking, preventing any flavorful surprises from leaking out.
How to Store and Freeze Garlic Butter Cheeseburger Rollups
Room Temperature: Store any leftover rollups at room temperature for up to 2 hours. If longer storage is needed, refrigerate them to maintain freshness.
Fridge: Keep the rollups in an airtight container in the fridge for up to 3 days. Reheat in the oven or microwave until heated through for the best taste.
Freezer: For longer storage, freeze assembled rollups before baking. Wrap each tightly in plastic wrap and place in a freezer-safe bag for up to 2 months. Bake from frozen, adding 5-10 minutes to the cooking time.
Reheating: Reheat leftover rollups in the oven at 350°F (175°C) for about 10-15 minutes. This ensures a crispy exterior and melty interior, perfect for enjoying your Garlic Butter Cheeseburger Rollups again!
What to Serve with Garlic Butter Cheeseburger Rollups
Delight in creating a complete dining experience that pairs beautifully with these delectable rollups.
-
Crisp Garden Salad: A fresh, vibrant salad adds a burst of color and crunch, balancing the rich flavors of the rollups. Toss in your favorite veggies, and maybe a zingy vinaigrette, to elevate the meal.
-
Sweet Potato Fries: These crispy, slightly sweet fries complement the savory cheeseburger flavors, providing the perfect crispy contrast. Serve them with a sprinkle of sea salt for added flavor!
-
Pickles: The tangy crunch of pickles cuts through the richness of the rollups, creating a delightful bite. Consider serving dill pickles for a classic pairing that aids digestion while enhancing taste.
-
Coleslaw: A creamy or vinegar-based coleslaw adds a refreshing crunch and a hint of tartness that pairs well with the comfort food aspects of the rollups. The crunch of the coleslaw is just the texture needed!
-
Buffalo Cauliflower Bites: Spicy, crispy baked cauliflower provides a fun kick that contrasts nicely with the cheeseburger flavors. These bites offer a unique texture and can be the perfect finger food alongside your rollups.
-
Garlic Breadsticks: For those garlic lovers, pairing buttery, cheesy garlic breadsticks can strengthen that aromatic flavor profile while satisfying any carb cravings. These are perfect for dipping into leftover condiments like ketchup or ranch.
-
Beer or Soda Float: For a fun and refreshing drink, serve a beer or a soda float to cleanse the palate and round out the meal with a touch of sweetness, making it a delightful experience for all ages.
Garlic Butter Cheeseburger Rollups Recipe FAQs
What type of ground beef should I use for the rollups?
Absolutely! For the best results, I recommend using lean ground beef, such as 80/20 or 90/10 blends. This will help reduce excess grease, ensuring your Garlic Butter Cheeseburger Rollups remain flavorful without being soggy.
How long can I store my Garlic Butter Cheeseburger Rollups in the fridge?
Very! You can keep your rollups in an airtight container in the fridge for up to 3 days. When you’re ready to enjoy them again, reheat them in the oven or microwave until warmed through for maximum deliciousness.
Can I freeze Garlic Butter Cheeseburger Rollups? How do I do it?
Yes, indeed! To freeze them, assemble the rollups but do not bake. Wrap each rollup tightly in plastic wrap, then place them in a freezer-safe bag. They’ll keep well for up to 2 months! When you’re ready to bake, simply cook them straight from the freezer, adding an extra 5-10 minutes to the baking time. This way, you can enjoy a fresh batch anytime!
What should I do if my rollups are overcooked or dry?
Very common! If your Garlic Butter Cheeseburger Rollups come out a bit dry, serve them with extra condiments like ketchup or ranch, which can add moisture and flavor. Next time, check your cooking time closely as they only need 15-20 minutes to reach that golden perfection—no need for longer!
Are there any dietary considerations I should keep in mind with these rollups?
Absolutely! If you’re cooking for someone with dietary restrictions, consider using ground turkey or chicken for a leaner option. Also, check for any cheese allergies; you can substitute cheddar with dairy-free cheese alternatives to accommodate those preferences.
Garlic Butter Cheeseburger Rollups: Comfort in Every Bite
Ingredients
Equipment
Method
- Preheat your oven to 375°F (190°C) and line a baking sheet with parchment paper.
- Brown the ground beef in a skillet over medium heat for 6-8 minutes, then drain excess fat.
- Roll out the dough on a floured surface and cut into rectangles or triangles.
- Spread a generous layer of garlic butter over each piece of dough.
- Distribute the cooked ground beef and cheddar cheese across the dough, leaving a small border.
- Roll each piece of dough tightly around the filling and place seam side down on the baking sheet.
- Brush the tops of each rollup with remaining garlic butter.
- Bake in the preheated oven for 15-20 minutes until golden brown.
- Cool slightly on the baking sheet for about 5 minutes before serving.
Leave a Reply