
As the aroma of baked goodness wafts through the kitchen, I’m reminded of those oh-so-busy afternoons when we all crave something that satisfies without the fuss. Enter my 4-Ingredient Crispy Chocolate Oat Cookies: your new go-to for quick, homemade indulgence. These delightful cookies come together in under 30 minutes, making them the ultimate solution for last-minute gatherings or simply satisfying a sweet tooth without the guilt. With just a handful of minimalist ingredients, they manage to pack a delightful crunch and a rich chocolate flavor that’s bound to impress both your family and anyone dropping by for a visit. Ready to indulge in a deliciously simple treat? Let’s dive into the recipe!
Why are these cookies a must-try?
Simplicity makes them a breeze to prepare with just four ingredients. Nutritious elements like oats and nut butter offer a healthier cookie option that doesn’t skimp on flavor. Customizable with various nut butters or add-ins like walnuts, you can easily make them your own. Crowd-pleaser approved, these cookies are perfect for sharing at gatherings or enjoying solo! For more delicious ideas, check out our Crazy Good Casserole for a cozy meal or Beef Shells for a hearty dinner.
Crispy Chocolate Oat Cookies Ingredients
For the Cookie Base
• Oats – Provides structure and chewiness; gluten-free oats can be used for a gluten-free option.
• Nut Butter – Acts as a binding agent; adds creaminess and healthy fats—substitute with seed butter for a nut-free version.
• Maple Syrup or Honey – Sweetens the cookies naturally; use agave syrup for a vegan alternative.
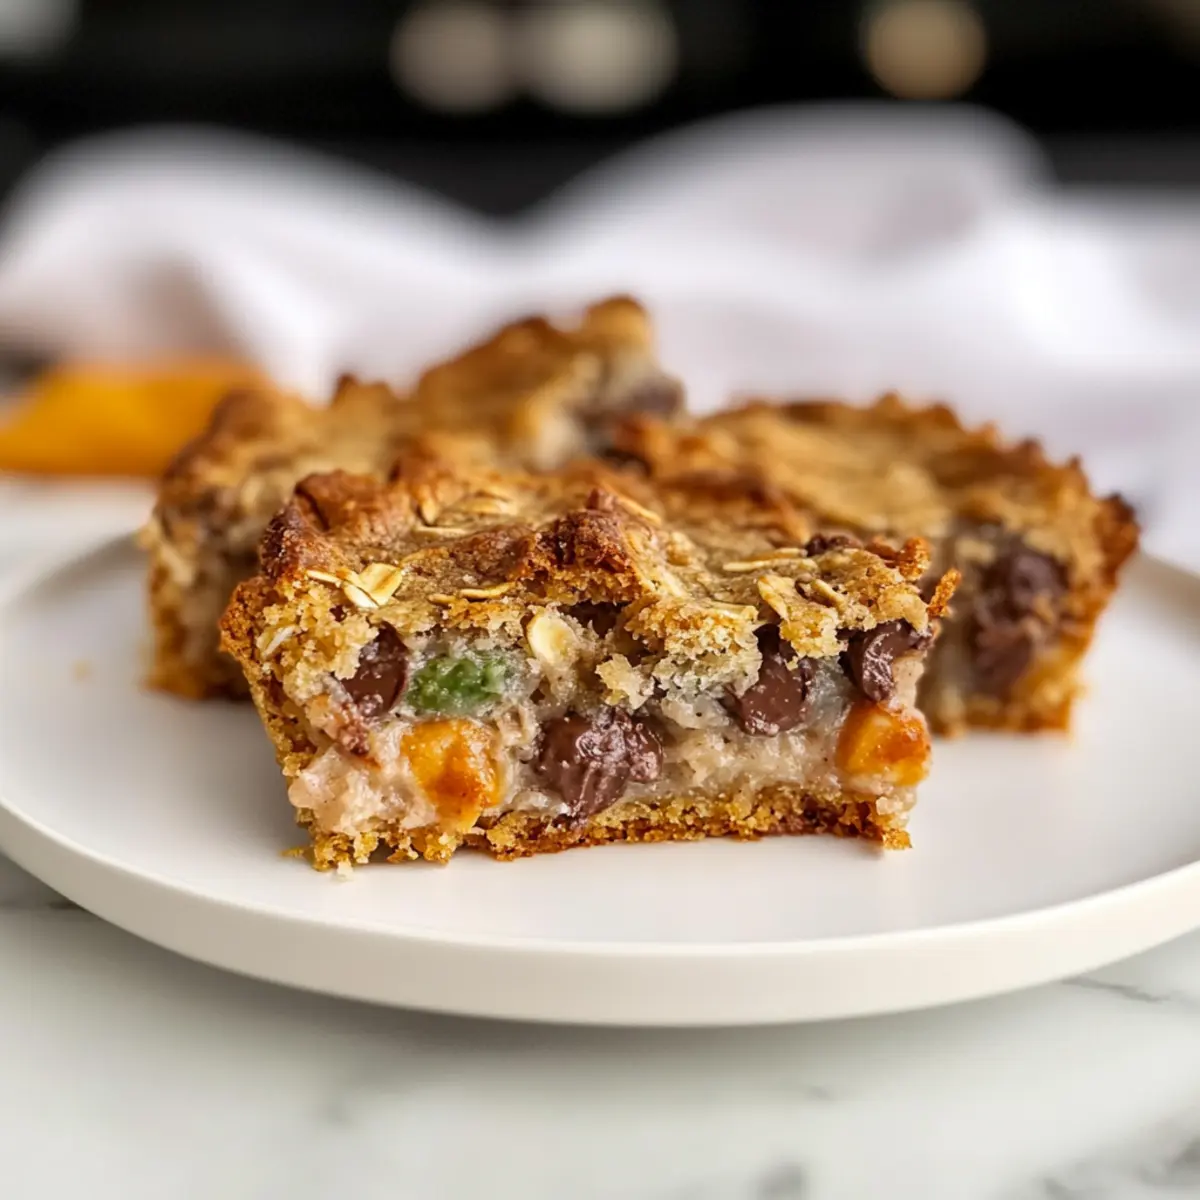
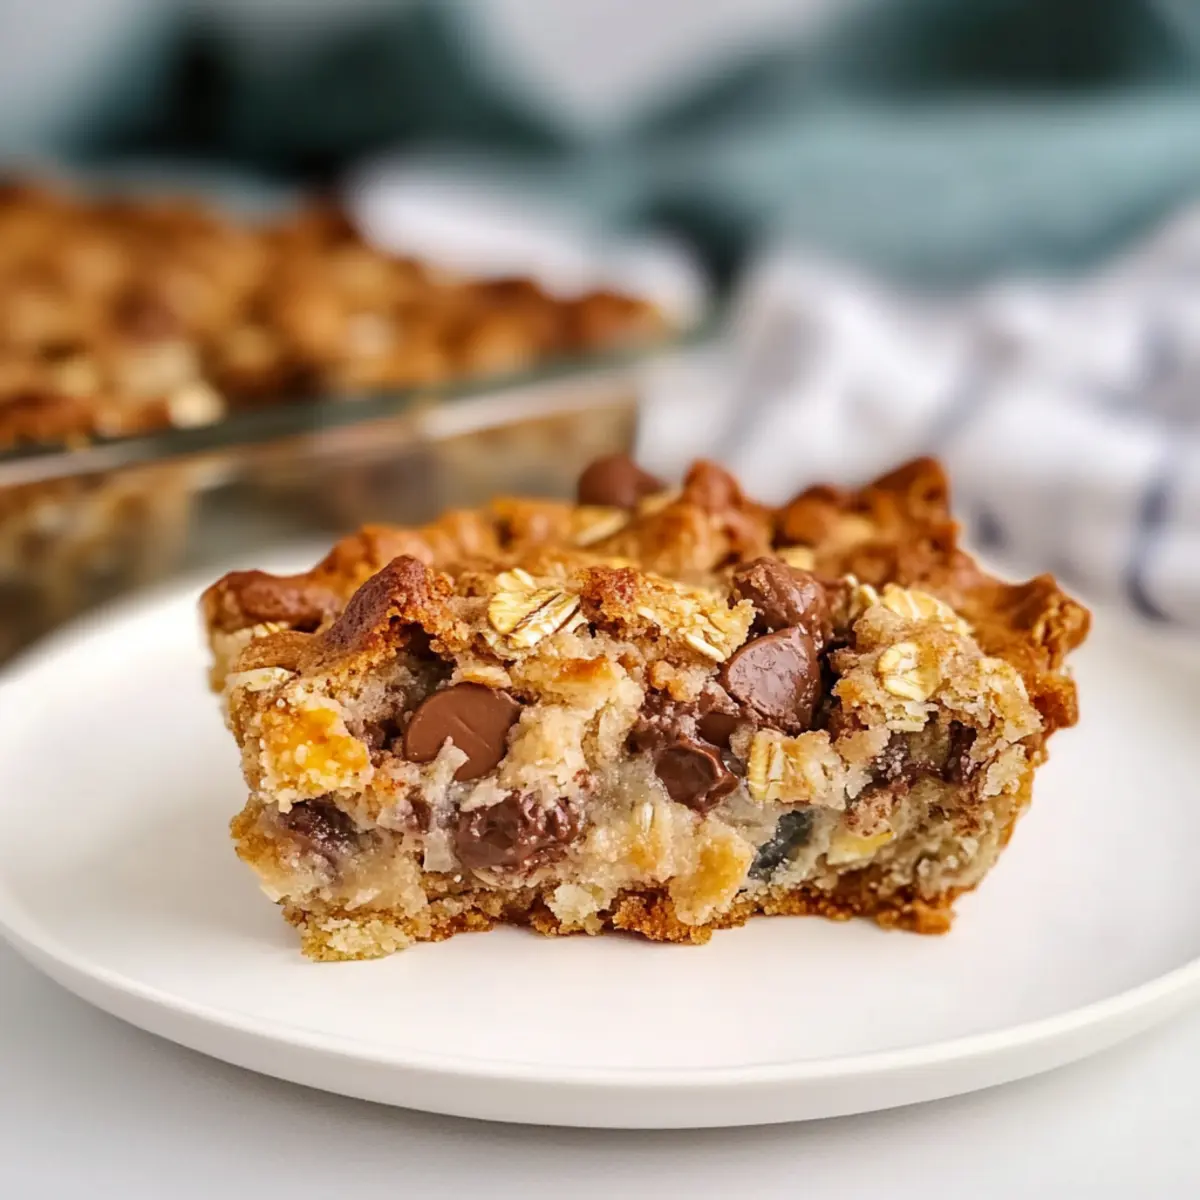
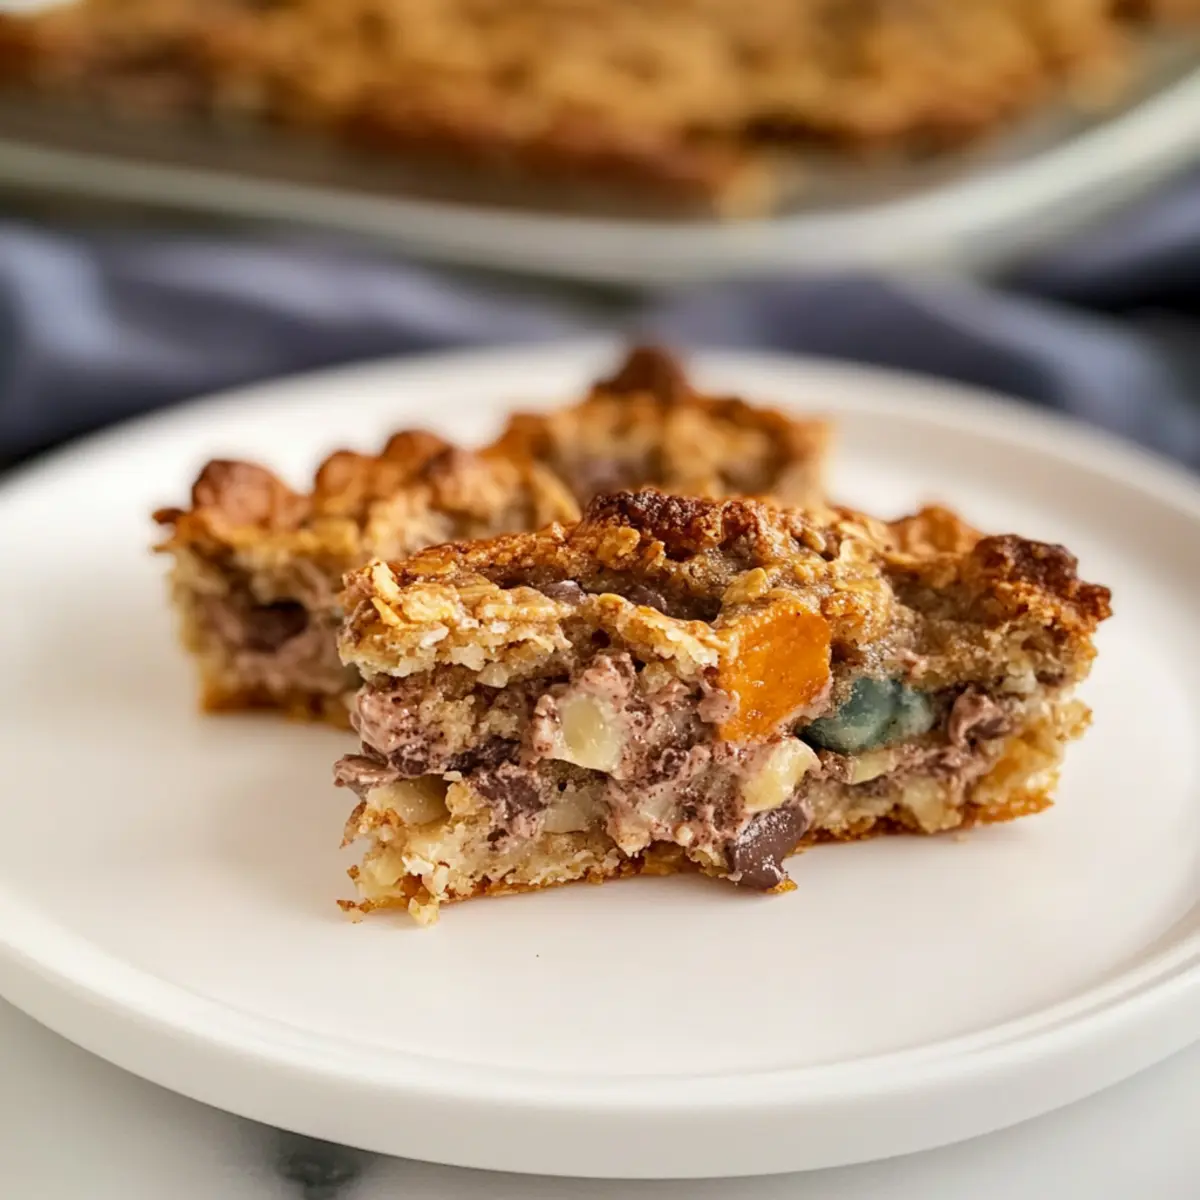
• Chocolate Chips – Contributes rich chocolate flavor and texture; consider dark chocolate chips for a more intense taste or dried fruit for a healthier twist.
For Variations
• Chopped Nuts – Adds extra crunch and richness; try walnuts or pecans for different flavors.
• Cinnamon – Incorporating this spice enhances flavor depth for a cozy touch in each bite.
• Vanilla Extract – A splash of this adds a warm, aromatic quality to the cookies, making them even more irresistible.
These Crispy Chocolate Oat Cookies are a fantastic way to indulge in a sweet treat without compromising your health goals!
Step‑by‑Step Instructions for Easy Sausage and Egg Casserole
Step 1: Preheat and Prepare
Begin by preheating your oven to 350°F (175°C) while preparing your baking dish. Grease a 9×13 inch casserole dish with cooking spray or butter to ensure easy removal later. Line your countertop with all the ingredients for the Easy Sausage and Egg Casserole within reach, creating an inviting space for your cooking adventure.
Step 2: Cook the Sausage
In a large skillet over medium heat, cook 1 pound of your favorite sausage until it’s browned and fully cooked, about 5-7 minutes. As it cooks, use a spatula to crumble it into smaller pieces, ensuring even browning. Once browned, drain any excess grease if necessary, then spread the sausage evenly in the bottom of your prepared baking dish.
Step 3: Beat the Eggs
In a mixing bowl, crack 8 large eggs and whisk them together until fully combined, adding salt and pepper to taste. Whisk vigorously for about 1-2 minutes until the mixture is frothy and well-blended. This creates a light texture for your Easy Sausage and Egg Casserole, helping it rise beautifully in the oven.
Step 4: Add Cheese and Milk
Pour in 1 cup of milk (or a dairy-free alternative) to the egg mixture, whisking once again for another 30 seconds until thoroughly blended. Next, fold in 2 cups of shredded cheese of your choice, such as cheddar or mozzarella. This cheesy addition will melt beautifully, enhancing the comfort food appeal of your Easy Sausage and Egg Casserole.
Step 5: Combine and Pour
Gently pour the egg and cheese mixture over the cooked sausage in the casserole dish. Make sure it evenly distributes, allowing the savory sausage to be nestled within the creamy egg. Use a spatula to press down lightly, ensuring a uniform mix throughout for a perfectly balanced casserole.
Step 6: Bake to Perfection
Pop the casserole into your preheated oven and bake for 30-35 minutes, or until the edges begin to bubble and the center is set. You’ll know it’s done when the top is golden brown and slightly puffed. Avoid overbaking to keep the casserole moist and fluffy for your delightful Easy Sausage and Egg Casserole.
Step 7: Cool and Serve
Once baked, remove the casserole from the oven and let it cool for about 5-10 minutes. This resting period allows the flavors to meld and makes it easier to slice. Cut into squares and serve warm, perhaps with a side of fresh fruit or a light salad for a perfect brunch that everyone will love!

Make Ahead Options
These Crispy Chocolate Oat Cookies are perfect for meal prep enthusiasts looking to save time! You can prepare the dough up to 24 hours in advance by combining oats, nut butter, and sweetener in a bowl, then refrigerating the mixture in an airtight container. This not only keeps the ingredients fresh but also allows the flavors to meld beautifully, ensuring your cookies are just as delicious when baked! When you’re ready to indulge, fold in chocolate chips, scoop the dough onto a baking sheet, and bake as directed. This way, you’ll have fresh cookies with minimal effort, giving you more time to enjoy the sweet moments with family and friends.
Easy Crispy Chocolate Oat Cookies Variations
Feel free to get creative and make these cookies uniquely yours with these delightful twists!
-
Nut-Free: Substitute any nut butter with sunflower seed butter to keep it safe for schools or nut allergies.
If you swap out the nut butter, you’ll maintain that glorious texture while taking away any nutty flavor. -
Vegan: Replace honey or maple syrup with agave syrup for a completely plant-based treat.
Enjoy the same beloved richness while making these cookies suitable for your vegan friends or family! -
Chewy Texture: Add 1/4 cup of applesauce to the dough for a softer, chewier cookie.
This twist offers a delightful contrast in texture, giving every bite a luscious feel, perfect for the chewy-cookie lover! -
Flavor Boost: Mix in a teaspoon of espresso powder to elevate the chocolate flavor while adding a gentle coffee note.
This sophisticated touch will surprise any dark chocolate enthusiast and awaken their taste buds with every bite! -
Spicy Kick: Add a pinch of cayenne pepper for a warm, spicy kick to balance the sweetness.
Those who enjoy a little heat will love how the spiciness blends seamlessly with the rich chocolate. -
Fruity Addition: Stir in a handful of dried cranberries or raisins for a sweet, fruity burst.
Not only do they provide a pop of color, but the tart flavor also pairs beautifully with the rich chocolate.
For a comforting brunch, try these cookies alongside a warm serving of Easy Sausage and Egg Casserole. They also make a lovely dessert after enjoying Beef Shells!
Storage Tips for Crispy Chocolate Oat Cookies
Room Temperature: Store cookies in an airtight container at room temperature for up to 1 week to maintain their delightful crunch.
Fridge: To extend freshness, refrigerate in an airtight container for up to 2 weeks. Just allow them to come to room temperature before serving.
Freezer: For longer storage, freeze cookies wrapped individually in plastic wrap and placed in a heavy-duty zip-top bag. They can last up to 3 months!
Reheating: Warm cookies in the microwave for about 15 seconds to bring back their delicious texture or enjoy them chilled straight from the fridge.
What to Serve with Crispy Chocolate Oat Cookies
Indulging in these delightful cookies offers the perfect opportunity to create a memorable treat pairing that enhances your experience.
- Creamy Almond Milk: A refreshing glass of almond milk complements the rich chocolate in the cookies, providing a smooth contrast to the crunchy texture.
- Fresh Berries: Juicy strawberries or blueberries add a pop of color and a burst of freshness, balancing the sweetness beautifully.
- Vanilla Ice Cream: A scoop of vanilla ice cream on the side transforms your cookies into an irresistible dessert that satisfies your sweet tooth.
- Nut Butter Dip: For an extra indulgent bite, serve with a small bowl of your favorite nut butter for dipping. It enhances the nutty flavors within.
- Herbed Yogurt: Mix plain yogurt with fresh herbs like mint or basil to create a zesty dip that offsets the cookie’s sweetness in a unique way.
- Coffee or Tea: A warm cup of coffee or a soothing herbal tea pairs perfectly, offering a comforting finish that’s perfect for a cozy afternoon delight.
With these delicious pairings, your Crispy Chocolate Oat Cookies become the star of a delightful spread that’s sure to impress!
Expert Tips for Crispy Chocolate Oat Cookies
-
Use Quality Ingredients: Choose high-quality chocolate chips and natural nut butter for the best flavor. It makes a noticeable difference in your easy crispy chocolate oat cookies!
-
Don’t Overmix: Mix just until combined to avoid a dense texture. You want the dough to remain light and airy for a delightful crunch.
-
Let Them Cool: Allow cookies to cool on the baking sheet for a few minutes. This helps them firm up, making them easier to transfer without breaking.
-
Experiment with Add-ins: Don’t hesitate to try different nut butters or mix in spices. They enhance flavor depth and make your easy crispy chocolate oat cookies uniquely yours.
-
Mind the Baking Time: Keep a close eye on your cookies as they bake. They can quickly go from perfect to overbaked; underbake slightly for a chewy center.
-
Use Parchment Paper: Lining your baking sheet with parchment paper prevents sticking and ensures easy cleanup, making the process smooth and enjoyable!
Crispy Chocolate Oat Cookies Recipe FAQs
What type of oats should I use for the cookies?
Absolutely! For these cookies, I recommend using rolled oats as they provide structure and chewiness. If you need the recipe to be gluten-free, be sure to choose certified gluten-free oats to avoid any cross-contamination.
How should I store my crispy chocolate oat cookies?
Very simple! Store your cookies in an airtight container at room temperature for up to 1 week to keep them crunchy. If you prefer them to last longer, refrigerate them in an airtight container for up to 2 weeks. Just allow them to return to room temperature before indulging in the deliciousness!
Can I freeze these cookies?
Certainly! To freeze, wrap each cookie tightly in plastic wrap and place them in a heavy-duty zip-top bag. They can be stored in the freezer for up to 3 months. When you’re ready to enjoy, just grab one and let it thaw at room temperature or warm it in the microwave for about 15 seconds for that fresh-baked taste!
What can I do if my cookies turn out too crumbly?
No worries! If your dough seems crumbly rather than cohesive, it may need a little more moisture. You can add a tablespoon of nut butter or sweetener until the mixture binds well. Remember, it’s important to mix until just combined; overmixing can create a dense texture.
Are there any substitutions for nut butter or sweeteners?
Absolutely! For nut butter, feel free to substitute sunflower seed butter or tahini for a nut-free option. You can also replace maple syrup or honey with agave syrup for a vegan alternative. The more the merrier when it comes to personalizing your cookie flavors!
Can my pets eat these cookies?
I recommend avoiding giving these cookies to your pets, especially if they contain chocolate, which is toxic to dogs and cats. Always keep human treats away from your furry friends to ensure their safety!
Easy Sausage and Egg Casserole for a Cozy Weekend Brunch
Ingredients
Equipment
Method
- Preheat your oven to 350°F (175°C) and grease a 9x13 inch casserole dish.
- In a large skillet, cook the sausage over medium heat until browned, about 5-7 minutes.
- In a mixing bowl, whisk together the eggs and season with salt and pepper.
- Pour in the milk and whisk until blended, then fold in the cheese.
- Pour the egg and cheese mixture over the cooked sausage in the casserole dish.
- Bake for 30-35 minutes until golden brown and set in the center.
- Let cool for 5-10 minutes, then slice and serve warm.
Leave a Reply