
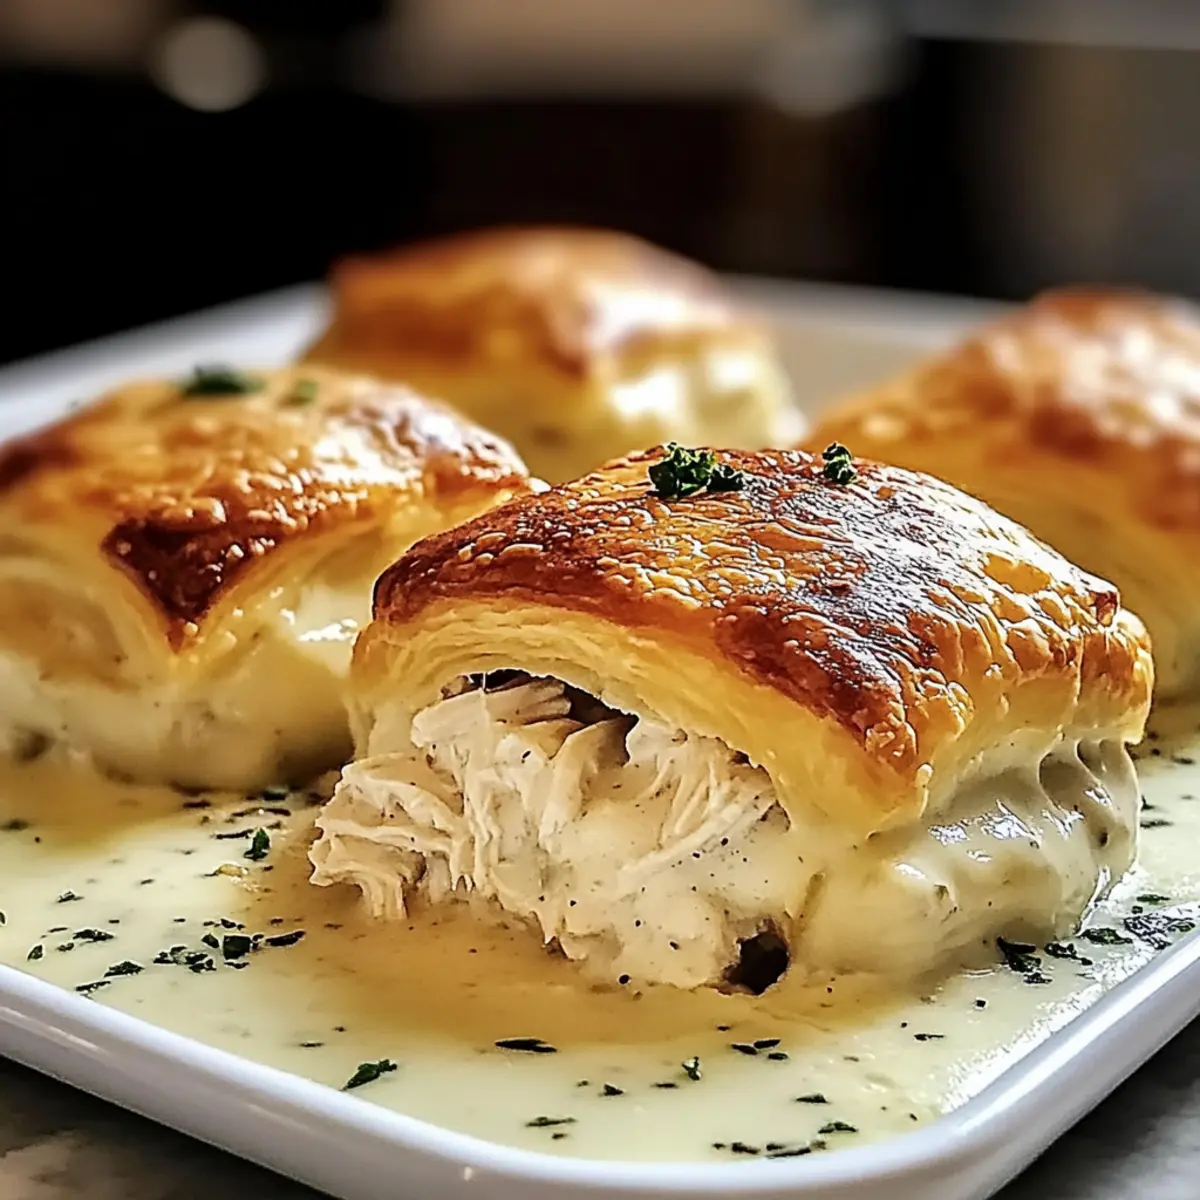
The rich aroma of Chicken Pillows wafts through the kitchen, instantly transporting me to cozy family dinners past. These delightful little pockets, bursting with tender chicken and creamy Parmesan sauce, have the power to turn any meal into a celebration of comfort food. Perfect for a quick weeknight dinner or as eye-catching appetizers for your next gathering, these Chicken Pillows are not just easy to whip up, but also incredibly adaptable. With the option for gluten-free dough and an array of flavorful additions, they cater to every dietary preference while pleasing even the pickiest eaters. Are you ready to dive into a world of culinary comfort that’ll have everyone asking for seconds? Let’s make some magic in the kitchen!
Why Are Chicken Pillows a Must-Try?
Easy Preparation: These Chicken Pillows come together in a snap, making them perfect for busy weeknights or impromptu gatherings. Flavorful Filling: The creamy Parmesan sauce paired with tender chicken creates a mouthwatering explosion of taste. Versatile Options: Whether you want bite-sized appetizers or a hearty casserole, this recipe adapts to your needs. Diet-Friendly: With gluten-free options and healthier substitutions, everyone can enjoy them. Plus, they look stunning on any table, ensuring they become the star of your next event. Enjoy with sides like roasted vegetables or pair them with Chicken Mein Savory for an unforgettable meal!
Chicken Pillows Ingredients
• Discover the essentials to create these delightful Chicken Pillows!
For the Filling
- Cooked and Shredded Chicken – Provides the main protein; use rotisserie or leftover chicken for convenience.
- Cream Cheese – Adds creaminess to the filling; best at room temperature for easy mixing.
- Garlic Powder – Enhances flavor depth; a must for savory richness.
- Onion Powder – Provides aromatic sweetness; pairs well with the garlic.
- Dried Parsley – Offers a fresh herbal note; substitute with fresh if available.
- Salt – Adjust seasoning to taste; essential for flavor balance.
- Black Pepper – Adds a kick; freshly ground gives the best flavor.
- Melted Butter – Enriches the filling; aids in keeping the filling moist.
- Crescent Roll Dough – Forms the flaky exterior; ensure it remains cold for easy handling.
- Panko Breadcrumbs – Optional for added crunch; sprinkle on top for a texture contrast.
- Egg – Used for an egg wash; creates a beautiful golden finish during baking.
For the Creamy Parmesan Sauce
- Butter – Base for the roux; a key component to build the sauce.
- All-purpose Flour – Thickens the sauce; essential for roux preparation.
- Whole Milk – Forms the creamy base; can substitute with low-fat milk for a lighter version.
- Heavy Cream – Adds richness to the sauce; for a lighter alternative, use half-and-half.
- Grated Parmesan Cheese – Provides the main flavor of the sauce; use authentic Parmigiano-Reggiano for the best taste.
- Garlic Powder, Salt, and Black Pepper – Further season the sauce; adjust according to taste.
Step‑by‑Step Instructions for Chicken Pillows
Step 1: Preheat the Oven
Begin by preheating your oven to 375°F (190°C). As it warms up, line a large baking sheet with parchment paper to prevent the Chicken Pillows from sticking. The parchment will also make cleanup a breeze! Ensure your oven is fully preheated before moving on to the next step for even cooking.
Step 2: Prepare the Filling
In a mixing bowl, combine the cooked and shredded chicken with softened cream cheese, garlic powder, onion powder, dried parsley, salt, black pepper, and melted butter. Mix vigorously until everything is well-combined and smooth, which should take about 2-3 minutes. This creamy filling is the heart of your Chicken Pillows, so give it the attention it deserves!
Step 3: Prep the Dough
Unroll the crescent roll dough and separate it into triangles. Carefully flatten each triangle slightly with your fingers or a rolling pin, making it easier to fill. This important step ensures that each Chicken Pillow will hold the creamy goodness without bursting during baking. Keep the dough cold for best results.
Step 4: Fill & Seal
Take a generous spoonful of the chicken filling and place it in the center of each triangle. Fold the dough edges over the filling, pinching them together firmly to seal. This step is crucial; it ensures that the filling stays inside while baking. Arrange the filled pillows on your prepared baking sheet, ensuring they have space to puff up.
Step 5: Apply Egg Wash
In a small bowl, beat an egg until well combined. Use a pastry brush to gently coat the tops of each Chicken Pillow with the egg wash, giving them a beautiful golden hue once baked. If you choose, sprinkle panko breadcrumbs on top for an extra crunch. This step adds a delightful texture to your Chicken Pillows!
Step 6: Bake the Pillows
Place the baking sheet in the preheated oven and bake for 20-25 minutes. Keep an eye on the Chicken Pillows; they should turn a lovely golden brown and puff up beautifully. This visual cue indicates they are ready for the next stage—be patient and allow them to achieve that perfect, crispy exterior.
Step 7: Make the Creamy Parmesan Sauce
While the Chicken Pillows are baking, it’s time to prepare the creamy Parmesan sauce. In a saucepan over medium heat, melt butter and whisk in flour to create a roux. Gradually add whole milk and heavy cream while continuing to whisk to avoid lumps, letting it simmer until it thickens. Add grated Parmesan cheese and season with garlic powder, salt, and black pepper to taste.
Step 8: Serve and Enjoy
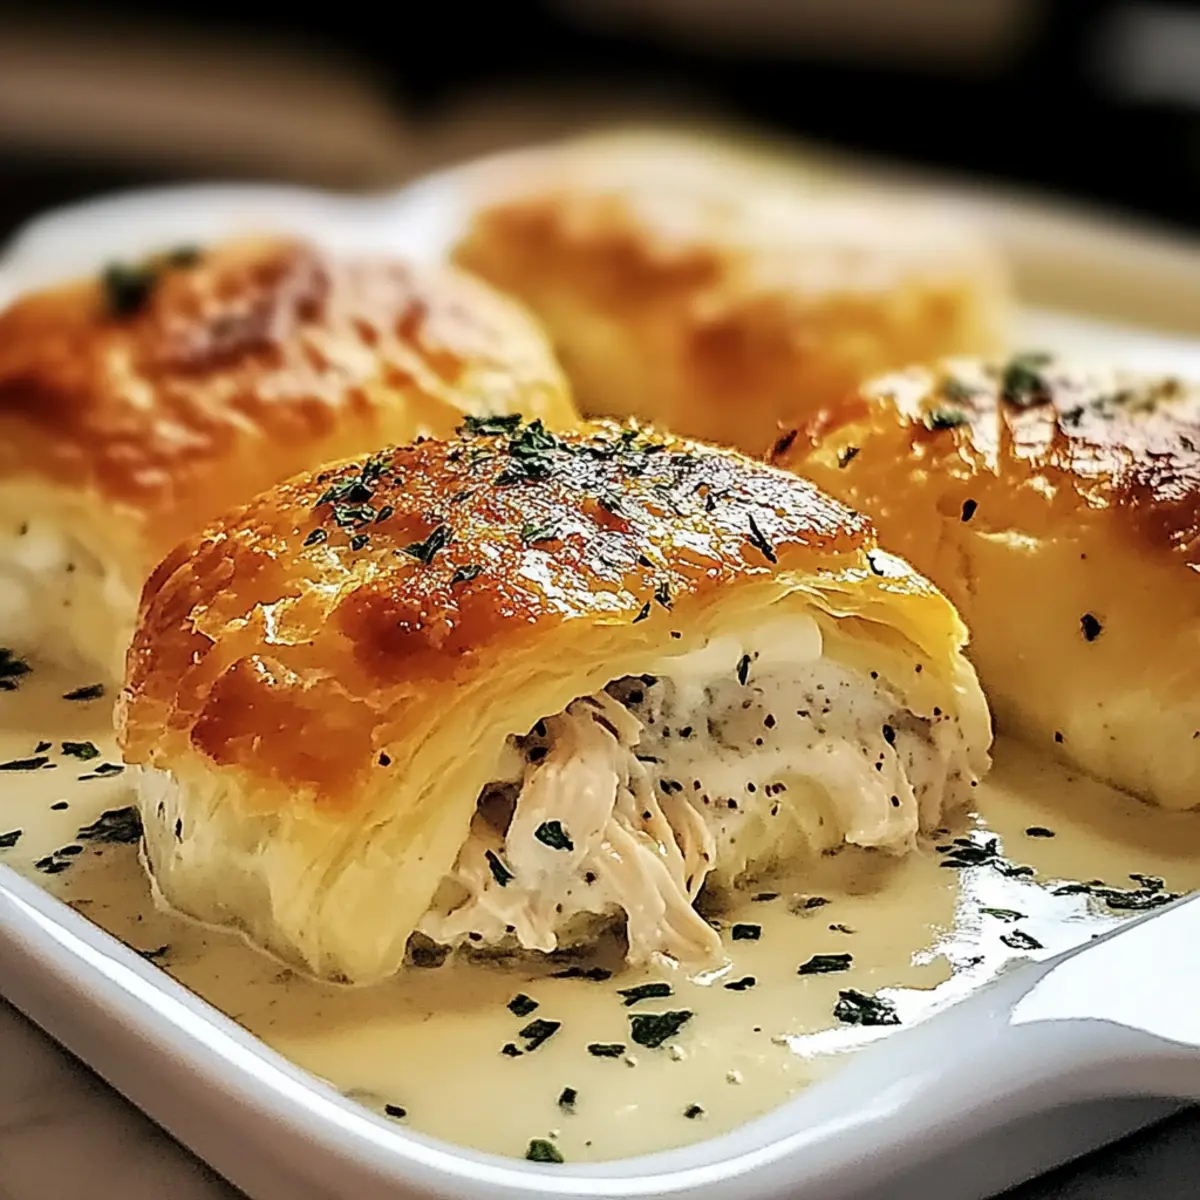
Once the Chicken Pillows are out of the oven and cooling slightly, drizzle the warm creamy Parmesan sauce over the top. This indulgent sauce complements the Chicken Pillows perfectly. Serve them warm, and watch as family and friends savor each comforting bite. These are sure to become a treasured addition to your dinner rotation!
Make Ahead Options
These Chicken Pillows with Creamy Parmesan Sauce are perfect for meal prep enthusiasts looking to save time during busy weeknights! You can assemble them up to 24 hours in advance by filling and sealing the pillows, then refrigerating them. To maintain their flaky texture, cover them tightly with plastic wrap or place them in an airtight container. When you’re ready to bake, simply preheat your oven and bake them straight from the fridge, adding a couple of extra minutes to the cooking time. For longer storage, you can freeze unbaked Chicken Pillows for up to 2 months. Just ensure they are well-wrapped to prevent freezer burn, and enjoy restaurant-quality results with minimal effort.
What to Serve with Creamy Parmesan Chicken Pillows?
Imagine the warmth of a home-cooked meal enveloping you, with delightful side dishes that elevate the flavors of your Chicken Pillows.
-
Garlic Butter Green Beans: Their crisp-tender texture and garlicky richness beautifully balance the creamy filling of your Chicken Pillows.
-
Roasted Vegetables: A colorful mix of roasted bell peppers, zucchini, and carrots adds a sweet freshness, complementing each cheesy bite. This vibrant side not only enhances the meal visually but provides a nutritious crunch to the plate.
-
Crisp Garden Salad: A light, refreshing salad with mixed greens, cucumbers, and a tangy vinaigrette contrasts the richness of the dish, cleansing the palate between bites.
-
Creamy Mashed Potatoes: Their smooth, buttery flavor mirrors the luscious Parmesan sauce drizzled over the Chicken Pillows, delivering comfort in every spoonful. Perfect for cozy dinners!
-
Savory Garlic Breadsticks: Warm, soft, and garlicky, these breadsticks are perfect for mopping up leftover creamy sauce and inviting extra delight to your feast.
-
Chardonnay or Riesling: Elevate your meal with a glass of crisp Chardonnay or off-dry Riesling. Their fruity notes and acidity will balance the dish’s richness and refresh your palate wonderfully.
-
Chocolate Lava Cake: For a sweet finish, serve with rich chocolate lava cake – its warm, gooey center is the ultimate indulgence contrasting perfectly with your savory main dish.
Chicken Pillows Variations & Substitutions
Get ready to personalize your Chicken Pillows with these delightful twists, ensuring every bite bursts with joy!
- Mini Versions: Cut dough into smaller squares for bite-sized appetizers. Perfect for parties or game days!
- Casserole Style: Pour creamy Parmesan sauce over assembled pillows before baking for a gooey, comforting dish that everyone will love.
- Open-Faced Version: Use a galette style to showcase the filling, perfect for brunch or a lighter meal option.
- Healthier Options: Substitute whole wheat dough or swap Greek yogurt for cream cheese to cut calories while keeping the flavor.
- Flavor Boosts: Add red pepper flakes or fresh herbs like basil for a zesty twist. Substitute with different cheeses like mozzarella or cheddar for varied flavor profiles.
- Vegetable Add-ins: Incorporate sautéed spinach, mushrooms, or bell peppers for added nutrition and texture enhancements.
- Gluten-Free: Use gluten-free crescent roll dough to make this recipe accessible while still keeping it delicious, making it suitable for everyone!
Whether you’re looking to impress guests with a unique appetizer or simply adjusting for health concerns, these variations ensure your Chicken Pillows will always be a hit! You might find inspiration in other dishes too, like Spicy Korean Chicken Wings or Healthy Baked Chicken to match your culinary creativity.
Expert Tips for Chicken Pillows
-
Room Temperature Cream Cheese: Ensure cream cheese is at room temperature to avoid lumps in the filling. This will help achieve a smooth and creamy texture.
-
Cold Dough Handling: Keep crescent roll dough cold until ready to shape. This prevents stickiness and helps maintain the flakiness of the Chicken Pillows during baking.
-
Filling Quantity: Be mindful not to overfill the dough. A generous scoop is great, but overfilling can cause them to burst open, losing that delicious filling.
-
Consistent Sauce: Whisk continuously when adding liquids to the sauce to prevent lumps. This ensures a velvety texture that perfectly complements your Chicken Pillows.
-
Even Egg Wash: Use a pastry brush for an even application of the egg wash. This step enhances browning and gives your Chicken Pillows that golden, appetizing finish.
-
Visual Check for Doneness: Look for a golden-brown, puffed appearance to determine if the Chicken Pillows are done. This prevents them from being undercooked or overbaked.
How to Store and Freeze Chicken Pillows
Fridge: Store baked Chicken Pillows in an airtight container for up to 3 days. Reheat in the oven at 350°F (175°C) for about 10-15 minutes until heated through for best results.
Freezer: Unbaked Chicken Pillows can be assembled and frozen for up to 2 months. Arrange them on a baking sheet, freeze until solid, then transfer to a freezer bag. Bake from frozen, adding about 5-10 extra minutes to the cooking time.
Reheating: For leftovers, reheat Chicken Pillows in the oven or air fryer to maintain crispness. Avoid the microwave, as it can make them soggy.
Wrap Carefully: If storing, wrap or container your Chicken Pillows tightly to prevent freezer burn and preserve their delicious flavor.
Chicken Pillows with Creamy Parmesan Sauce Recipe FAQs
What type of chicken works best for the filling?
I recommend using cooked and shredded chicken for a quick prep! Rotisserie chicken is perfect—it’s flavorful and ready to go. Any leftovers from a previous meal work too, ensuring that you get the most out of your ingredients without waste.
How should I store leftover Chicken Pillows?
Store your baked Chicken Pillows in an airtight container in the fridge for up to 3 days. Reheat them in the oven at 350°F (175°C) for about 10-15 minutes. This method helps keep them crisp and delicious!
Can I freeze unbaked Chicken Pillows? How do I do that?
Absolutely! Assemble your Chicken Pillows but do not bake them. Instead, arrange them on a baking sheet and freeze them until solid. Then, transfer them to a freezer bag and label them with the date. You can freeze them for up to 2 months. When you’re ready to bake, pop them straight from frozen into the oven, adding about 5-10 extra minutes to the cooking time.
What if my Chicken Pillows burst open while baking?
If your Chicken Pillows burst, they may have been overfilled or the dough may have been too warm when sealed. To prevent this, use a generous but moderate amount of filling, and handle the crescent roll dough cold. If you see a small burst, don’t worry; just enjoy the crispy treat inside!
Are there any dietary alternatives I can make?
Very! You can substitute the crescent roll dough with gluten-free options or whole wheat dough if you prefer a healthier base. For the filling, using Greek yogurt in place of cream cheese gives you that creamy texture with less fat. Feel free to add sautéed spinach or mushrooms for extra nutrition!
Can pets eat Chicken Pillows?
While your furry friends would love a taste, it’s best not to share. The seasonings, especially garlic and onion powder, can be harmful to pets. Instead, ensure you keep the Chicken Pillows safely where your pets can’t reach them!
Irresistible Chicken Pillows with Creamy Parmesan Sauce Delight
Ingredients
Equipment
Method
- Preheat your oven to 375°F (190°C) and line a large baking sheet with parchment paper.
- In a mixing bowl, combine the cooked and shredded chicken with cream cheese, garlic powder, onion powder, dried parsley, salt, black pepper, and melted butter. Mix until smooth.
- Unroll the crescent roll dough and separate it into triangles. Flatten each triangle slightly.
- Take a spoonful of the chicken filling and place it in the center of each triangle. Fold and pinch to seal.
- Beat the egg in a small bowl and coat the tops of each Chicken Pillow with the egg wash. Sprinkle with panko breadcrumbs if desired.
- Bake for 20-25 minutes until golden brown and puffed up.
- Meanwhile, in a saucepan, melt butter and whisk in flour to make a roux. Gradually add milk and cream, whisking until thick. Stir in Parmesan and season.
- Drizzle the warm creamy Parmesan sauce over the Chicken Pillows and serve warm.
Leave a Reply