
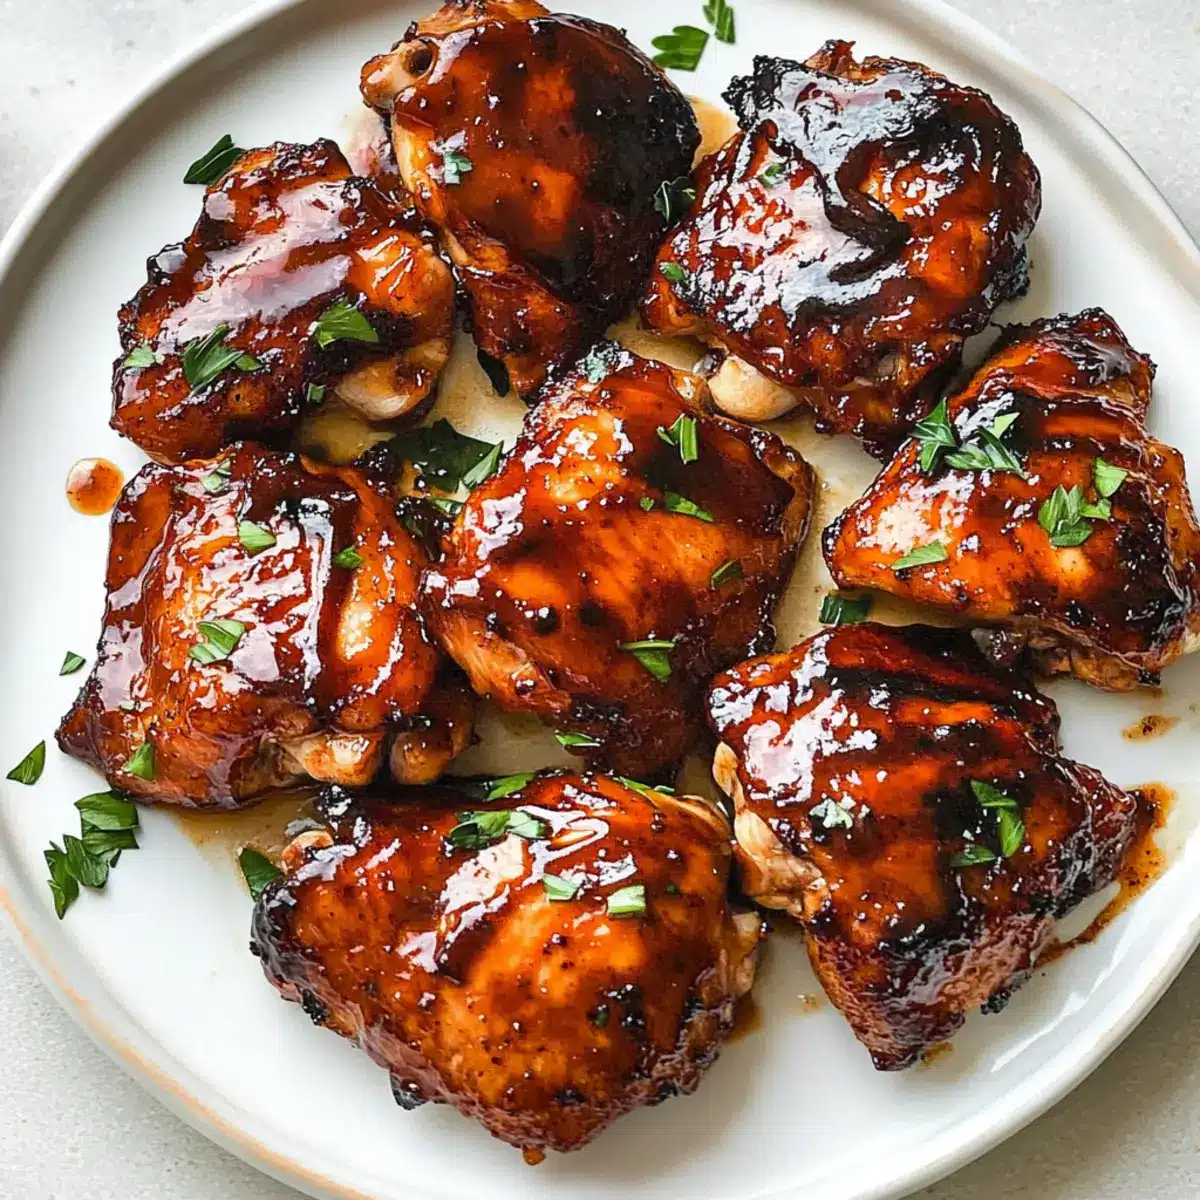
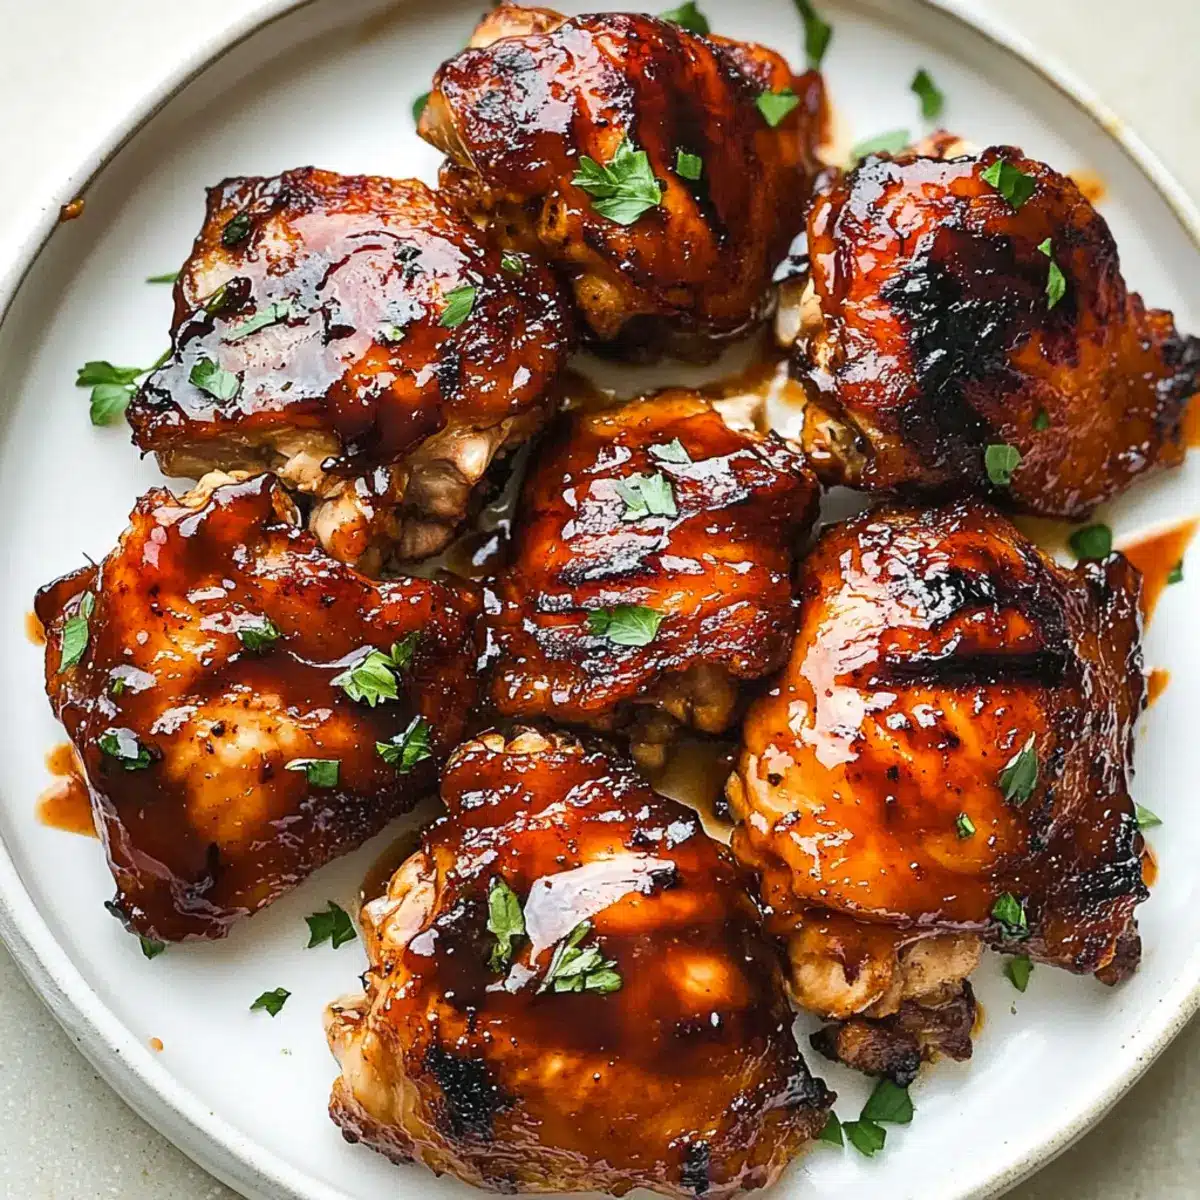
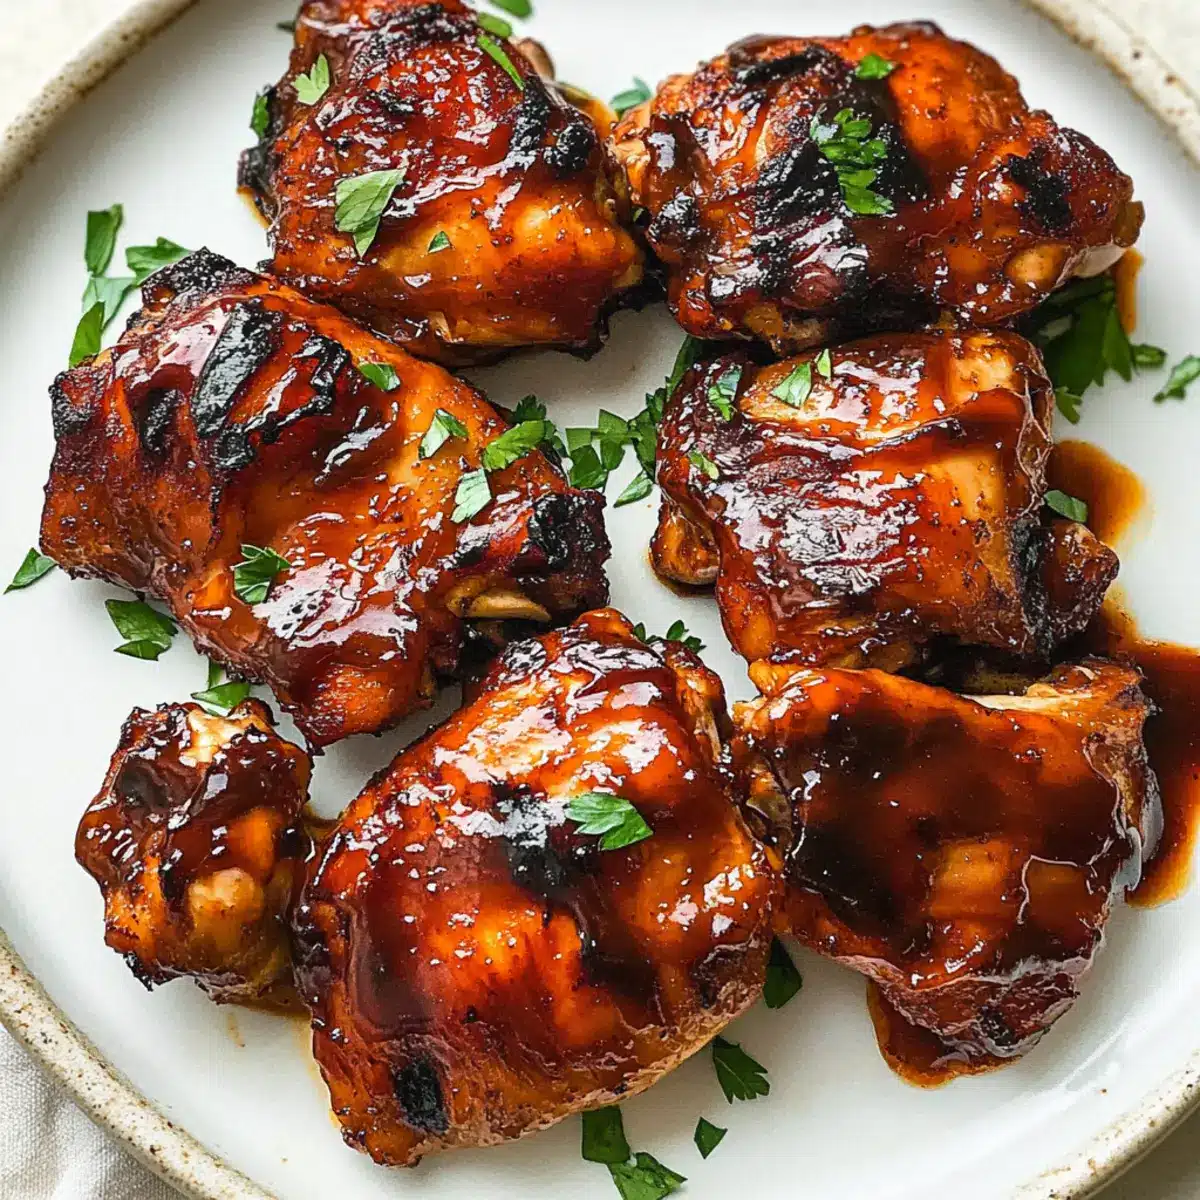
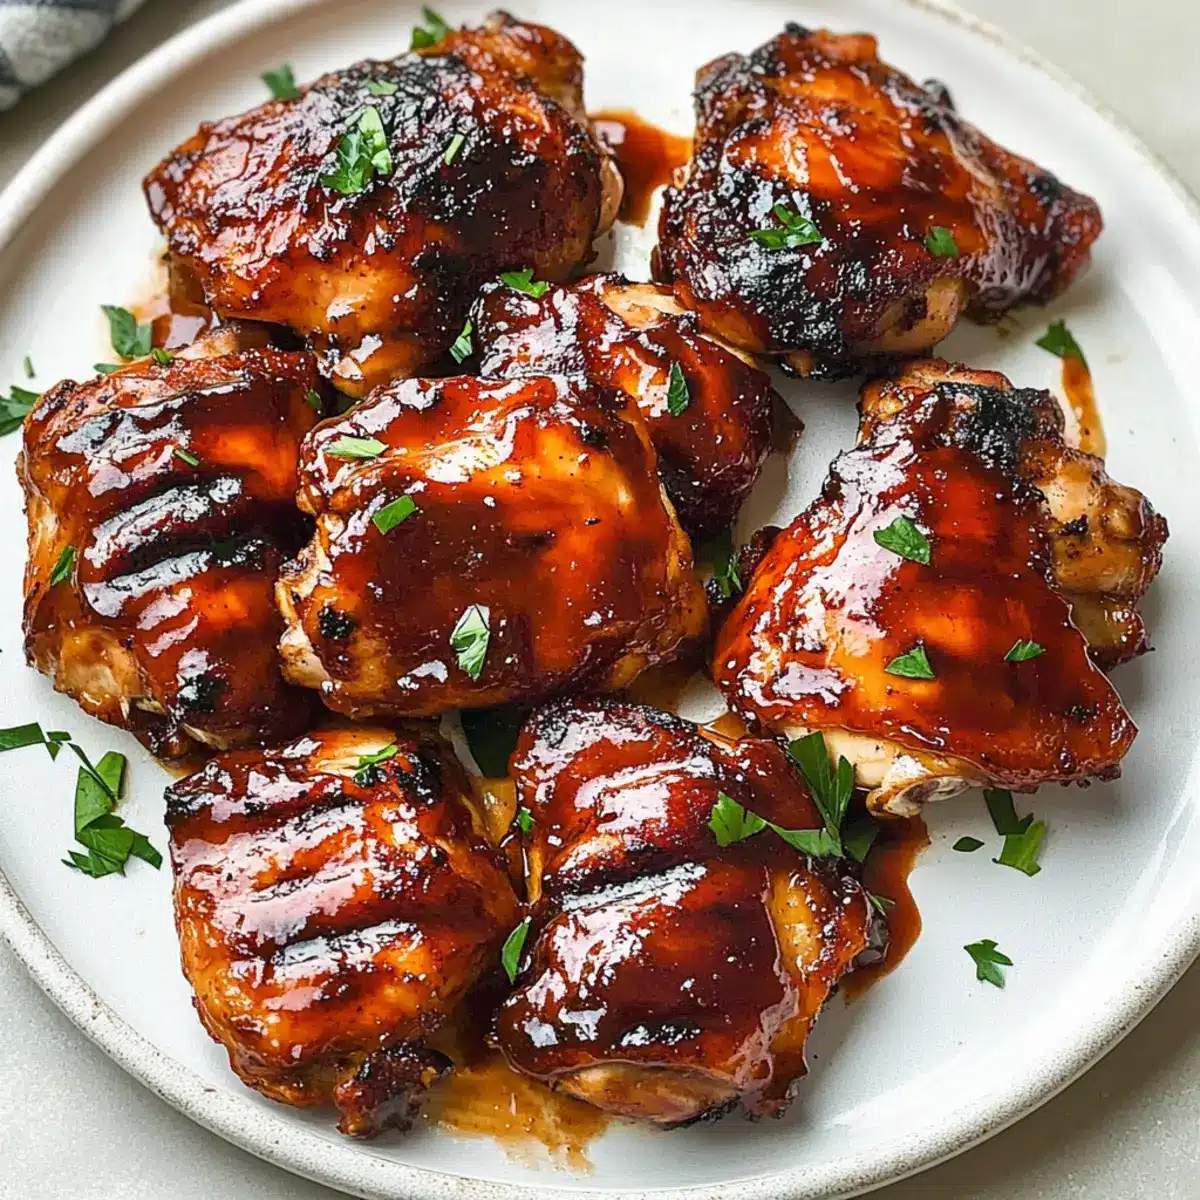
As my oven hummed with anticipation, the sweet aroma of caramelizing BBQ chicken thighs wafted through my kitchen, instantly making my mouth water. This oven-baked recipe for Caramelized BBQ Chicken Thighs is the perfect solution for those busy weeknights when you crave something delicious, yet simple to prepare. With just a handful of pantry staples, you can create a dish that’s not only gluten-free and dairy-free but also compliant with Whole30 and paleo diets. These sticky and crispy bites are sure to impress both family and friends, ensuring everyone will rave about your culinary skills. Whether you’re looking to cut down on fast food or just want an easy weeknight dinner, these BBQ chicken thighs promise juicy flavor while keeping the clean eating vibes alive. Ready to dive into a recipe that delivers both taste and purpose? Let’s get cooking!
Why Are These Chicken Thighs Irresistible?
Easy Preparation: You’ll love how simple it is to put this meal together, making it a go-to recipe for busy nights.
Flavorful Bliss: The combination of sticky caramelization and BBQ sauce creates a mouthwatering experience that’s unforgettable.
Versatile Choices: Feel free to swap in chicken breasts or drumsticks, adapting to whatever you have on hand for even more variety!
Diet-Friendly: This recipe caters to various dietary needs, being gluten-free, dairy-free, and suitable for Whole30 and paleo lifestyles. Pair it with Whole30 Coleslaw for a crisp contrast!
Crowd-Pleaser: Impress friends and family with these juicy thighs that are bound to steal the spotlight at your dinner table. Don’t forget to serve alongside a fresh Watermelon Arugula Salad!
Caramelized BBQ Chicken Thighs Ingredients
Here’s what you’ll need to create this delicious dish!
For the Chicken
- Boneless Skinless Chicken Thighs – The star protein; you can substitute with chicken leg quarters, but adjust cooking time accordingly.
- Olive Oil – Keeps the chicken moist and helps achieve that beautiful caramelization; feel free to use any cooking oil you prefer.
For the Marinade
- BBQ Sauce – Adds a sweet and tangy flavor; for a Whole30 compliant option, use a compatible BBQ sauce or make your own.
- Dry Mustard – Brings a slight tanginess to balance the sweetness; if you don’t have it, simply omit without losing much flavor.
- Simple Seasonings (salt, pepper, garlic powder, onion powder) – These essentials enhance the overall profile; adjust to your taste preferences for a personalized touch.
Get ready to enjoy your homemade caramelized BBQ chicken thighs that are not just simple to prepare, but bursting with flavor!
Step‑by‑Step Instructions for Caramelized BBQ Chicken Thighs
Step 1: Preheat the Oven
Begin by preheating your oven to 425°F (220°C). This high temperature will ensure a beautiful caramelization on your BBQ chicken thighs. While the oven warms up, prepare your baking sheet by lining a large, rimmed aluminum sheet pan with parchment paper, making cleanup a breeze and preventing the chicken from sticking.
Step 2: Blend the Marinade
In a mixing bowl, combine olive oil, dry mustard, salt, pepper, garlic powder, and onion powder to create a flavorful marinade. Whisk these ingredients together until well blended. This aromatic mixture enhances the natural flavor of the chicken, setting the stage for your caramelized BBQ chicken thighs to shine.
Step 3: Coat the Chicken
Toss the boneless skinless chicken thighs in the marinade, ensuring each piece is evenly coated. Allow the chicken to sit in this mixture for about 10 minutes, letting the flavors infuse. As you work with the chicken, notice how the oil glistens, promising an appetizing result in the oven.
Step 4: Arrange on the Baking Sheet
Carefully place the coated chicken thighs onto the prepared baking sheet, making sure they’re spaced apart to avoid overcrowding. This ensures optimal air circulation, which is crucial for achieving that crispy texture. Take a moment to admire the shiny, seasoned thighs awaiting their transformation.
Step 5: Bake the Chicken
Slide the baking sheet into the preheated oven and bake the chicken for 25 minutes. This initial baking time allows the thighs to cook through while absorbing the marinade’s flavors. Keep an eye on them; you’ll notice the edges start to darken, a sign of the caramelizing process beginning.
Step 6: Flip for Even Cooking
After 25 minutes, use tongs to carefully flip each thigh over. This will promote even cooking and caramelization on both sides of the BBQ chicken thighs. Return the chicken to the oven to bake for an additional 10 minutes, allowing them to fully develop their flavors and sticky, tender texture.
Step 7: Brush with BBQ Sauce
After flipping, take a moment to brush a generous layer of BBQ sauce over each chicken thigh. This not only adds a delightful sweetness but also enhances the caramelization. Return the pan to the oven for another 10 minutes, watching as the sauce becomes thick and sticky, making your kitchen smell heavenly.
Step 8: Crisp with Broiling
For that final crispy finish, set your oven to broil. Broil the BBQ chicken thighs for an additional 3-5 minutes, keeping a watchful eye to prevent burning. The sauce will bubble and caramelize, creating a tantalizing crust that contrasts beautifully with the tender chicken underneath.
Step 9: Check Doneness
Ensure your caramelized BBQ chicken thighs are fully cooked by checking that the internal temperature reaches 165°F (74°C). Use a meat thermometer for accuracy, and if the chicken isn’t quite there, return it to the oven for a few more minutes. Once done, you’ll have perfectly juicy, caramelized chicken ready to serve.
Caramelized BBQ Chicken Thighs Variations
Feel free to get creative with this dish and tailor it to your taste buds!
-
Homemade BBQ Sauce: Craft your own BBQ sauce using ingredients like tomatoes, vinegar, and spices for a healthful twist. The delightful control over sweetness and seasoning makes a big difference in flavor.
-
Spicy Kick: Add cayenne pepper or your favorite hot sauce to the marinade for a zesty heat. This little twist will awaken your taste buds and add an exciting layer of flavor.
-
Herb-Infused: Incorporate fresh herbs like rosemary or thyme into the marinade for an aromatic boost. The fragrant notes intertwine beautifully with the sticky BBQ, bringing a gourmet touch to your meal.
-
Chicken Breasts or Drumsticks: Swap chicken thighs for breasts or drumsticks to change up the protein while maintaining flavor. Adjust cooking times as necessary, keeping an eye on the internal temperature.
-
Citrus Burst: Add lemon or lime zest into the marinade for a refreshing zing. This brightens the dish and complements the sweetness of the BBQ sauce perfectly.
-
Maple Glaze: Substitute part of the BBQ sauce with pure maple syrup for a sweet, caramel-like finish. This adds a rich flavor that pairs splendidly with the sticky chicken.
-
Chinese BBQ Twist: Use hoisin sauce instead of BBQ sauce for a delightful Asian-inspired flavor profile. This swap transforms the dish into a unique fusion meal that everyone will love!
For more delicious spins on chicken, check out my Healthy Baked Chicken recipes for quick weeknight options or explore Spicy Chicken Fillet for a flavor-packed adventure!
Tips for the Best Caramelized BBQ Chicken Thighs
-
Marinade Time Matters: Allow the chicken thighs to sit in the marinade for at least 10 minutes. This infuses flavor deeper into the meat.
-
Watch the Oven Time: Don’t skip the flipping step halfway through cooking; it ensures even caramelization for your BBQ chicken thighs.
-
Broil with Care: When broiling for that crispy finish, keep a close eye to prevent burning. If unsure, use aluminum foil instead of parchment paper.
-
Temperature Test: Always check that the chicken reaches an internal temperature of 165°F (74°C) to ensure it’s fully cooked and safe to eat.
-
Cleanup Made Easy: Lining your baking sheet with parchment paper not only helps with cleanup but also prevents sticking, making serving a breeze!
What to Serve with Oven-Baked Caramelized BBQ Chicken Thighs
Give your weeknight dinner a delightful upgrade with vibrant accompaniments that perfectly complement the sticky, savory goodness of these chicken thighs.
-
Creamy Coleslaw: A crunchy and refreshing side that balances the richness of BBQ chicken with a tangy dressing, enhancing every bite.
-
Garlic Roasted Potatoes: Crispy on the outside, fluffy on the inside, these addictive potatoes soak up the BBQ flavor while adding heartiness to your meal.
-
Grilled Veggies: Colorful, slightly charred vegetables bring a smoky sweetness to the table, providing a fresh, earthy counterpoint to the richness of the chicken. A medley of bell peppers, zucchini, and red onions can brighten the plate beautifully.
-
Cornbread Muffins: Soft and slightly sweet, cornbread muffins create a satisfying contrast and are perfect for mopping up the delicious sauce from your chicken.
-
Watermelon Arugula Salad: Light and refreshing, this salad’s sweet watermelon and peppery arugula provide a delightful crunch that contrasts beautifully with the tender chicken.
-
Homemade BBQ Sauce: A drizzle of extra BBQ sauce can elevate the flavor, adding layers of sweetness and a sticky finish that complements the caramelization.
-
Iced Tea: A refreshing drink that balances the sweet and smoky notes of the chicken, serving as a perfect palate cleanser.
-
Dark Chocolate Brownies: For dessert, serve these fudgy treats as a decadent finish to your meal. Their rich flavor contrasts with the meal, providing a sweet ending to a savory feast.
How to Store and Freeze Caramelized BBQ Chicken Thighs
Fridge: Store any leftovers in an airtight container for up to 3-4 days. This keeps your caramelized BBQ chicken thighs fresh and flavorful throughout the week.
Freezer: For longer storage, freeze the chicken in a freezer-safe bag or container for up to 3 months. Make sure to remove as much air as possible to avoid freezer burn.
Thawing: To defrost, move the chicken thighs to the fridge overnight or use the defrost setting on your microwave.
Reheating: Gently reheat in the oven at 350°F (177°C) for about 15-20 minutes until warmed through. This preserves the crispy texture and delicious flavor of your chicken.
Make Ahead Options
These Caramelized BBQ Chicken Thighs are a fantastic choice for meal prep! You can marinate the chicken thighs up to 24 hours in advance by tossing them in the marinade and refrigerating them in an airtight container. This not only saves time on busy weeknights but also allows the flavors to deepen, resulting in even juicier chicken. Additionally, you can bake the thighs in advance and store them in the refrigerator for up to 3 days. When you’re ready to serve, simply reheat them in the oven at 350°F (177°C) until warmed through, then brush on the BBQ sauce and broil for that signature crispy finish. This way, you enjoy delicious, restaurant-quality results with minimal effort!
Caramelized BBQ Chicken Thighs Recipe FAQs
What’s the best way to select chicken thighs for this recipe?
Absolutely! When selecting your boneless skinless chicken thighs, look for pieces that are firm to the touch, with a pinkish color and no dark spots. The thighs should have a slight sheen but avoid any that seem slimy or discolored. If you’re using chicken leg quarters, ensure they’re of similar size for even cooking.
How can I store leftovers of caramelized BBQ chicken thighs?
To keep your delicious caramelized BBQ chicken thighs fresh, store any leftovers in an airtight container in the refrigerator for up to 3-4 days. Reheat gently in the oven at 350°F (177°C) for about 15 to 20 minutes until warmed through, so they retain their wonderful texture.
Can I freeze caramelized BBQ chicken thighs? How?
Yes! For longer storage, you can freeze the chicken thighs. First, let them cool to room temperature. Then, place them in a freezer-safe bag or airtight container, removing as much air as possible to prevent freezer burn. Frozen, they’re good for up to 3 months. When you’re ready to enjoy again, defrost them in the refrigerator overnight or use your microwave’s defrost setting.
What if my chicken thighs are not caramelized after baking?
Very! If you find your chicken thighs aren’t as caramelized as you’d like after the initial baking time, that’s easily remedied. Simply brush on a little extra BBQ sauce and switch your oven to broil for the last few minutes, keeping a close eye to prevent burning. This will create a delightful crispy and sticky layer on top!
Are there any dietary considerations for this recipe?
Indeed! This caramelized BBQ chicken thighs recipe is not only gluten-free and dairy-free, but it’s also suitable for Whole30 and paleo diets. If you’re cooking for family or friends with allergies, double-check the ingredients in your BBQ sauce, as some store-bought versions can contain hidden gluten or dairy. Making your own BBQ sauce is a wonderful alternative!
How can I ensure my chicken is cooked properly?
To be sure your chicken thighs reach a safe temperature, use a meat thermometer to check that the internal temperature is at least 165°F (74°C). Insert it into the thickest part of the thigh, avoiding the bone for an accurate reading. If the target temperature hasn’t been achieved, return them to the oven until fully cooked, ensuring safe and juicy chicken for everyone.
Savor Every Bite of Caramelized BBQ Chicken Thighs
Ingredients
Equipment
Method
- Preheat your oven to 425°F (220°C) and line a large baking sheet with parchment paper.
- In a mixing bowl, combine olive oil, dry mustard, salt, pepper, garlic powder, and onion powder to create the marinade.
- Toss the chicken thighs in the marinade, ensuring each piece is fully coated. Allow to sit for about 10 minutes.
- Arrange the coated chicken onto the baking sheet, spaced apart for optimal cooking.
- Bake in the preheated oven for 25 minutes.
- Flip each thigh for even cooking and return to the oven for an additional 10 minutes.
- Brush BBQ sauce over each thigh and bake for another 10 minutes, until sticky and caramelized.
- Broil for an additional 3-5 minutes for a crispy finish, watching closely to avoid burning.
- Check that the internal temperature reaches 165°F (74°C) before serving.
Leave a Reply