
As I prepared to dive into my weekend baking ritual, an unexpected craving struck—a delightful need for something chewy and sweet. That’s when I remembered the joy of making the best mochi! This easy recipe brings a touch of Japan to your kitchen, transforming simple ingredients into bite-sized, gluten-free treats that both kids and adults adore. The beauty of homemade mochi is its versatility; whether you keep it classic or add fun flavors like matcha or ube, you’ll experience a satisfying satisfaction that fast food just can’t match. Plus, it’s a wonderful way to gather the family for a fun activity. Are you ready to explore this delicious journey with me?

Why is this mochi recipe a must-try?
Irresistible Chewiness: The texture of this mochi is simply unbeatable—soft, chewy, and addictive! You’ll crave it long after the last piece is gone.
Versatile Flavor: Whether you prefer the classic taste or want to jazz things up with matcha or ube, this recipe adapts to any palate, just like the delicious Gingerbread Brownies Cozy for the holidays!
Fun for Everyone: Making mochi is a delightful family activity that invites creativity. Kids love to help; it’s a fantastic way to bond and create memories.
Quick & Easy: With just a handful of ingredients and simple steps, you’ll have a treat ready before you know it! If you’re short on time, check out the delightful Air Fryer Apple Fritters for another quick sweet fix!
Gluten-Free Goodness: Ideal for gluten-sensitive friends and family, this recipe ensures everyone can indulge, making it perfect for gatherings.
Crowd-Pleasing Treat: Serve these at your next get-together, and watch as they disappear in no time—everyone will be asking for the recipe!
Best Mochi Recipe Ingredients
Get ready to create the ultimate treat with these delightful ingredients!
For the Mochi Base
- Mochiko flour – essential for that signature chewy texture; be sure to grab this at Asian grocery stores or online.
- Granulated sugar – adds a sweet touch; you can substitute it with erythritol for a low-calorie option if needed.
- Baking powder – a little lift for a lighter texture; don’t skip this step!
- Water – hydrates the dry ingredients; it’s crucial for achieving the right consistency.
- Coconut milk – adds rich creaminess; you can use regular milk, but it might alter the chewy texture.
- Vanilla extract – a flavor enhancer that elevates the taste profile; this makes each bite delightful.
- Food coloring – optional for visual flair; natural agents keep it fun and healthy.
For the Coating
- Potato starch – prevents stickiness in your mochi pieces; dust generously for the best results.
Explore the world of flavors with this best mochi recipe that brings joy to your kitchen!
Step‑by‑Step Instructions for Best Mochi Recipe
Step 1: Preheat Your Oven
Begin by preheating your oven to 350°F (175°C). This temperature ensures a perfectly baked mochi, providing that delightful chewy texture. While the oven warms up, gather and measure your ingredients, creating a smooth workflow to keep the process enjoyable. You’ll smell the sweet scent of baking soon!
Step 2: Mix Dry Ingredients
In a medium mixing bowl, combine 1 cup of mochiko flour, 1 cup of granulated sugar, and 1 teaspoon of baking powder. Whisk these dry ingredients together until they are evenly blended. This crucial step helps create the ultimate chewy consistency in your best mochi. Set this mixture aside as you prepare the wet ingredients.
Step 3: Combine Wet Ingredients
In a large bowl, mix together 1 cup of water, 1 cup of coconut milk, 1 teaspoon of vanilla extract, and any food coloring if desired. Stir well until combined, ensuring that the coconut milk is fully incorporated for that rich creaminess. This wet mixture will bring your best mochi recipe to life, creating a beautifully flavored treat.
Step 4: Create the Batter
Gradually add the dry ingredients to the wet mixture in the large bowl. Stir until the batter becomes smooth and free of lumps, ensuring a uniform batter for your mochi. Make sure there are no dry patches; the better this is mixed, the chewier your final product will be. This process should take just a few minutes.
Step 5: Prepare the Baking Pan
Take a 9×13-inch baking pan and grease it generously with non-stick spray to prevent any sticking during baking. Pour the smooth mochi batter into the pan, using a spatula to spread it evenly. Cover the pan tightly with aluminum foil; this helps trap moisture while baking, ensuring the best chewy texture.
Step 6: Bake the Mochi
Place the covered baking pan in the preheated oven and bake for about 60 minutes. You’ll know it’s done when the edges start to pull away from the sides of the pan and a toothpick inserted in the center comes out clean. Stay nearby and enjoy the delightful aroma filling your kitchen!
Step 7: Cool Down and Slice
Once baked, remove the pan from the oven and let it cool completely for about 30 minutes at room temperature. As it cools, the mochi will firm up slightly and become easier to handle. Then, flip the pan upside down onto a dusted work surface to release your beautiful mochi.
Step 8: Coat and Serve
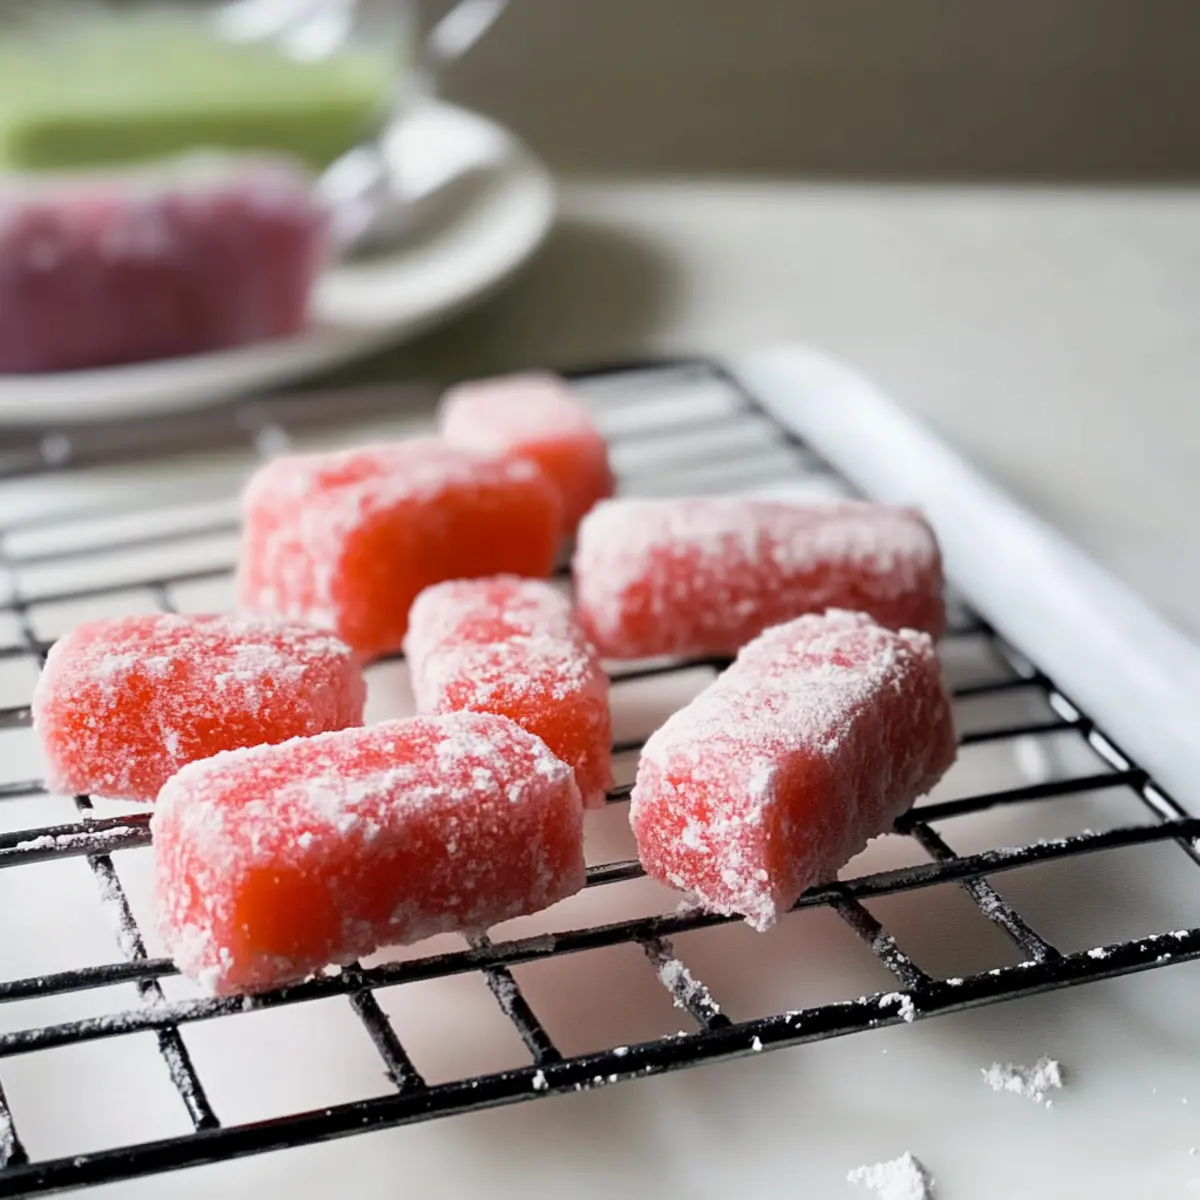
Dust the top of the mochi slab generously with potato starch to prevent sticking. Cut the mochi into bite-sized pieces with a sharp knife. As you slice, gently toss the pieces in more potato starch to coat all sides, ensuring they remain well-separated. Now you’re ready to enjoy this delightful best mochi recipe!

How to Store and Freeze Best Mochi
Room Temperature: Store mochi in an airtight container at room temperature for up to 2-3 days to maintain its delightful chewy texture.
Fridge: Avoid refrigerating mochi, as it can harden and lose its signature softness. If it must be stored in the fridge, consume it within 1-2 days for optimal taste.
Freezer: If needed, freeze mochi pieces in a single layer on a baking sheet before transferring to a freezer-safe container. It can last up to 1 month.
Reheating: Thaw frozen mochi at room temperature for 30 minutes, or microwave for 10-15 seconds for a quick revival. Enjoy your best mochi recipe!
Best Mochi Recipe: Variations & Substitutions
Feel free to get creative and personalize your mochi experience as you explore these vibrant variations!
- Matcha Magic: Add a few tablespoons of matcha powder for a unique green tea flavor that’s earthy and refreshing. Just mix it in with the dry ingredients before combining with wet ones.
- Vibrant Ube: Incorporate ube extract into the wet mixture for a striking color and delightful flavor. Your mochi will look stunning and taste fabulous!
- Fruity Fusion: Use ½ cup of fruit puree like strawberry or mango instead of some of the water for a burst of sweet, fruity goodness with every bite.
- Chocolate Lover’s Delight: Add cocoa powder to the dry ingredients for a rich, chocolatey twist that’s irresistible, especially when coated in potato starch.
- Spicy Surprise: For a heat kick, incorporate a pinch of cayenne or chili powder into the mix. It adds an unexpected yet delightful zing!
- Nutty Overload: Mix in a few tablespoons of almond or coconut extract for an added layer of flavor; your best mochi will have that nutty aroma that captivates.
- You Could Even Flavor Dust: Instead of just potato starch, try dousing mochi in crushed nuts, powdered coconut, or flavored sugar for a textured treat reminiscent of your favorite Hash Browns.
- Add Texture: Fold in mini mochi pieces or diced fruit, such as mango or kiwi, into the batter for surprising textures in every bite. This way, each piece bursts with flavors!
Get ready for your home to be flooded with aromatic delight, making your best mochi a family favorite!
What to Serve with The Best Mochi
Elevate your mochi experience by pairing it with delightful accompaniments that will tantalize your taste buds and create a memorable meal.
-
Fresh Fruit Salad: A medley of seasonal fruits adds a refreshing contrast to the chewy texture of mochi, brightening up each bite. Think juicy strawberries, sweet mangoes, and tangy kiwis for a colorful explosion of flavor.
-
Matcha Green Tea: The earthy notes of matcha perfectly complement the sweetness of your best mochi, enhancing its flavors while providing a calming energy boost. Sip it warm for a cozy after-dinner treat.
-
Savory Dipping Sauce: A light soy or sesame sauce offers a delightful contrast, introducing saltiness that balances the sweet mochi. This is an excellent option for adventurous eaters looking to explore unique flavor combinations.
-
Coconut Ice Cream: Soft and creamy, coconut ice cream pairs wonderfully with mochi, mirroring its rich coconut flavor while adding a cooling element. It’s a delightful way to enjoy a sweet treat on a warm day.
-
Chocolate Drizzle: For a decadent touch, drizzle melted dark chocolate over your mochi pieces. The rich, bittersweet chocolate creates an irresistible contrast that elevates this traditional treat to new heights.
-
Sesame Seeds: Sprinkle toasted sesame seeds over your mochi before serving for a nutty crunch. This adds delightful texture and a burst of flavor that complements the chewy nature of the mochi beautifully.
-
Chai Tea: The warm spices of chai tea create a comforting pairing with mochi, uniting the sweet and spicy elements in perfect harmony. It’s a lovely drink to enjoy while savoring these delightful treats.
Expert Tips for the Best Mochi
Non-Stick Must-Have: Always use a generous layer of non-stick spray; mochi can easily stick to the pan if not properly greased.
Flavor Boosting: Experiment with flavors early on; add matcha or ube extracts to the wet ingredients for a delicious twist in your best mochi recipe.
Storage Savvy: Keep mochi at room temperature in an airtight container for 2-3 days; refrigeration can lead to a hard texture.
Patience is Key: Let the mochi cool completely before slicing; this step ensures a better texture and easier handling, resulting in perfect bite-sized pieces.
Coat Well: Use plenty of potato starch when dusting the mochi; it’s essential for preventing stickiness and ensuring a delightful experience with every piece.
Make Ahead Options
These best mochi are perfect for busy home cooks who want to save time during their week! You can prepare the batter up to 24 hours in advance—just mix the wet and dry ingredients as instructed and store it covered in the refrigerator. When you’re ready to bake, bring the batter back to room temperature and pour it into the greased pan before cooking. For even more convenience, you can bake the mochi ahead of time; just let it cool completely, slice it into pieces, and toss them in potato starch to prevent stickiness. Store the sliced mochi in an airtight container at room temperature for up to 3 days. This way, you’ll enjoy delightful mochi with minimal effort whenever you crave this gluten-free treat!

Best Mochi Recipe FAQs
How do I choose the right mochiko flour?
Absolutely! Look for mochiko flour that is finely ground and labeled specifically for mochi-making. You can usually find it in Asian grocery stores or online. This type of flour is key to achieving that iconic chewy texture. If it’s clumpy or past its expiration date, it might not yield the best results.
What’s the best way to store mochi?
For optimal freshness, store mochi in an airtight container at room temperature for up to 2-3 days. This helps retain that delicious chewiness. Avoid refrigerating it, as it can harden and lose its delightful texture. If you notice dark spots or a dried-out appearance, it’s best to consume it as soon as possible.
Can I freeze leftover mochi?
Absolutely! To freeze your mochi, lay the pieces out in a single layer on a baking sheet for about an hour to freeze them individually. Then, transfer them to a freezer-safe container or bag and store in the freezer for up to 3 months. When you’re ready to enjoy them, simply thaw at room temperature for about 30 minutes or microwave for 10-15 seconds.
What should I do if my mochi is too sticky?
Very! If your mochi turns out too sticky, it likely needs more potato starch when coating each piece. After cutting, toss them in potato starch generously to prevent them from sticking together. Additionally, make sure you dust your work surface well before slicing to keep everything separated. If it’s still too sticky, you can let it rest for a little while at room temperature.
Is this mochi recipe safe for kids and those with allergies?
Yes, indeed! This best mochi recipe is vegan and gluten-free, making it a safe choice for many dietary restrictions. However, be sure to check the ingredient labels for allergens, especially if you’re using flavored extracts or food coloring. Always supervise kids while cooking for added safety and fun in the kitchen!
What’s the best flavor to add to my mochi for a fun twist?
The more the merrier! Options like matcha and ube are always a hit, but don’t shy away from fruit purees such as strawberry or mango for a refreshing take. You can start by adding 1-2 tablespoons of flavoring to the wet mixture, adjusting according to your preference. Experiment to find your favorite combination!
Best Mochi Recipe: Chewy, Gluten-Free and Oh-So-Delicious
Ingredients
Equipment
Method
- Preheat your oven to 350°F (175°C).
- In a medium bowl, combine 1 cup of mochiko flour, 1 cup of granulated sugar, and 1 teaspoon of baking powder. Whisk until blended.
- In a large bowl, mix together 1 cup of water, 1 cup of coconut milk, 1 teaspoon of vanilla extract, and food coloring if desired.
- Gradually add the dry ingredients to the wet mixture and stir until smooth.
- Grease a 9x13-inch baking pan and pour the batter in, spreading it evenly. Cover with aluminum foil.
- Bake for about 60 minutes or until the edges pull away from the pan.
- Let it cool completely for about 30 minutes, then flip the pan upside down to release the mochi.
- Dust the mochi slab with potato starch, cut into bite-sized pieces, and toss in more starch to coat.
Leave a Reply