
Stepping into the kitchen, the comforting scent of baking wafts through the air, reminding me of cozy mornings and nourishing starts. Enter my High Protein Baked Greek Yogurt—a satisfying delight that transforms a simple ingredient list into a nutritious powerhouse that’s perfect for breakfast or a post-workout snack. This Baked Greek Yogurt is not only low carb and gluten-free but also comes together in a flash, making it ideal for meal prep enthusiasts looking to conquer their week with healthy choices. With its fluffy, custardy texture and the opportunity to jazz it up with your favorite fruits or nuts, you’ll quickly find it becoming a staple in your home. Curious about how to whip up this deliciously versatile treat? Let’s dive in!

Why is Baked Greek Yogurt Amazing?
Nutrient-Packed Perfection: Each serving packs a mighty punch with 46.5g of protein, making it a fantastic choice for bodybuilders and fitness enthusiasts alike.
Versatile Base: Adapt this recipe easily to cater to your dietary needs—whether you’re gluten-free or on a vegan diet, there’s an option for you! Substitute Greek yogurt with coconut yogurt for a delicious vegan twist.
Quick & Simple: The prep time is a breeze! You can whip this up in just a few minutes, giving you more time to enjoy your food.
Deliciously Customizable: Feel free to enhance your baked yogurt with fresh fruits, nuts, or chocolate chips to elevate flavors and textures! For more delightful fruity ideas, check out my Baked Cranberry Brie for a unique touch.
Meal Prep Gem: This dish holds well in the refrigerator, making it ideal for those who love to prep a week’s worth of snacks. Eat it warm or chilled—it’s delicious at any temperature!
Baked Greek Yogurt Ingredients
• Ready to create this delightful dish? Here’s what you’ll need to get started!
For the Base
- Nonfat Plain Greek Yogurt – A rich source of protein and creaminess; feel free to substitute with any plain yogurt for a similar texture.
- Egg – Helps provide structure and binds the ingredients together; for a vegan twist, swap with aquafaba (whipped chickpea water).
- Unsweetened Almond Milk – Adds moisture to the mix; can be replaced with any plant-based milk or regular milk.
- Vanilla Protein Powder – Boosts protein content; use whey-casein for a non-vegan version or choose a plant-based protein powder for vegan-friendly options.
- Cornstarch – Maintains the mixture’s stability and structure; you can omit it if you prefer.
Optional Mix-Ins
- Chopped Berries – Lend fresh flavor and nutrition; use any fruit you love or even nuts for added texture.
- Chocolate Chips – For a touch of sweetness; opt for dairy-free chips if you’re keeping it vegan.
Your journey to creamy Baked Greek Yogurt starts with these fantastic ingredients—let’s make something delicious!
Step‑by‑Step Instructions for Baked Greek Yogurt
Step 1: Preheat the Oven
Begin by preheating your oven to 350°F (175°C) and preparing your baking vessel. Grease a large ramekin or two small ones with non-stick spray to prevent sticking. You’ll want a smooth, non-greasy surface so your Baked Greek Yogurt can rise beautifully.
Step 2: Mix Greek Yogurt and Egg
In a mixing bowl, whisk together the nonfat plain Greek yogurt and one egg until the mixture is smooth and creamy. This base will provide the rich texture that defines your Baked Greek Yogurt. Aim for a homogenous blend, ensuring there are no lumps, which will take about 1-2 minutes of gentle whisking.
Step 3: Incorporate Protein Powder and Cornstarch
Next, sprinkle in the vanilla protein powder and cornstarch gently. Stir the mixture until just combined to maintain its light structure; overmixing can lead to a denser texture. This step should take no more than 30 seconds.
Step 4: Adjust Consistency with Almond Milk
If your mixture feels too thick, gradually add unsweetened almond milk until it reaches a pourable consistency. Stir well after each addition and watch for a smooth, silky texture. This step ensures your Baked Greek Yogurt has that delightful custard-like quality we all adore.
Step 5: Add Optional Ingredients
Now’s the time to get creative! If desired, fold in any optional mix-ins like chopped berries or chocolate chips for additional flavor and texture. This will not only elevate your Baked Greek Yogurt but also make it visually appealing. Mix gently to distribute evenly without overworking the batter.
Step 6: Pour and Smooth the Batter
Carefully pour the yogurt mixture into the prepared ramekin(s), filling them just about to the top. Use a spatula to smooth out the surface for a professional finish. This little detail helps ensure even baking and a beautiful presentation.
Step 7: Bake to Perfection
Place the ramekin(s) in the preheated oven and bake for about 30 minutes, or 20 minutes for smaller ramekins. You’ll know it’s done when the top is slightly golden and jiggly, indicating a light, custardy texture. Keep an eye on it to prevent overbaking, which can lead to a dry result.
Step 8: Cool and Serve
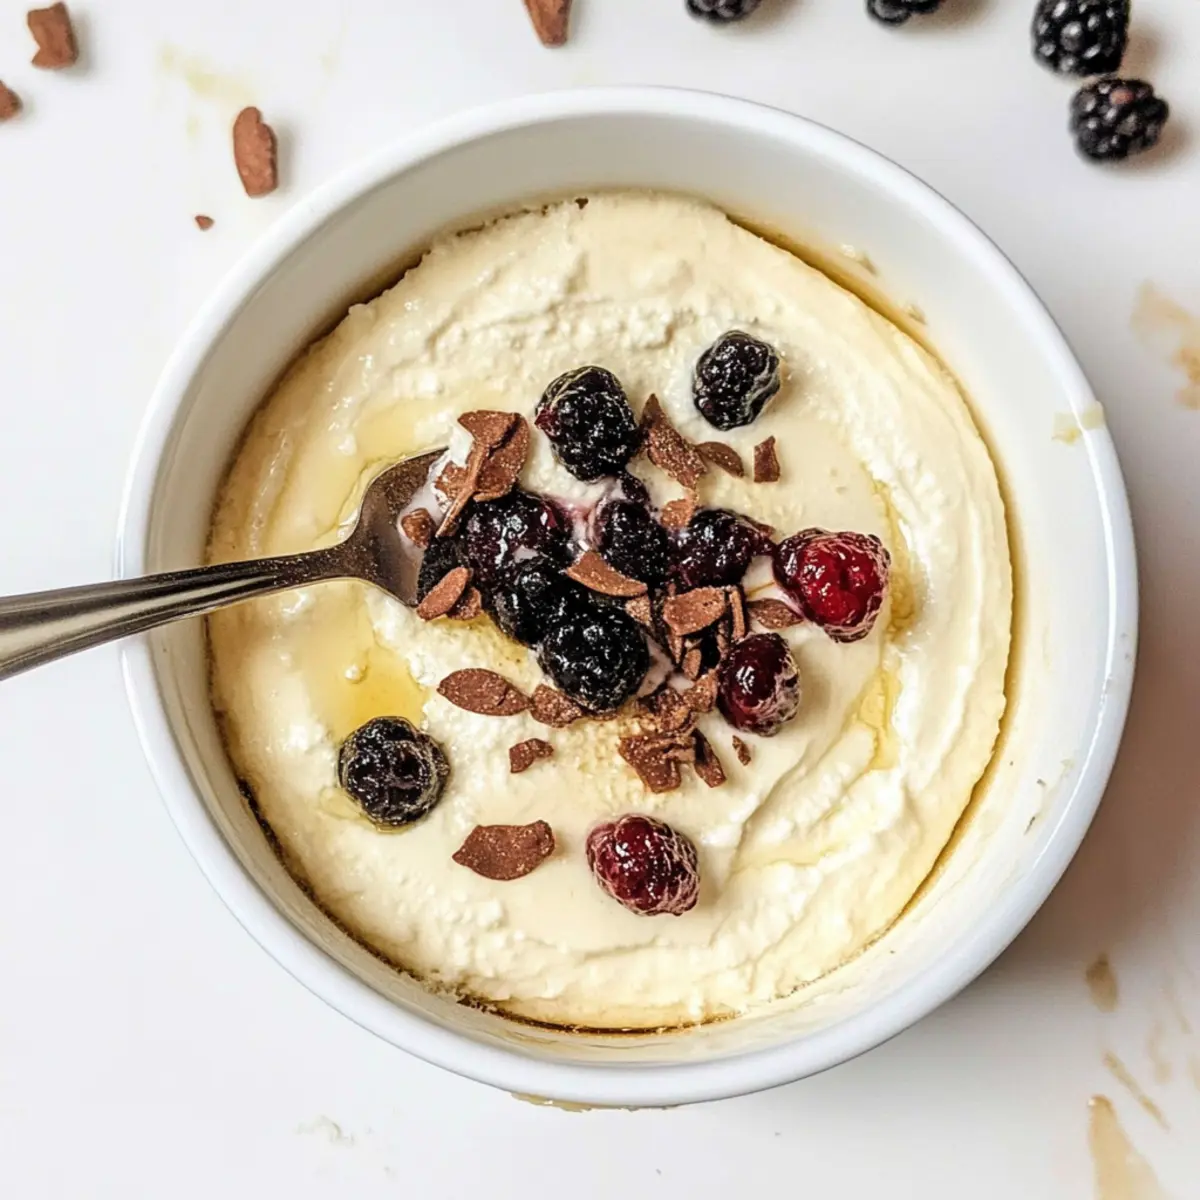
Once baked, remove the ramekin(s) from the oven and allow it to cool slightly. The center should still be slightly jiggly but will firm up as it cools. Serve warm or chilled, and feel free to top with extra fruit or a drizzle of honey for a lovely finishing touch. You now have a delicious Baked Greek Yogurt ready to enjoy!

What to Serve with Baked Greek Yogurt
Imagine a warm kitchen filled with the aroma of a wholesome breakfast, beckoning you to create a delightful full meal around this protein-packed treasure.
- Fresh Berries: Juicy strawberries or blueberries add bright flavors and a pop of color that enhances the baked yogurt’s creamy texture. A sprinkle of these fruits brings freshness to each bite.
- Granola Parfait: Crunchy granola layered with yogurt gives a divine texture contrast; the sweet and nutty flavors pair beautifully together for a satisfying breakfast bowl.
- Smoothie Bowl: Blend your favorite fruits and greens into a refreshing smoothie, providing a vibrant and nutrient-dense complement to the warm, custardy yogurt.
- Almond Butter Drizzle: A spoonful of creamy almond butter drizzled on top adds a nutty richness and healthy fats, taking your baked Greek yogurt to an indulgent level.
- Herbal Tea: A warm cup of chamomile or mint tea serves as a soothing drink that balances the meal’s richness while promoting relaxation and comfort.
- Dark Chocolate Shavings: For a sweet finish, sprinkle dark chocolate shavings on top for a hint of decadence—because who can resist a little chocolate?
- Coconut Flakes: Toasted coconut adds a tropical flair and delightful texture, making each spoonful of baked yogurt feel extra special.
- Honey or Maple Syrup: Drizzle a bit for an added touch of sweetness; these natural sweeteners enhance the yogurt without overpowering its flavor.
Your Baked Greek Yogurt will shine even brighter when paired with these delightful options, creating meals that nourish and inspire!
How to Store and Freeze Baked Greek Yogurt
Fridge: Store your Baked Greek Yogurt in an airtight container in the refrigerator for up to 3 days. Make sure to cover it tightly with plastic wrap or aluminum foil to prevent any odors from mixing in.
Freezer: For long-term storage, freeze the baked yogurt in individual portions, wrapped securely. It can be stored in the freezer for up to 2 months. Thaw it overnight in the fridge before enjoying.
Reheating: To enjoy your baked yogurt warm, simply reheat in the microwave for 30–60 seconds or until heated through. You may want to add a splash of almond milk to counteract any dryness.
Serving Suggestions: Enjoy your Baked Greek Yogurt warm or chilled, topped with your favorite fruits or a drizzle of honey to enhance its flavor further!
Baked Greek Yogurt Variations
Are you ready to make this recipe your own with delightful twists and substitutions that will tickle your taste buds?
- Vegan Delight: Swap Greek yogurt for creamy coconut yogurt, replace the egg with aquafaba, and enjoy a luscious vegan treat.
- Nut-Free Option: Use oat milk instead of almond milk and omit any nut toppings to keep it friendly for nut allergies.
- Chocolate Lovers: Fold in unsweetened cocoa powder or dark chocolate chips for that rich, decadent flavor that chocolate aficionados adore!
- Extra Flavor: Spice it up with a dash of cinnamon or a splash of vanilla extract for an aromatic twist that activates the senses.
- Fruity Boost: Mix in seasonal fruits like peaches, mangoes, or even a handful of blueberries for vibrant pops of color and added flavor.
- Protein Power: Boost your protein punch by adding silken tofu blended in or mixing in additional protein powder to meet your fitness goals.
- Sweetener Swap: Replace sweeteners with natural alternatives like agave nectar or pure maple syrup, adding a hint of sweetness without refined sugars.
- Savory Style: Experiment with savory additions like crumbled feta cheese, fresh herbs, or roasted garlic for an exciting appetizer twist that breaks the mold.
Each variation adds a unique spin to this already fabulous recipe. Consider this your personalized canvas, and don’t hesitate to explore flavors! If you’re looking for some more inspiration, try enhancing your meals with my Baked Eggs Napoleon for a nourishing breakfast option or indulge in a warm bowl of my Baked Cod Coconut for dinner. Happy baking!
Expert Tips for Baked Greek Yogurt
-
Whisk It Well: Ensure all ingredients are thoroughly combined to avoid lumps, resulting in a smoother, creamier texture for your Baked Greek Yogurt.
-
Temperature Control: If your Baked Greek Yogurt is rising too much, tent it with foil halfway through baking to prevent over-browning while allowing it to cook through.
-
Cooling Perfection: Always let the yogurt cool slightly after baking; it will firm up more as it rests, leading to that ideal custardy consistency without becoming too dense.
-
Experiment with Flavors: Feel free to customize your Baked Greek Yogurt with different mix-ins like cinnamon, vanilla extract, or a variety of fruits to find your favorite combination.
-
Storage Secrets: When storing, cover tightly with plastic wrap or foil to keep it fresh and prevent it from absorbing any unwanted fridge odors.
Make Ahead Options
These Baked Greek Yogurts are perfect for those busy home cooks who want to save time during their week! You can prepare the yogurt mixture up to 24 hours in advance, simply whisk together the Greek yogurt, egg, protein powder, and cornstarch, then refrigerate it covered. To prevent browning, ensure the mixture is tightly sealed in an airtight container. When ready to bake, pour the mixture into greased ramekins, and add any mix-ins like fruit or chocolate chips just before baking. Bake as directed, and you’ll have a creamy, delicious snack or breakfast waiting to boost your day, just as delightful as if made fresh!

Baked Greek Yogurt Recipe FAQs
What type of yogurt is best for baking?
Choosing the right yogurt is key! Nonfat plain Greek yogurt is the star of this recipe, providing a creamy base with high protein content. However, if you prefer a different texture, feel free to substitute with any plain yogurt, but keep in mind that Greek yogurt’s thickness contributes to the custard-like quality of the final dish.
How should I store Baked Greek Yogurt?
Absolutely! Store your Baked Greek Yogurt in an airtight container in the refrigerator. It will stay fresh for about 3 days. Make sure to cover it tightly with plastic wrap or aluminum foil to keep out any unwanted odors from your fridge.
Can I freeze Baked Greek Yogurt?
Very much so! For long-term enjoyment, you can freeze it in individual portions wrapped securely. Baked Greek Yogurt can be stored in the freezer for up to 2 months. Thaw it overnight in the fridge before reheating or enjoying it cold. To reheat, just pop it in the microwave for about 30-60 seconds or until warmed through.
What if my Baked Greek Yogurt is too dense?
If your baked yogurt turns out too dense, it might be due to overmixing the batter or not adjusting the liquid properly. Next time, try adding a little more almond milk to achieve a pourable consistency before baking. Also, ensure you whisk the mixture gently and avoid overbaking—keep it jiggly in the center, which will firm up as it cools.
Is Baked Greek Yogurt suitable for those with allergies?
Great question! This recipe can be adapted to cater to various dietary needs. For those with egg allergies, you can substitute the egg with aquafaba (whipped chickpea water), which binds the mixture just as well. If you are lactose intolerant or vegan, use coconut yogurt and a plant-based protein powder to keep it allergy-friendly!
Can I add different flavors or mix-ins?
Absolutely, the more the merrier! You can customize your Baked Greek Yogurt with various mix-ins. Consider adding spices like cinnamon or nutmeg, extracts like almond or vanilla, or fruits and nuts for layers of flavor. Just fold in your favorites gently to create a deliciously personalized treat!
Creamy Baked Greek Yogurt: A High-Protein Delight
Ingredients
Equipment
Method
- Preheat your oven to 350°F (175°C) and grease the ramekin(s) with non-stick spray.
- Whisk together the Greek yogurt and egg until smooth and creamy.
- Sprinkle in the protein powder and cornstarch; stir until just combined.
- Add almond milk gradually until the mixture achieves a pourable consistency.
- Fold in any optional mix-ins like berries or chocolate chips.
- Pour the mixture into prepared ramekin(s) and smooth the surface.
- Bake for about 30 minutes or 20 minutes for smaller ramekins until slightly golden.
- Cool slightly before serving warm or chilled, garnished as desired.
Leave a Reply