
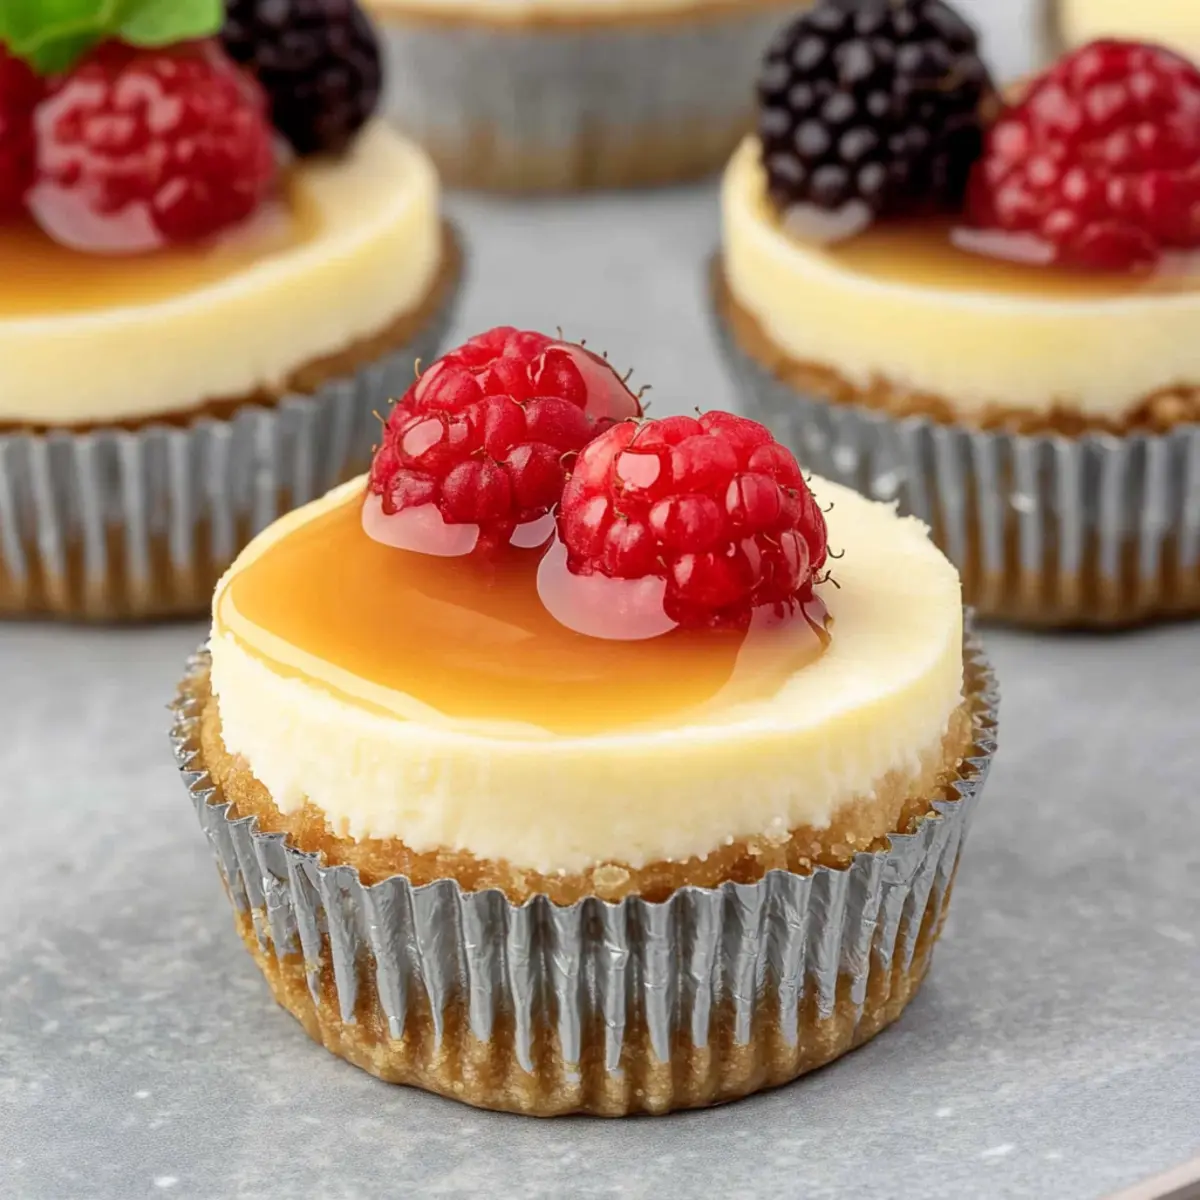
In the whirlwind of busy days, finding a quick yet satisfying dessert can sometimes feel like searching for hidden treasure. Enter my Easy Mini Cheesecakes – your new go-to recipe that’s as delightful as it is simple. Ready in just 15 minutes, these no-bake beauties bring all the creamy goodness of traditional cheesecake into perfectly portioned bites, making them the ideal treat for gatherings or a sweet escape after a long day. You’ll love how beginner-friendly they are, ensuring you can whip them up without a hitch, all while keeping the kitchen chaos at bay. Plus, with endless topping possibilities, from fresh berries to rich chocolate, you can truly tailor each mini cheesecake to please every palate. What flavor combinations will you dare to try?
Why are Easy Mini Cheesecakes a Must-Try?
Quick Delight: In just 15 minutes, these mini cheesecakes transform simple ingredients into a delectable treat that everyone will adore.
No Bake Needed: Embrace your inner chef without turning on the oven – perfect for warm days or when you’re short on time!
Crowd-Pleasing Variety: From topping suggestions like fresh berries to chocolate drizzles, you can customize each cheesecake to delight any crowd.
Beginner-Friendly: With an easy-to-follow method, even novice bakers can create these creamy bites without fear of cracks or complications.
Deliciously Versatile: Experiment with flavors by adding cocoa for a chocolate twist, or why not try your hand at a mini crème brûlée cheesecake variation?
With these beautiful cheesecakes, every gathering or quiet evening at home becomes an occasion worth celebrating. Pair them with Baked Cranberry Brie for a delightful dessert spread!
Easy Mini Cheesecake Ingredients
For the Crust
- Biscuit Crumbs – These form the base of our mini cheesecakes; graham crackers or gluten-free alternatives work excellently as substitutes.
- Unsalted Butter (melted) – This binds the crust together; using unsalted butter gives you better control over seasoning.
For the Filling
- Full-Fat Cream Cheese – The star ingredient for a creamy texture; be sure it’s at room temperature for smooth mixing.
- Granulated Sugar – Sweetens the filling perfectly, balancing the richness without direct substitutions.
- Large Eggs – Essential for structure and moisture; make sure they’re at room temperature to incorporate easily.
- Vanilla Extract – Adds depth to the flavor; feel free to use vanilla bean paste for a gourmet touch.
- Lemon Juice – Brightens the flavor and balances sweetness beautifully; lime juice can be a delightful alternative.
- All-Purpose Flour – Provides stability and structure; almond flour is a great gluten-free substitute.
- Full-Fat Sour Cream – Contributes a lovely tanginess; Greek yogurt can be a lighter substitute if desired.
These Easy Mini Cheesecakes are just waiting to be created with these simple yet key ingredients!
Step‑by‑Step Instructions for Easy Mini Cheesecakes
Step 1: Preheat Your Oven
Begin by preheating your oven to 320°F (160°C). While it’s warming up, grab a 12-cup muffin pan and line it with paper liners. These liners will help with easy removal later and contribute to the beautiful presentation of your Easy Mini Cheesecakes.
Step 2: Create the Crust
In a mixing bowl, crush your choice of biscuits into fine crumbs, using a rolling pin or food processor. Pour in the melted unsalted butter and mix until the crumbs are fully coated. Firmly press this mixture into the bottom of each muffin liner to create a sturdy crust; it should be even and compact for the best texture.
Step 3: Prepare the Creamy Filling
Using a hand mixer or stand mixer, blend the room-temperature cream cheese in a large bowl until it’s smooth and creamy, about 2-3 minutes. Gradually add the granulated sugar, continuing to mix until fully incorporated. This ensures your Easy Mini Cheesecakes will be sweetened perfectly and creamy without lumps.
Step 4: Incorporate the Eggs
One at a time, add the large eggs to the cream cheese mixture, mixing just until combined after each addition. It’s important not to overmix at this stage, as that can lead to cracks in your cheesecake. The batter should be smooth and light, reflecting its creamy texture when baked.
Step 5: Blend in the Flavorings
Mix in the vanilla extract, lemon juice, all-purpose flour, and full-fat sour cream until the filling is completely smooth and well combined. Be gentle as you incorporate these ingredients to maintain that luscious texture in your Easy Mini Cheesecakes.
Step 6: Fill the Muffin Liners
Carefully divide the cheesecake filling evenly among the prepped muffin liners, filling each about three-quarters full. This allows space for the cheesecakes to rise slightly during baking without overflowing.
Step 7: Bake to Perfection
Place the muffin pan in your preheated oven and bake for 15-18 minutes. Keep a close eye on them; the edges should be set while the centers should still have a slight jiggle. This indicates they’re perfectly baked and ensures a smooth finish.
Step 8: Cool and Chill for Best Flavor
Once baked, allow your Easy Mini Cheesecakes to cool in the pan for about 15 minutes. After that, refrigerate them for at least 4 hours or overnight to deepen their flavors and improve the texture. Chilling is crucial; it helps them set up beautifully for serving.
Expert Tips for Easy Mini Cheesecakes
Room Temperature Ingredients: Ensure your cream cheese and eggs are at room temperature to avoid lumps and achieve a creamy filling.
Mix Carefully: After adding the eggs, mix just until combined to prevent overmixing, which can lead to cracks in your Easy Mini Cheesecakes.
Oven Accuracy Matters: Keep your oven temperature consistent; use an oven thermometer if needed to ensure perfect baking without overcooking.
Gradual Cooling: Allow cheesecakes to cool in the pan before refrigerating, which helps maintain smooth tops and prevents moisture loss.
Perfect Portioning: Fill muffin liners about three-quarters full to allow the cheesecakes to rise without overflowing during baking.
Easy Mini Cheesecakes Variations & Substitutions
Feel free to elevate your easy mini cheesecakes with these delightful twists that add your personal touch!
-
Chocolate Twist: Blend in cocoa powder for a rich chocolate flavor, or top with dark chocolate ganache for added indulgence.
-
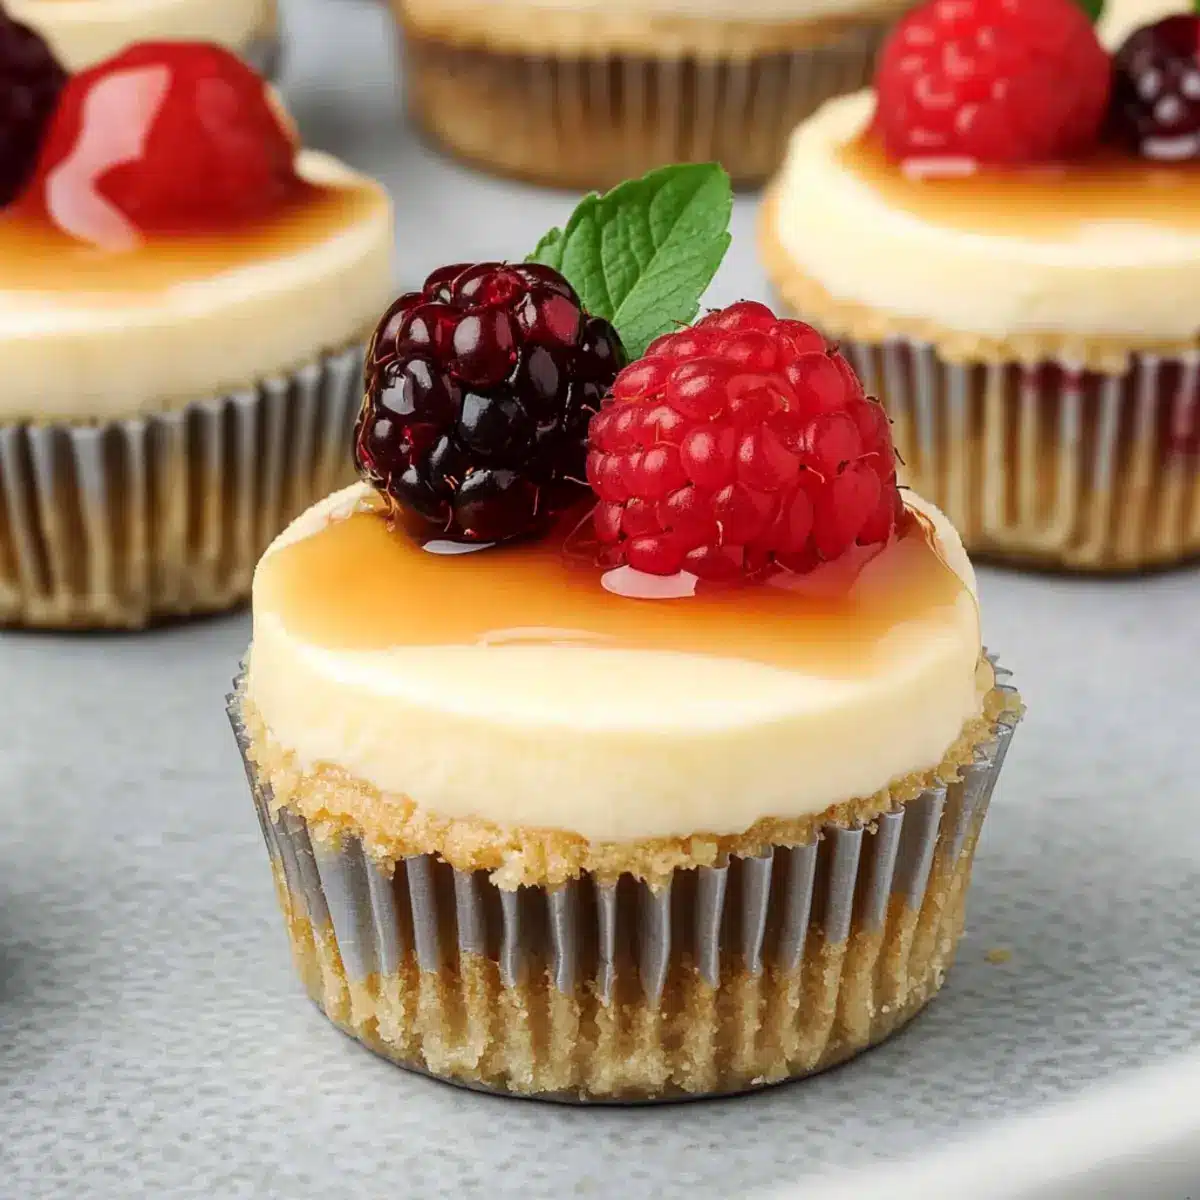
Berry Bliss: Swap fresh berries like strawberries, blueberries, or raspberries to create a fruity topping that adds a pop of color and flavor.
-
Lemon Zest: Incorporate lemon zest into the filling for a brighter, zestier cheesecake that balances beautifully with the creaminess.
-
Nutty Crunch: Add chopped nuts like pecans or almonds to the crust for an exciting crunch and extra texture. They provide a delightful contrast to the creamy filling.
-
Seasonal Spices: Sprinkle a pinch of cinnamon or nutmeg into your filling for a warm, cozy twist. It’s particularly lovely in the fall.
-
Mini Crème Brûlée Cheesecakes: Top with a layer of caramelized sugar for that crème brûlée flair. Just torch the sugar until golden right before serving.
-
Dairy-Free Delight: Substitute cream cheese with a dairy-free alternative like cashew cream to make these cheesecakes suitable for vegan diets.
-
Swirled Goodness: Create a marbled effect by swirling in fruit purée or chocolate sauce into the filling before baking. It adds a visually-stunning touch!
Experimenting with flavors is the key to making your Easy Mini Cheesecakes a personalized dessert masterpiece. For more tasty inspirations, check out my Mini Chicken Pot for savory bites or indulge in rich Butter Chicken Weeknight for a complete meal experience.
How to Store and Freeze Easy Mini Cheesecakes
Fridge: Keep your Easy Mini Cheesecakes in an airtight container for up to 5 days. This will help maintain their creamy texture and delicious flavor.
Freezer: Of course, these delightful treats can be individually wrapped and stored in the freezer for up to 2 months. Thaw them overnight in the fridge before savoring!
Serving: Serve chilled for the best taste experience. You can also add toppings like fresh fruits or chocolate right before serving to keep them fresh and vibrant.
Reheating (if necessary): Although best enjoyed cold, you can let them sit at room temperature for about 15 minutes if you prefer a slightly softened texture.
What to Serve with Easy Mini Cheesecakes?
These delightful little treats are perfect as a centerpiece for a sweet spread or a simple indulgence after dinner.
-
Fresh Berries: A medley of strawberries, blueberries, and raspberries brings a burst of freshness, balancing the rich cheesecake with a natural sweetness.
-
Whipped Cream: Fluffy and light, topped generously on each mini cheesecake, it adds an irresistible creamy element that enhances every bite.
-
Chocolate Sauce: Drizzling rich chocolate over these cheesecakes introduces a decadent touch that cater to chocolate lovers, creating a perfect harmony of flavors.
-
Coffee or Tea: A warm cup of coffee or a soothing herbal tea complements the creamy texture of the cheesecakes while enhancing dessert time conversations.
-
Caramel Drizzle: Sweet and buttery caramel paired with the tangy cheesecake provides the perfect luscious contrast, making your treat even more indulgent.
-
Mini Fruit Tarts: Offering a variety of flavors, these tarts can beautifully complement the rich cheesecakes while adding a lovely presentation to your dessert table.
Delight in the balance of flavors and textures, transforming your dessert experience into something truly special!
Make Ahead Options
These Easy Mini Cheesecakes are perfect for busy home cooks looking to save time during meal prep! You can prepare the crust up to 24 hours in advance by crushing the biscuits and mixing them with melted butter, then press the mixture into muffin liners and store them in the fridge. The cheesecake filling can also be made ahead and stored in an airtight container in the refrigerator for up to 3 days. When ready to serve, simply fill the prepared crusts with the chilled filling and bake as directed. This way, you’ll have a delicious, no-fuss dessert that tastes just as fresh with minimal last-minute effort!
Easy Mini Cheesecakes Recipe FAQs
What types of biscuits can I use for the crust?
You can use graham crackers, digestive biscuits, or even gluten-free alternatives like almond flour or gluten-free cookies. The choice of biscuit will influence the flavor and texture, so feel free to choose your favorite!
How should I store the Easy Mini Cheesecakes?
Store your cheesecakes in an airtight container in the refrigerator for up to 5 days. This will keep them fresh and maintain their creamy texture. Remember to add any toppings just before serving to ensure they stay vibrant and delicious!
Can I freeze these mini cheesecakes?
Absolutely! To freeze, wrap each mini cheesecake individually in plastic wrap and then place them in a zip-top freezer bag. They can last in the freezer for up to 2 months. When you’re ready to enjoy them, simply thaw them in the refrigerator overnight.
What should I do if my mini cheesecakes crack during baking?
Cracks usually come from overmixing after adding the eggs or baking at too high a temperature. Make sure to mix the filling gently, and keep your oven temperature low and consistent. If they do crack, don’t worry! They’ll still taste delightful and can be covered with toppings to hide those little imperfections.
Are these mini cheesecakes suitable for people with dietary restrictions?
You can modify these mini cheesecakes to accommodate dietary needs. For a gluten-free version, use gluten-free biscuits for the crust and gluten-free flour in the filling. If you’re making them for someone with a dairy allergy, you can experiment with dairy-free cream cheese and yogurt alternatives. Always check ingredient labels to ensure they fit your dietary restrictions!
Creamy Easy Mini Cheesecakes You Can Make in 15 Minutes
Ingredients
Equipment
Method
- Preheat your oven to 320°F (160°C) and line a 12-cup muffin pan with paper liners.
- Crush the biscuits into fine crumbs and combine with melted butter. Press firmly into the muffin liners.
- Blend the room-temperature cream cheese until smooth, then gradually add the sugar.
- Add eggs one at a time, mixing just until combined to avoid cracks.
- Incorporate vanilla extract, lemon juice, flour, and sour cream until smooth.
- Divide the cheesecake filling evenly among the muffin liners, filling about three-quarters full.
- Bake for 15-18 minutes until edges are set but centers jiggle slightly.
- Cool in the pan for 15 minutes then refrigerate for at least 4 hours before serving.
Leave a Reply