
As I rummaged through my pantry this morning, a little voice in my head whispered the magic word: cookies! That’s when the idea struck me—why not whip up a batch of scrumptious 4-Ingredient Gluten-Free Chocolate Oat Cookies? With only four simple ingredients and minimal prep time, these delights are perfect for anyone looking for a quick snack or a healthier dessert option. The combination of chewy oats and rich chocolate creates a texture that will satisfy your sweet tooth without the guilt. Plus, they’re easily adaptable for various dietary needs, such as nut-free versions. Who knew the path to cookie happiness could be so simple? Are you ready to make your kitchen smell heavenly? Let’s dive in!
Why are these cookies a must-try?
Simplicity at Its Best: With just four ingredients, these cookies are incredibly easy to whip up, making them perfect for busy days.
Guilt-Free Indulgence: Made with wholesome oats and ripe bananas, you can satisfy your sweet cravings without unnecessary additives.
Versatile Delight: Whether you need a gluten-free treat or a quick snack, this recipe easily adapts to various dietary needs—just switch the nut butter to a seed-based option for nut-free fans.
Crowd-Pleaser: Everyone loves cookies! Whether enjoyed with family or friends, these chocolate oat wonders are sure to disappear fast.
Quick Bake Time: Ready in just 12 minutes, they can go from mixing bowl to your plate in no time—perfect for those spontaneous cravings!
Pair them with a refreshing glass of milk or even serve them alongside an indulgent scoop of ice cream for an extra special dessert. If you enjoy creative dishes like Baked Eggs Napoleon or want to try something like Autumn Harvest Mushrooms, these cookies will fit right into your repertoire!
Chocolate Oat Cookie Ingredients
• Get ready to satisfy your sweet tooth!
For the Base
- Oats – Provides chewiness and structure; make sure to use certified gluten-free oats for those with gluten sensitivities.
- Banana – This natural sweetener and binder adds moisture; opt for overripe bananas for extra sweetness.
- Cocoa Powder – Rich chocolate flavor enhancer; choose unsweetened cocoa powder to manage the sweetness level.
- Nut Butter – Ensures creaminess and adds richness; if nut allergies are a concern, feel free to substitute with a seed-based butter like sunflower seed butter.
Enjoy creating these scrumptious chocolate oat cookies, made with just four ingredients!
Step‑by‑Step Instructions for 4-Ingredient Gluten-Free Chocolate Oat Cookies
Step 1: Preheat the Oven
Begin by preheating your oven to 350°F (175°C). This step is crucial for ensuring that the cookies bake evenly and achieve the perfect texture. While the oven is heating, prepare your baking sheet by lining it with parchment paper, which will help prevent sticking and make for easy cleanup.
Step 2: Mash the Banana
In a medium mixing bowl, take 1 overripe banana and mash it thoroughly with a fork until it reaches a smooth consistency. You want to avoid any large chunks, as this will help the banana blend seamlessly into the mixture, acting as a natural sweetener and binder for your 4-Ingredient Gluten-Free Chocolate Oat Cookies.
Step 3: Combine the Dry Ingredients
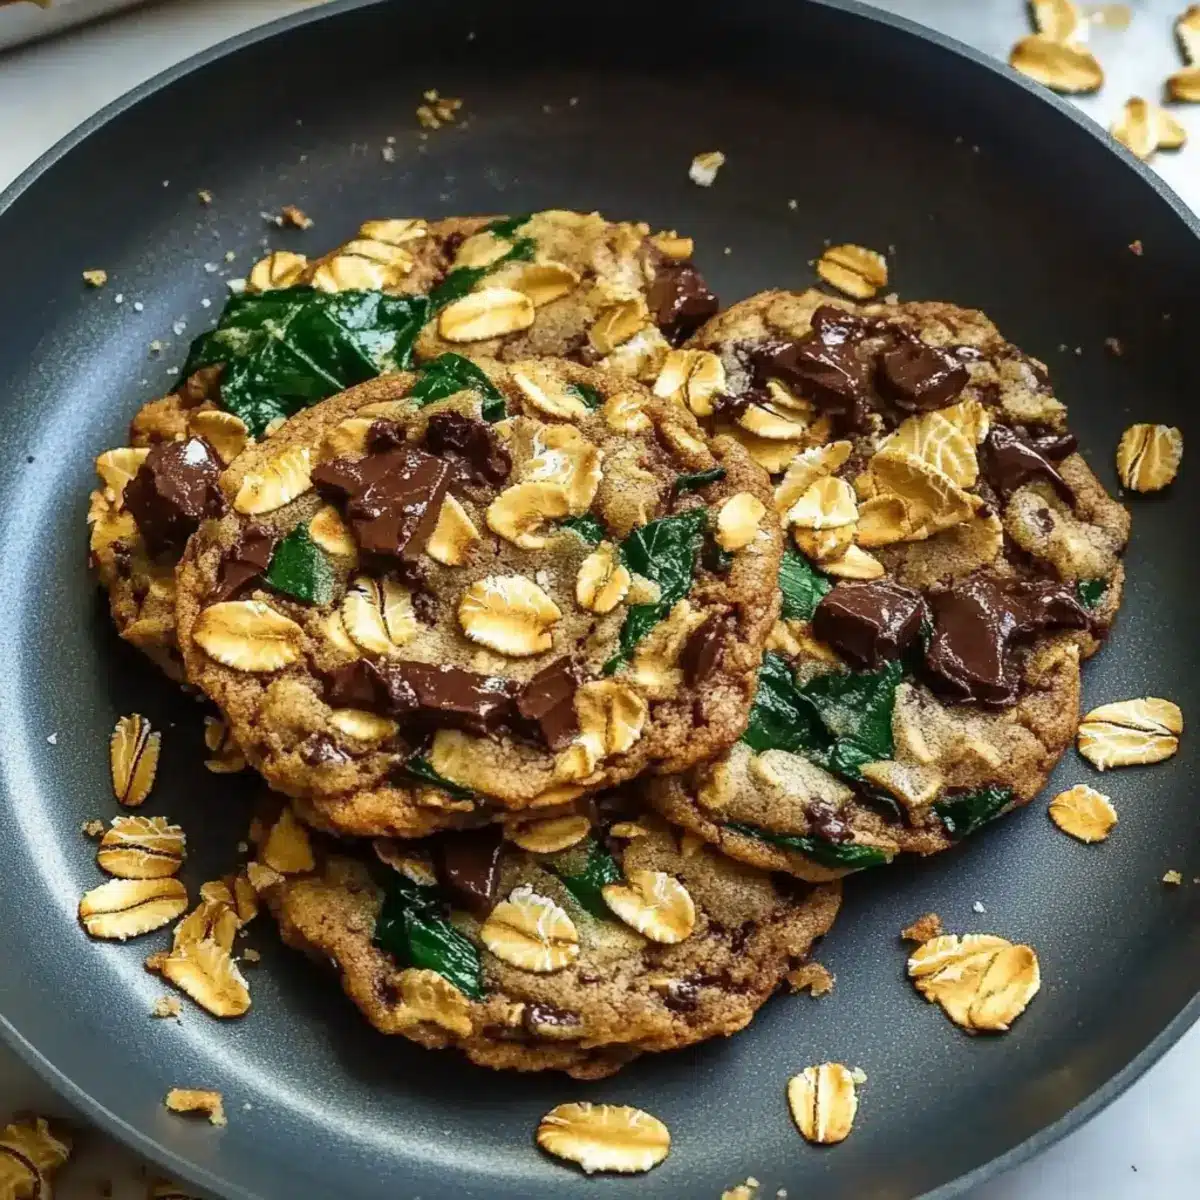
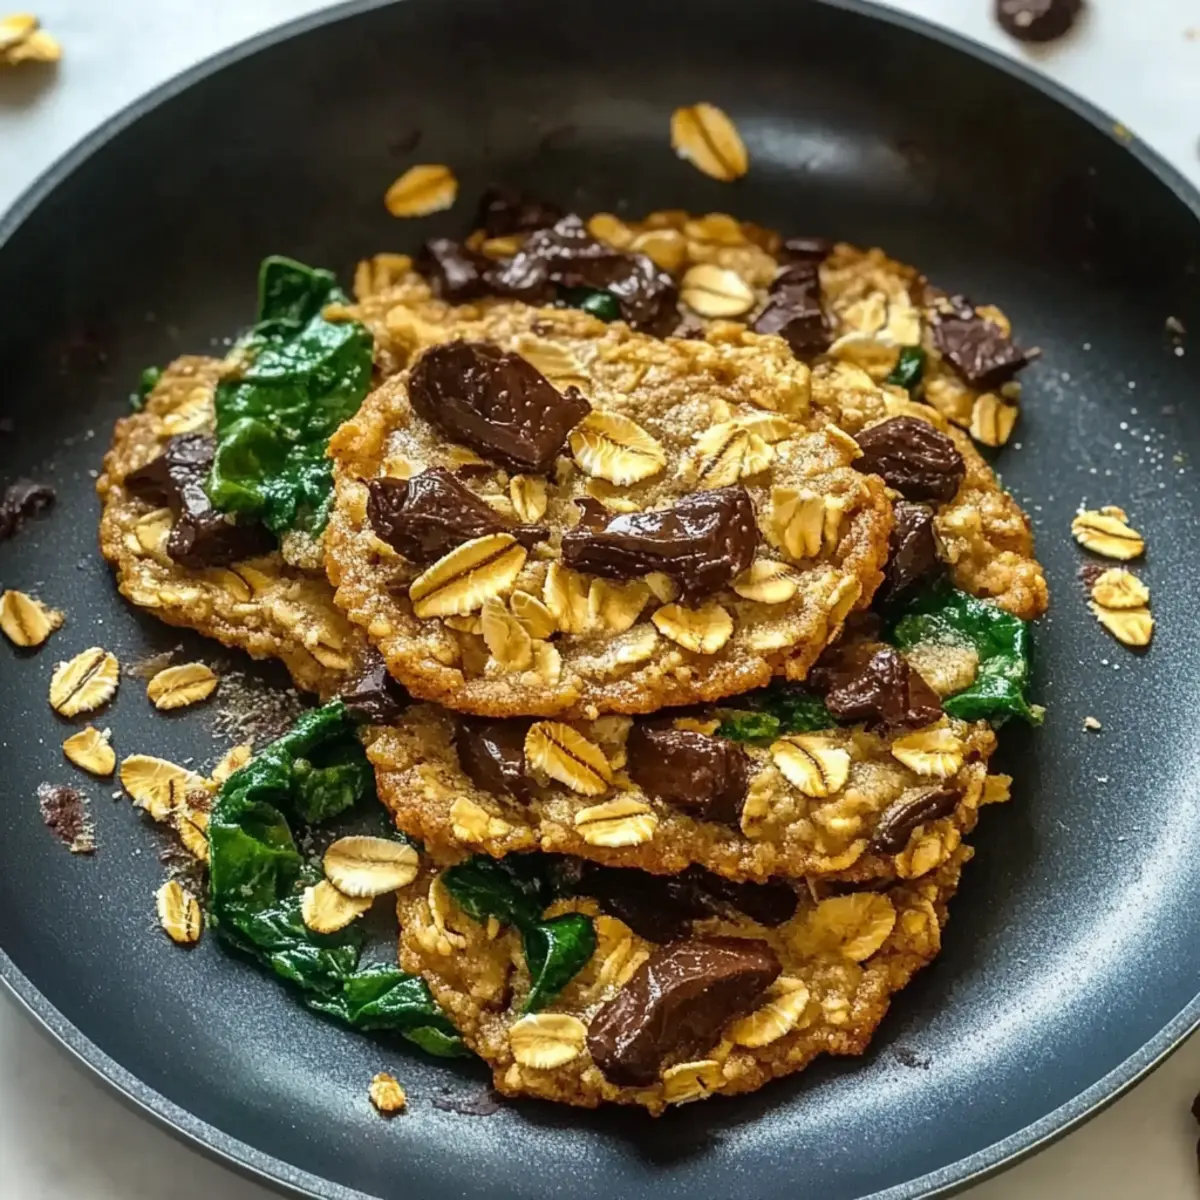
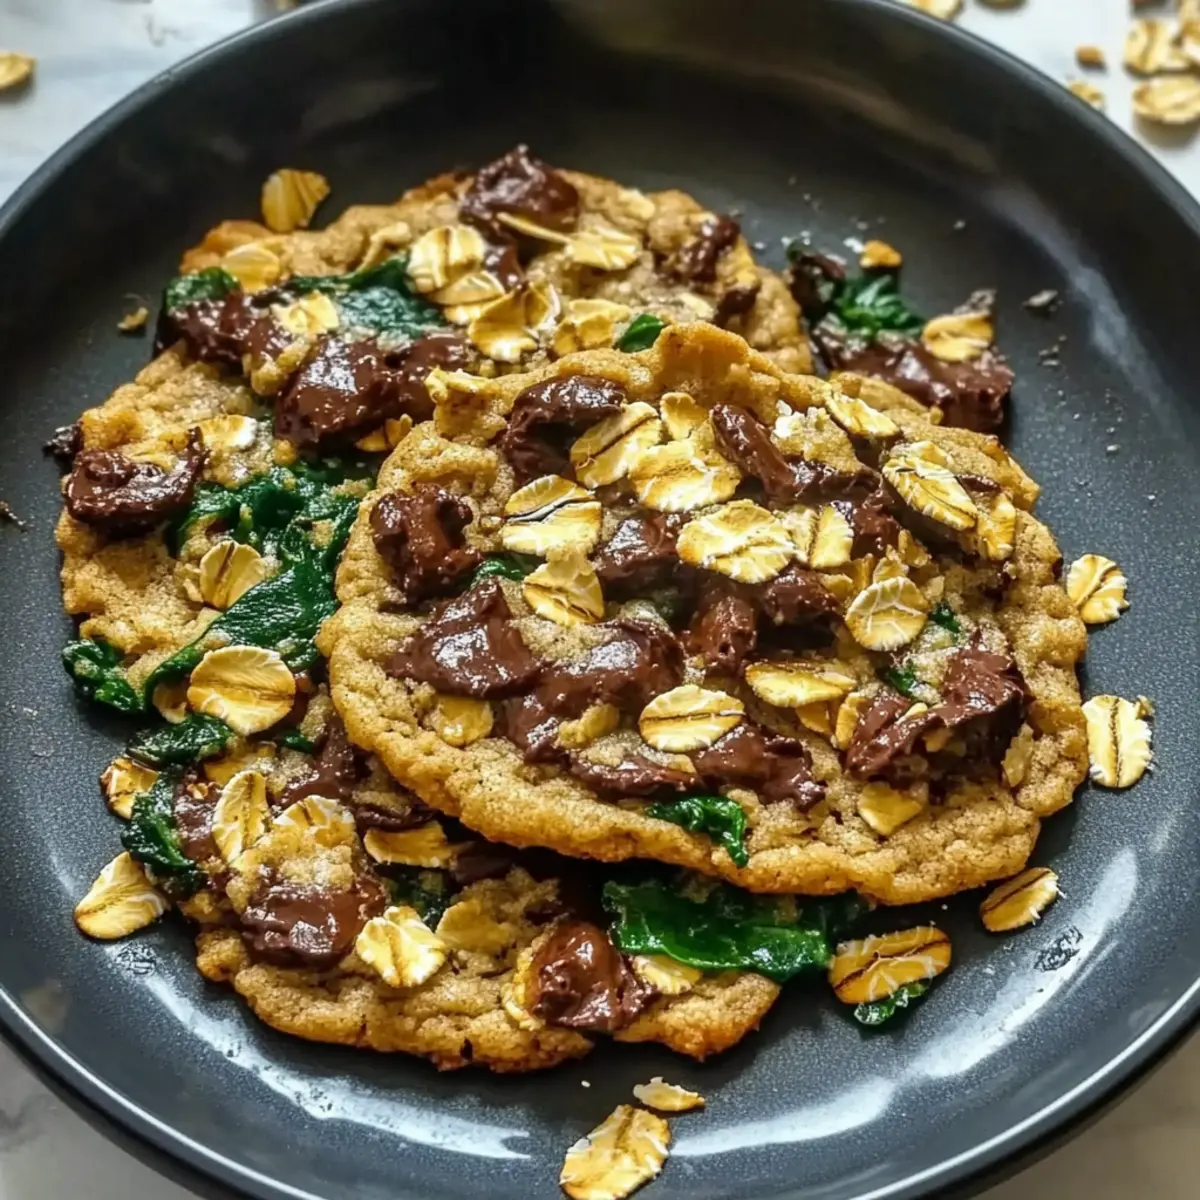
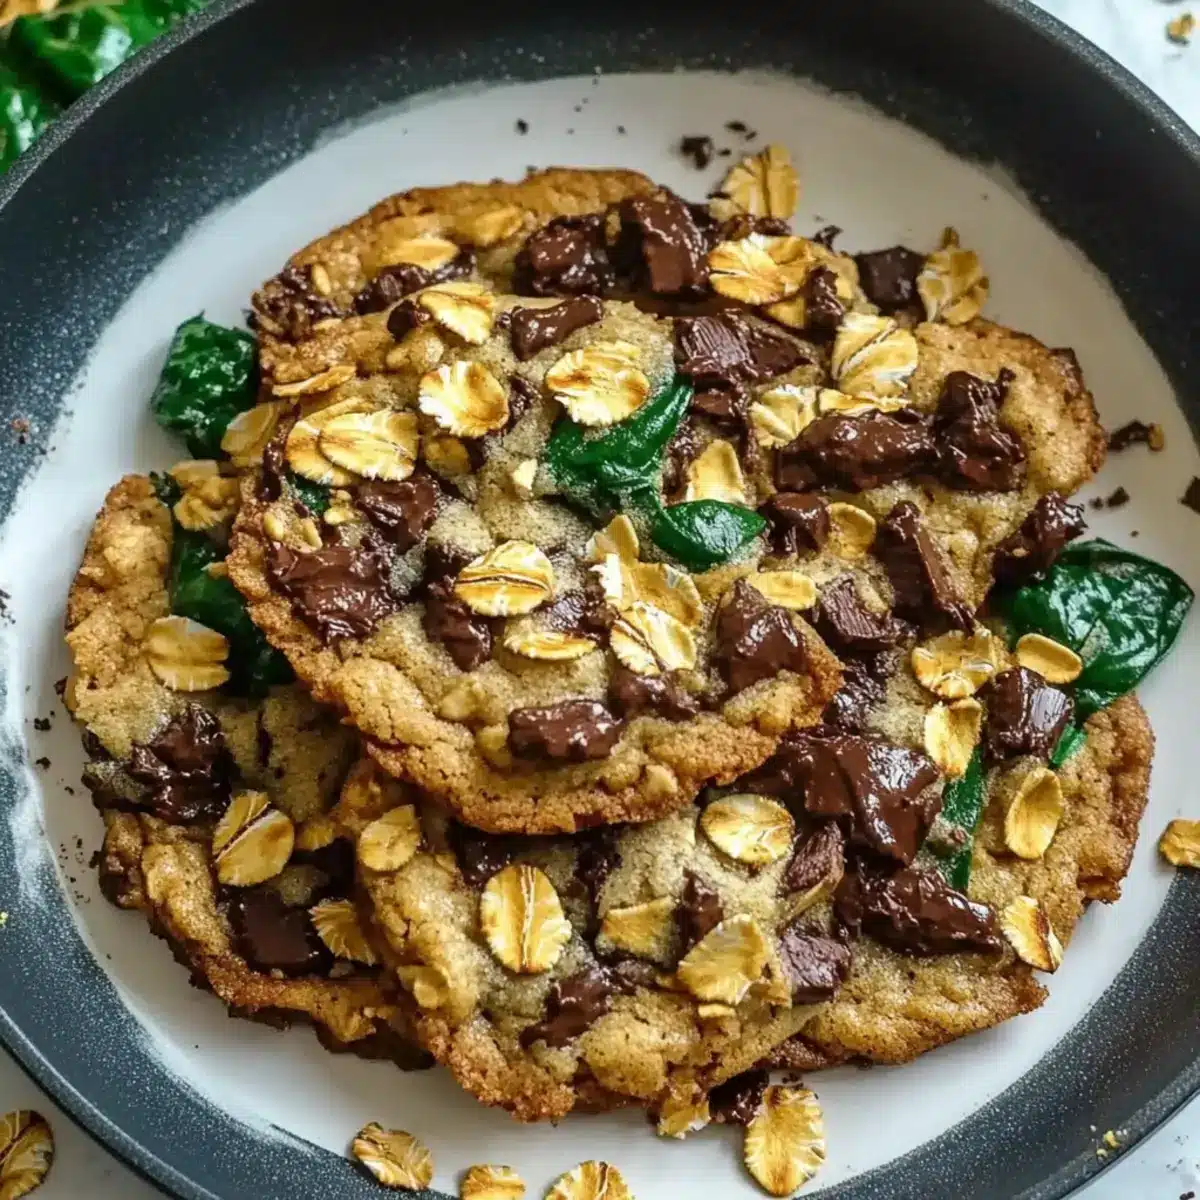
Once the banana is well-mashed, add 1 cup of gluten-free oats and ¼ cup of unsweetened cocoa powder to the bowl. Stir these ingredients together until they are evenly combined. This mixture is what gives the cookies that delightful chocolatey flavor and chewy texture, making them irresistible.
Step 4: Add Nut Butter
Next, introduce ¼ cup of your favorite nut butter or a seed-based alternative into the bowl. Using a spatula or wooden spoon, mix until all the ingredients are well incorporated. This will create a sticky dough that holds everything together, making your Chocolate Oat Cookies fudgy and delicious.
Step 5: Shape the Cookies
With your dough ready, use a spoon or cookie scoop to portion out the dough onto the lined baking sheet. Flatten each mound slightly with the back of the spoon. Make sure to leave some space between each cookie as they will spread a bit while baking, creating the perfect shape for your cookie masterpiece.
Step 6: Bake the Cookies
Place the baking sheet in the preheated oven and set a timer for 10-12 minutes. Keep an eye on the cookies; they should be firm to the touch and slightly set at the edges. Once baked, they will have that delightful combination of a fudgy center and slightly crisp edges.
Step 7: Cool Down
After baking, remove the cookies from the oven and let them cool on the baking sheet for about 5 minutes. This resting time allows them to firm up even more. Then, carefully transfer the cookies to a wire rack to cool completely, allowing them to reach their optimal texture before enjoying.
Chocolate Oat Cookies Variations
Feel free to mix things up and make these cookies your own with some delightful twists!
- Dairy-Free: Use coconut oil instead of butter for a vegan-friendly treat, adding a tropical essence to every bite.
- Nut-Free: Substitute nut butter with sunflower seed butter to cater to those with nut allergies—enjoy without worry!
- Sweetness Boost: Add a tablespoon of maple syrup or honey for extra natural sweetness to your cookies. Just remember, a little goes a long way!
- Add Some Crunch: Incorporate 1/4 cup of chopped nuts or seeds into the mix for an irresistible crunchy texture. Almonds and walnuts work wonderfully here!
- Fruit Flavors: Toss in dark chocolate chips or dried cranberries for bursts of flavor that transform each cookie into a mini adventure.
- Carob Twist: Swap out cocoa powder with carob powder for a unique, slightly sweeter flavor that offers a different take on your classic cookie.
- Spicy Kick: Sprinkle in a dash of cinnamon or cayenne to add a surprising warmth to the sweetness of your cookies.
- Double Chocolate Delight: For chocolate lovers, mix in chocolate chips along with the cocoa powder to create a double chocolate treat that’s simply divine.
These easy variations can make them feel brand new each time you bake! If you love trying inventive recipes, check out my delicious Baked Eggs Napoleon or the rich flavor of Autumn Harvest Mushrooms. Happy baking!
What to Serve with 4-Ingredient Gluten-Free Chocolate Oat Cookies
Pairing your delicious cookies with the right accompaniments can elevate them to new heights of enjoyment. Here are some delightful ideas to create a full experience!
-
Creamy Almond Milk: The nutty flavor and creaminess of almond milk perfectly complement the rich chocolate oats, providing a refreshing contrast.
-
Fresh Berries: Juicy strawberries or blueberries add a burst of freshness and acidity to balance the sweetness of the cookies, making every bite vibrant.
-
Whipped Coconut Cream: Light and fluffy, coconut cream adds a tropical twist, pairing beautifully with the chocolatey goodness in each cookie.
-
Nutty Granola: For a crunchy texture, add a sprinkle of nutty granola on top. Its chewiness will create a delightful contrast with the fudgy cookies.
-
Homemade Vanilla Ice Cream: A scoop of vanilla ice cream lends a creamy richness that melts into the warm cookie, creating a dessert that’s pure magic.
-
Hot Cup of Herbal Tea: A calming herbal tea, like chamomile or peppermint, serves as a soothing pairing, bringing warmth to your cookie enjoyment.
-
Chocolate Drizzle: Elevate your cookies by drizzling melted dark chocolate over the top for an extra decadent touch that chocolate lovers will adore.
-
Caramel Sauce: A drizzle of homemade or store-bought caramel adds sweetness and gooeyness, creating a delightful indulgence with each bite.
-
Zesty Citrus Salad: A salad of citrus fruits like oranges and grapefruits can brighten your palate, providing a refreshing counterpart to the rich cookies.
Choose your favorites to enhance your cookie experience, making it a decadent treat filled with delightful contrasts!
Storage Tips for Chocolate Oat Cookies
Room Temperature: Keep your cookies in an airtight container at room temperature for up to 5 days. This helps maintain their chewy texture and delicious taste.
Freezer: For longer storage, freeze the cookies in a single layer on a baking sheet. Once solid, transfer them to an airtight container or freezer bag for up to 3 months.
Thawing: When you’re ready to enjoy your frozen chocolate oat cookies, simply remove them from the freezer and let them thaw at room temperature.
Reheating: For a warm treat, you can reheat the cookies in a microwave for about 10-15 seconds. This brings back their delightful fudginess!
Expert Tips for the Best Chocolate Oat Cookies
-
Perfectly Mashed Banana: Ensure your banana is well-mashed to create a smooth texture in the dough, preventing any unwanted chunks that might disrupt the cookie’s consistency.
-
Dough Consistency: The cookie dough should be sticky but manageable; if it feels too dry, add a splash of almond milk to achieve the right texture for your chocolate oat cookies.
-
Watch the Bake Time: Keep a close eye on your cookies during the last couple of minutes in the oven to avoid overbaking. They should be firm to the touch but still soft in the center.
-
Even Sizing: Make sure to portion the dough evenly for consistent baking. Each cookie should be about the same size to ensure they all bake evenly.
-
Customize with Add-ins: Feel free to add chocolate chips, nuts, or dried fruit for extra flavor and texture, making your chocolate oat cookies uniquely yours!
Make Ahead Options
These 4-Ingredient Gluten-Free Chocolate Oat Cookies are perfect for meal prep enthusiasts who want to enjoy a delicious snack with minimal effort. You can mix the cookie dough up to 24 hours in advance; simply cover it tightly and refrigerate it to maintain that delightful fudgy texture. For even easier preparation, scoop the dough onto the lined baking sheet and freeze the mounds, allowing you to bake fresh cookies straight from the freezer in about 12-15 minutes—just add an extra minute or two to the bake time. This way, you can enjoy warm, gooey cookies whenever you crave them, all while saving time during busy weeknights!
Chocolate Oat Cookies Recipe FAQs
What type of oats should I use?
Absolutely! For the best results, use certified gluten-free oats, especially if you have gluten sensitivities or celiac disease. They provide that perfect chewy structure needed for your cookies without any unwanted allergens.
How long can I store these cookies?
You can keep your Chocolate Oat Cookies in an airtight container at room temperature for up to 5 days. This helps maintain their chewy texture and delicious flavor. If you want to enjoy them longer, they freeze beautifully!
How do I freeze the cookies?
Freezing is a great option! Start by laying the cookies in a single layer on a baking sheet and place them in the freezer until they’re solid (about 1-2 hours). Once frozen, transfer them to an airtight container or freezer bag, where they can stay fresh for up to 3 months. When you’re ready to enjoy, simply thaw them at room temperature.
What if my cookie dough is too dry?
No worries! If your dough feels too dry, just add a splash of almond milk or any non-dairy milk to moisturize it. Keep adding little by little until you reach the right sticky consistency. This helps bind everything nicely without compromising the texture.
Are these cookies safe for pets?
I recommend keeping these cookies away from pets, especially because they contain nut butter, which can be harmful to some animals. Always check ingredients for any potential allergens and consult your vet if you’re unsure.
Can I use a different sweetener besides bananas?
Very! If you don’t have ripe bananas on hand, you could try using unsweetened applesauce as a substitute; about 1/3 cup should work well. However, keep in mind that this may alter the flavor and moisture and may require some additional tweaking!
Mushroom Spinach Scrambled Eggs for a Cozy Breakfast Boost
Ingredients
Equipment
Method
- Preheat your non-stick skillet over medium heat and melt butter.

- In a mixing bowl, whisk together the eggs, milk, salt, and pepper.
- Add the sliced mushrooms to the skillet and sauté until soft.
- Stir in the chopped spinach and cook until wilted.
- Pour the egg mixture into the skillet and cook, gently stirring, until scrambled and fully cooked.
- Serve warm, optionally with toast or as is for a delightful breakfast.
Leave a Reply