
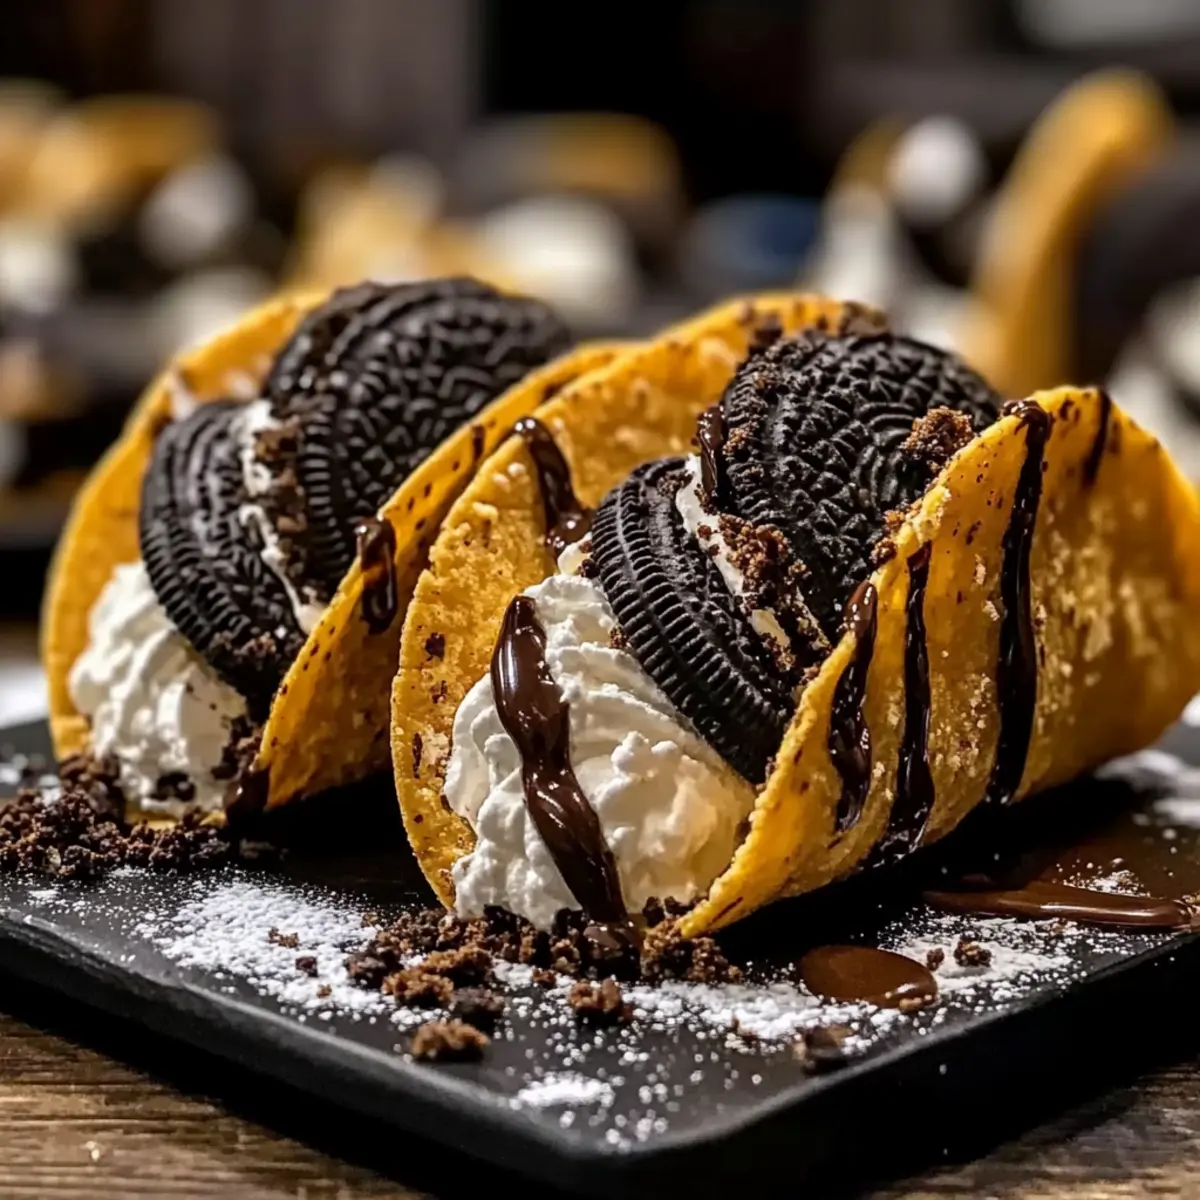
As the sweet scent of cinnamon and sugar fills my kitchen, I can’t help but smile at the delicious chaos ahead. Today, I’m sharing a fun and easy treat that’s soon to become a dessert classic—Oreo Crunch Cheesecake Tacos with Chocolate Drizzle. These delightful tacos not only bring a playful twist to your dessert lineup, but they also boast a creamy filling that will make you swoon. Perfect for parties or just a spontaneous sweet craving, these customizable tacos offer both convenience and crowd-pleasing appeal. Whether you indulge in the traditional Oreo crunch or switch it up with other favorite cookies, you’ll have a dessert that charms all who take a bite. Are you ready to elevate your dessert game with this unique recipe?
Why Are Oreo Crunch Cheesecake Tacos Irresistible?
Uniqueness: These tacos brilliantly merge two beloved desserts into one easy-to-eat treat.
Crispy & Creamy: Enjoy the delightful contrast of crispy, cinnamon-sugar shells against the rich, creamy cheesecake filling.
Customizable Fun: Make them your own! Swap Oreos for your favorite cookies or even try a gluten-free option to accommodate all guests.
Quick & Easy: With just a few straightforward steps, you’ll have a fun dessert ready in no time—perfect for unexpected guests or last-minute celebrations.
Crowd-Pleasing Appeal: These tacos are sure to impress! Serve them at parties alongside other favorites like Salted Caramel Cheesecake or Fried Strawberry Cheesecake for an unforgettable dessert table.
Oreo Crunch Cheesecake Tacos Ingredients
For the Taco Shells
- Cinnamon-sugar tortilla shells – They provide the crunchy outer layer; easy to make or find in stores.
For the Cheesecake Filling
- Philadelphia cream cheese (8 oz) – This creamy base is essential; substitute with low-fat or coconut cream for different options.
- Powdered sugar (½ cup) – Sweetens the filling to perfection; adjust according to your taste preference.
- Vanilla extract (1 tsp) – Enhances the flavor brilliantly; almond extract works as an intriguing alternative.
Add-Ins
- Chopped Oreos (½ cup) – These give delightful crunch and flavor; hand-chop for the best texture integrated throughout.
For the Chocolate Drizzle
- Chocolate chips (½ cup) – Use these for melting and drizzling; Ghirardelli is a tasty choice, or opt for melted chocolate sauce for convenience.
Step‑by‑Step Instructions for Oreo Crunch Cheesecake Tacos
Step 1: Prepare Taco Shells
Heat a generous amount of oil in a skillet over medium heat. Once hot, add the tortillas one at a time, frying for about 1-2 minutes per side until golden brown and crispy. For added shape, drape the hot shells over a muffin tin or an inverted oven rack and allow them to cool completely to maintain their taco form.
Step 2: Make Cheesecake Filling
In a mixing bowl, beat the Philadelphia cream cheese with an electric mixer on medium speed until smooth and creamy, about 2 minutes. Gradually add the powdered sugar and vanilla extract, mixing well until fully incorporated and silky. This luscious filling will be the heart of your Oreo Crunch Cheesecake Tacos, so ensure it’s perfectly blended.
Step 3: Add Oreos
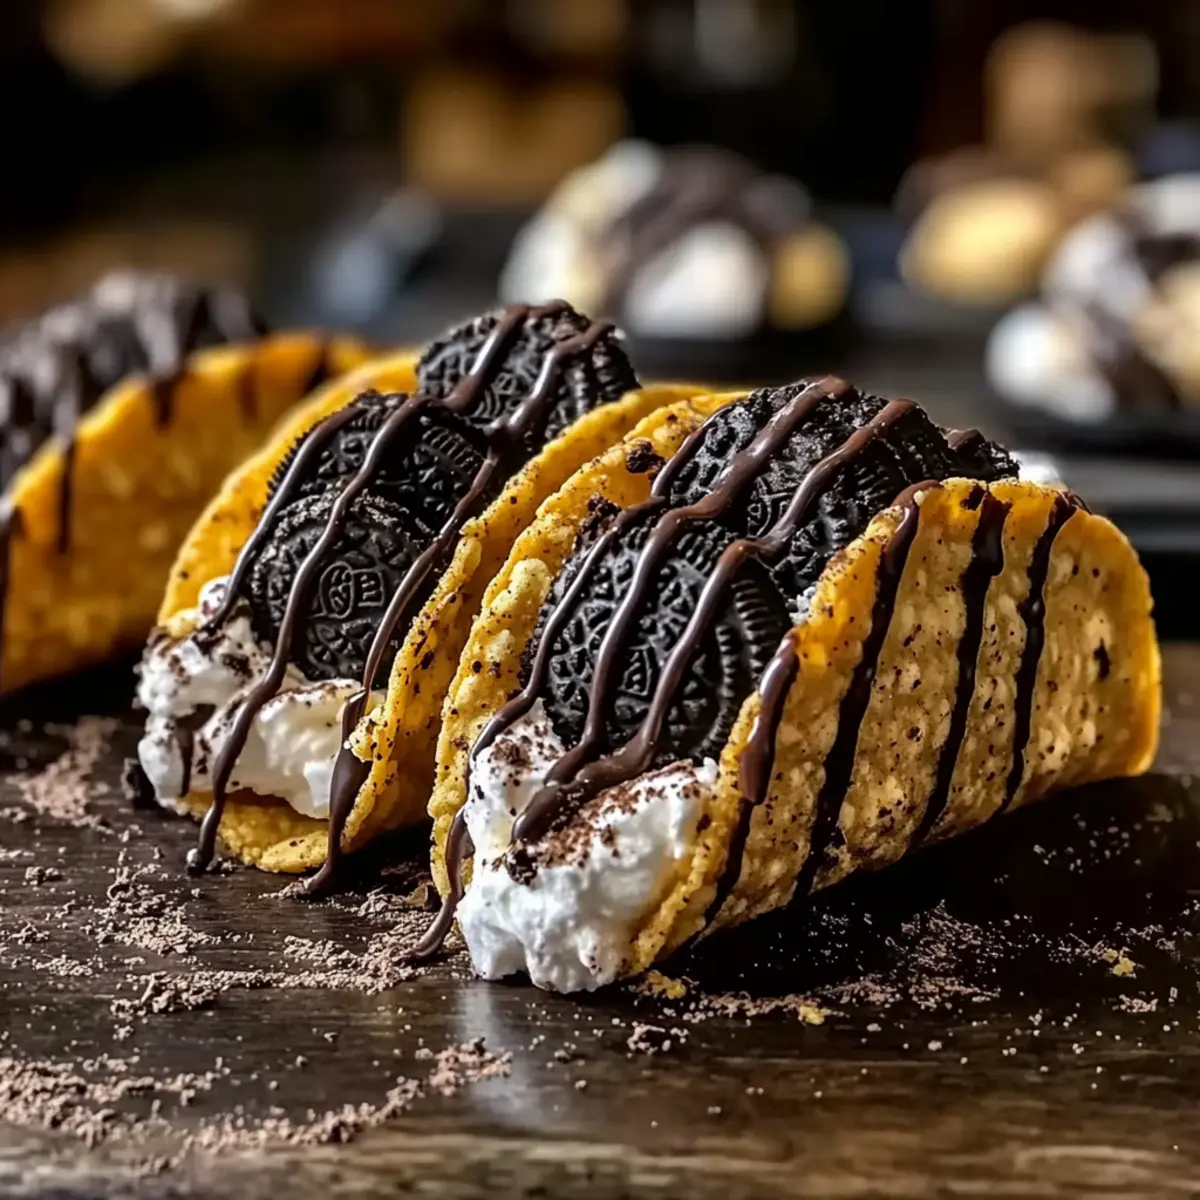
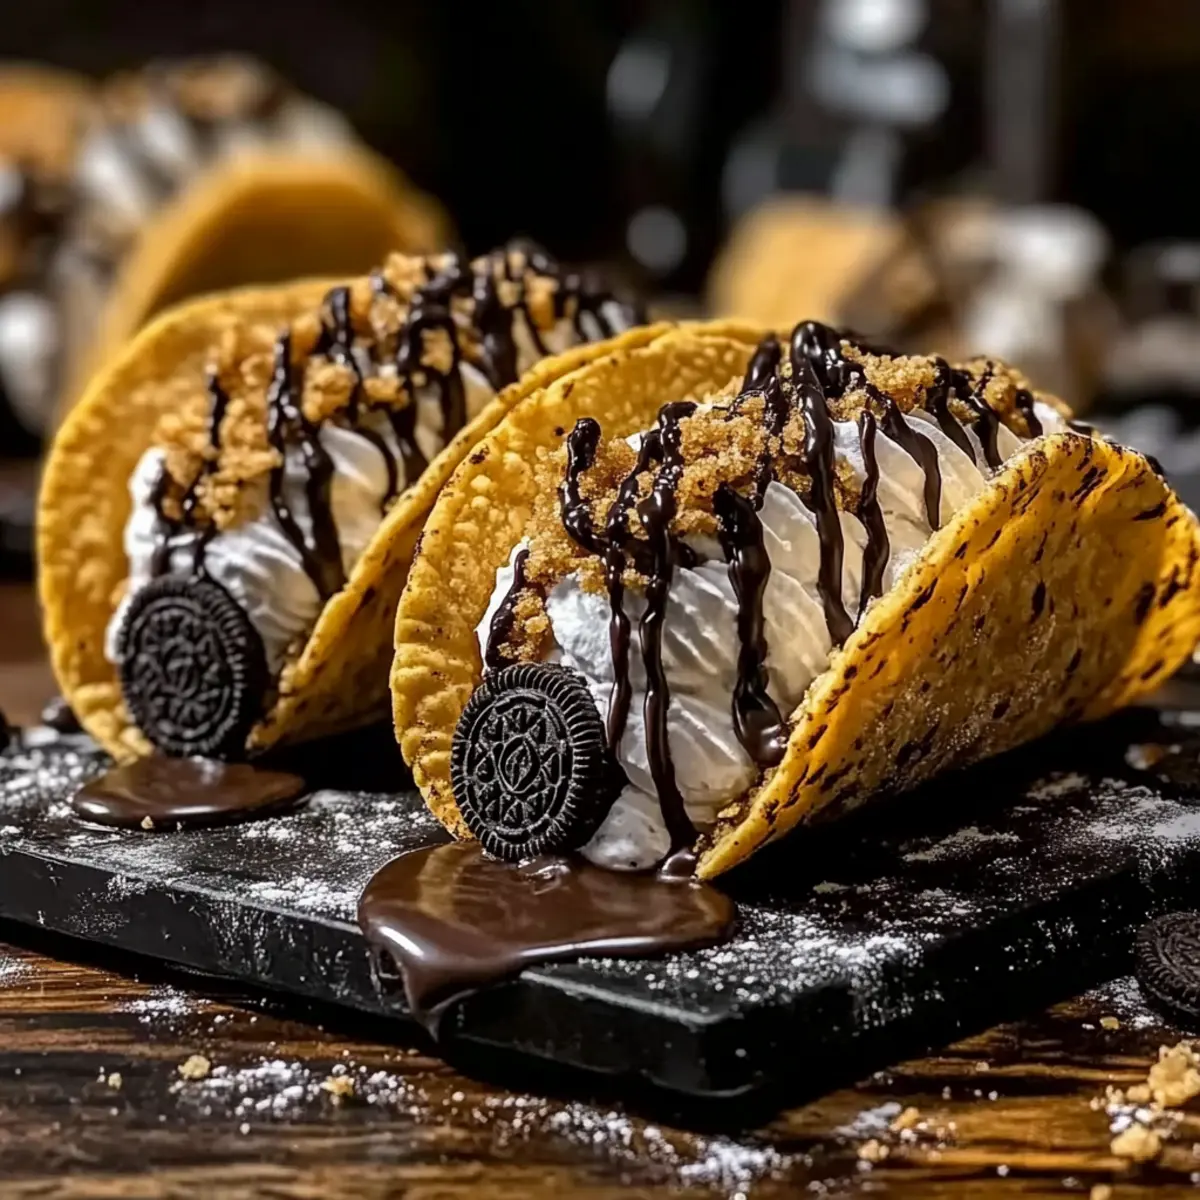
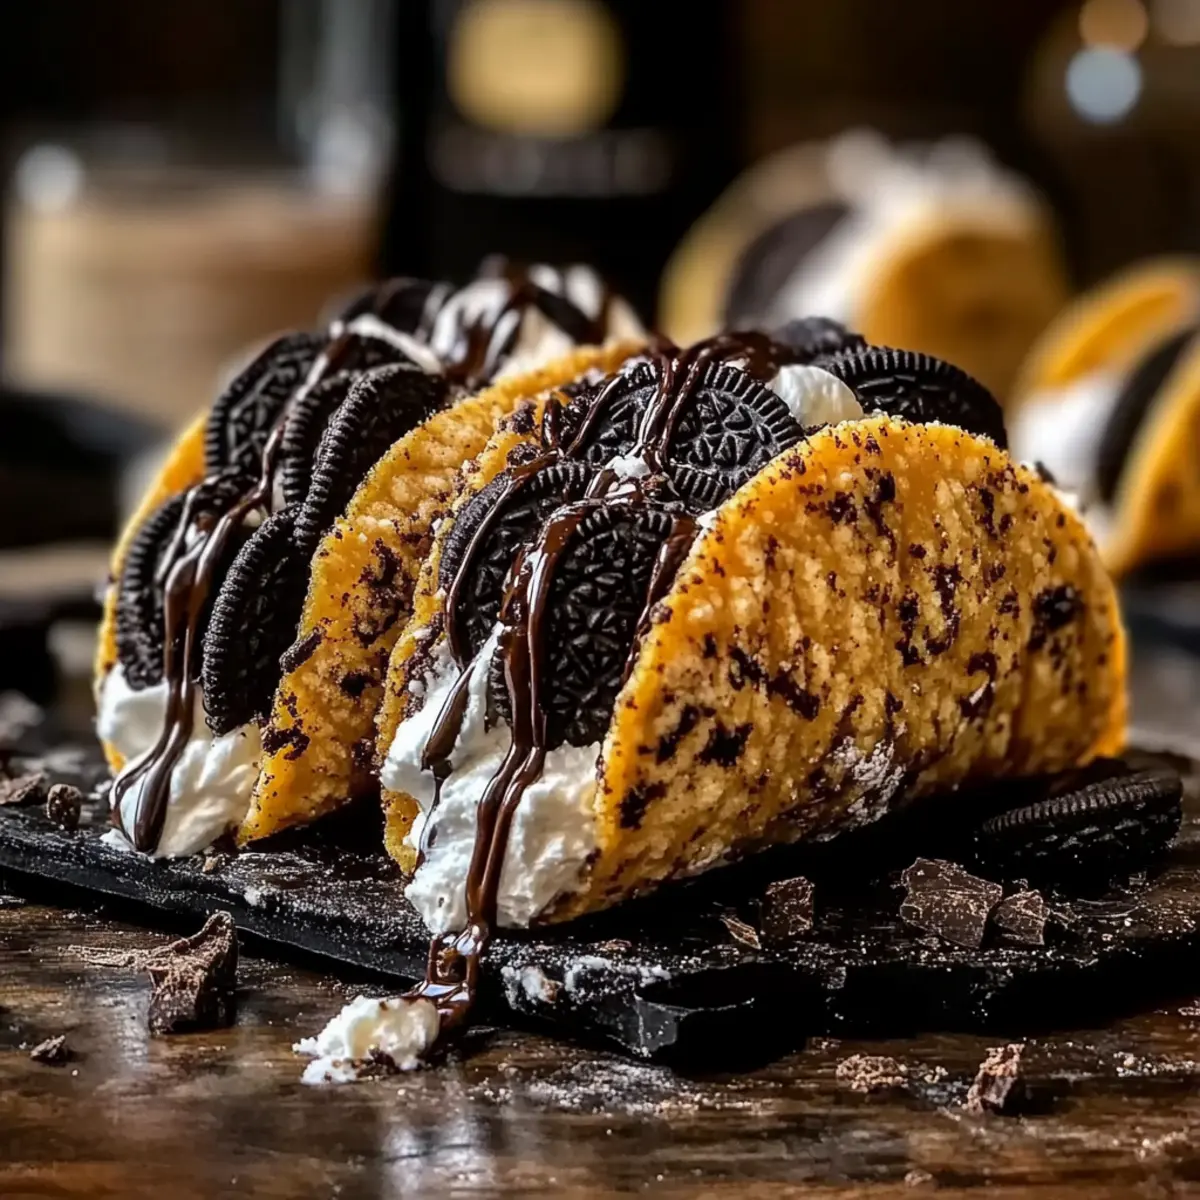
Fold the chopped Oreos gently into the cheesecake filling, making sure to distribute them evenly for a delightful crunch. Carefully spoon or pipe the rich filling into each cooled taco shell, being mindful not to overfill to prevent any spills. The contrast of textures is what makes these Oreo Crunch Cheesecake Tacos so irresistible!
Step 4: Drizzle with Chocolate
In a microwave-safe bowl, melt the chocolate chips in 30-second intervals, stirring between each until smooth and fully melted. Drizzle the melted chocolate generously over each taco for a decadent finish. Alternatively, you can use store-bought chocolate sauce for a quicker option—either way, this adds a luscious touch to your dessert.
Step 5: Serve Immediately
Arrange the finished Oreo Crunch Cheesecake Tacos on a beautiful serving platter, showcasing their delightful layers. Serve them right away for that perfect balance of crispy and creamy goodness. This treat is best enjoyed fresh, allowing everyone to indulge in the delightful chaos of flavors and textures!
Oreo Crunch Cheesecake Tacos Variations
Feel free to indulge your creativity and customize these delightful dessert tacos with these fun variations!
-
Gluten-Free: Use gluten-free cookies and tortillas to make the tacos suitable for those with dietary restrictions. It’s just as delicious!
-
Fruit-Filled: Swap in fresh fruit like strawberries or bananas for a refreshing twist. This brightens the dish and adds natural sweetness.
-
Nutty Crunch: Add crushed nuts, such as pecans or almonds, to the cheesecake filling for an added crunch. The nutty flavor complements the sweetness beautifully.
-
Ice Cream Delight: Serve these tacos with a scoop of your favorite ice cream for an even more decadent treat. Vanilla or chocolate ice cream pairs perfectly with the dark cookies.
-
Caramel Drizzle: Substitute chocolate drizzle with warm caramel sauce for a delightful twist. The gooey sweetness adds another layer of flavor!
-
Fruity Drizzle: Try a berry sauce or warm chocolate raspberry sauce for a fruity contrast. It introduces a splash of color and flavor harmony.
-
Flavor Infusion: Experiment with flavored extracts! Swap vanilla for peppermint or almond extract to change the dessert’s profile entirely.
-
Cheesecake Nachos: If you have leftover filling or broken taco shells, serve the filling with broken shell chips for “cheesecake nachos.” It’s a fun and casual way to enjoy the recipe.
Feel free to explore these variations and find your favorite way to enjoy these scrumptious Oreo Crunch Cheesecake Tacos! If you’re loving the creamy cheesecake concept, check out my Vanilla Bean Cheesecake or Fried Strawberry Cheesecake for more delightful treats!
How to Store and Freeze Oreo Crunch Cheesecake Tacos
Room Temperature: Keep unfilled taco shells at room temperature for up to 2 days in an airtight container to maintain their crispiness.
Fridge: Refrigerate the cheesecake filling for up to 3 days. Store in an airtight container to prevent any drying out.
Freezer: For longer storage, freeze unfilled taco shells for up to 1 month. Thaw in the fridge before serving. Avoid freezing the filled tacos, as the texture will change.
Reheating: If needed, briefly re-crisp taco shells in a warm oven for a few minutes before filling. Assemble just before serving for the perfect Oreo Crunch Cheesecake Tacos experience.
Expert Tips for Oreo Crunch Cheesecake Tacos
-
Taste the Filling: Always taste the cheesecake filling before piping it into the shells. Adjust the sweetness to your preference for the perfect Oreo Crunch Cheesecake Tacos.
-
Battle the Breakage: If your taco shells break during assembly, don’t worry! Simply serve the filling as “cheesecake nachos” instead—no one will complain!
-
Stay Fresh: To keep the crispy texture intact, store unfilled taco shells in an airtight container at room temperature and refrigerate the cheesecake filling separately. Assemble just before serving.
-
Make Extra: These tacos disappear fast! Consider doubling the recipe to ensure everyone gets to enjoy this crowd-pleasing dessert.
-
Customize Flavors: Feel free to use other favorite cookies in place of Oreos or sprinkle in additional toppings like sprinkles or other cookie crumbs for extra fun!
What to Serve with Oreo Crunch Cheesecake Tacos?
Indulging in these delightful dessert tacos will set the mood for a sweet and memorable gathering filled with laughter and joy.
- Cold Milk: A classic pairing that enhances the Oreo flavor and offers a creamy balance to the sweetness of the tacos.
- Vanilla Ice Cream: The smooth, creamy texture of ice cream complements the crunch of the tacos while providing a delightful temperature contrast.
- Espresso or Coffee: The rich, bold flavors of coffee bring out the chocolate notes and create a perfect after-dinner treat.
- Fruity Dipping Sauce: A light berry or mango sauce counterbalances the richness with a refreshing touch—sweet and tangy, a perfect contrast!
- Chocolate-Covered Strawberries: These bite-sized treats echo the chocolate drizzle on the tacos, adding a bit of elegant flair to your dessert spread.
- Fruit Salad: A bright and colorful mix of fresh fruits can lighten the meal, providing a refreshing palate cleanser alongside the rich tacos.
- Mini Cheesecake Bites: Additional cheesecake elements enhance the dessert theme, making for a delightful and varied cheesecake experience.
- Sparkling Water or Lemonade: Refreshing beverages can cleanse the palate between indulgent bites, making each taco experience even more enjoyable!
Make Ahead Options
These Oreo Crunch Cheesecake Tacos are perfect for meal prep enthusiasts looking to save time! You can prepare the taco shells up to 2 days in advance; simply fry them, let them cool, and store them in an airtight container at room temperature to maintain their crunchiness. The cheesecake filling can be made ahead and refrigerated for up to 3 days. Just whip up the cream cheese, powdered sugar, and vanilla, then fold in the chopped Oreos. When you’re ready to serve, simply fill the shells with the chilled filling and drizzle with melted chocolate for that fresh, decadent touch—ensuring the delightful combination is just as delicious as when first made!
Oreo Crunch Cheesecake Tacos Recipe FAQs
How should I select ripe ingredients for my Oreo Crunch Cheesecake Tacos?
Absolutely! When choosing your cream cheese, go for a brand you love, such as Philadelphia, for the best flavor and texture. If using fresh tortillas for your taco shells, opt for those that feel soft and pliable—avoid any with cracks or hard edges, as they may break during frying.
What’s the best way to store leftover Oreo Crunch Cheesecake Tacos?
To keep your tacos fresh, store unfilled taco shells in an airtight container at room temperature for up to 2 days. The cheesecake filling can be refrigerated separately for up to 3 days. Just assemble right before serving for that ideal crunchy-chewy experience!
Can I freeze Oreo Crunch Cheesecake Tacos?
Yes, but only the unfilled taco shells! You can freeze them for up to 1 month. Wrap them tightly in plastic wrap or place them in a freezer-safe bag. Thaw in the refrigerator before serving. However, avoid freezing the filled tacos, as the texture of the cheesecake filling won’t hold up well once thawed.
What should I do if my taco shells break while assembling?
Very! If you find that your taco shells have broken during assembly, don’t stress! Just scoop the delicious filling onto a plate and serve it as “cheesecake nachos” instead. Top with extra crushed Oreos and a drizzle of chocolate sauce—your guests will love the creativity!
Are there any dietary considerations for Oreo Crunch Cheesecake Tacos?
Of course! If you or your guests have allergies, consider using gluten-free cookies and dairy-free cream cheese alternatives, like coconut cream, to accommodate dietary restrictions. It’s always best to check labels to ensure all ingredients are allergen-free and safe for your guests!
How do I know if my cheesecake filling is sweet enough?
I recommend tasting your cheesecake filling before piping it into the taco shells. Start by blending your cream cheese and powdered sugar until smooth, then take a small spoonful to taste. If it’s not sweet enough, gradually add more powdered sugar—around a tablespoon at a time—until it reaches your desired level of sweetness. This step ensures each bite is just right!
Oreo Crunch Cheesecake Tacos You’ll Love to Indulge In
Ingredients
Equipment
Method
- Heat a generous amount of oil in a skillet over medium heat. Once hot, add the tortillas one at a time, frying for about 1-2 minutes per side until golden brown and crispy. For added shape, drape the hot shells over a muffin tin or an inverted oven rack and allow them to cool completely to maintain their taco form.
- In a mixing bowl, beat the Philadelphia cream cheese with an electric mixer on medium speed until smooth and creamy, about 2 minutes. Gradually add the powdered sugar and vanilla extract, mixing well until fully incorporated and silky.
- Fold the chopped Oreos gently into the cheesecake filling, making sure to distribute them evenly for a delightful crunch. Carefully spoon or pipe the rich filling into each cooled taco shell, being mindful not to overfill to prevent any spills.
- In a microwave-safe bowl, melt the chocolate chips in 30-second intervals, stirring between each until smooth and fully melted. Drizzle the melted chocolate generously over each taco for a decadent finish.
- Arrange the finished Oreo Crunch Cheesecake Tacos on a beautiful serving platter, showcasing their delightful layers. Serve them right away for that perfect balance of crispy and creamy goodness.
Leave a Reply