
The scent of freshly baked bread can instantly transport you to cozy family dinners or friendly gatherings. This Quick 20-Minute Homemade Bread recipe is a game changer—it brings the warmth of a bakery right to your kitchen without the fuss of kneading. Perfect for those chaotic weeknights or when surprise guests pop by, this no-knead approach ensures you can whip up a delightful, fluffy loaf in record time. Imagine pairing it with a hearty soup or enjoying it warm with a smear of butter; it’s pure comfort in every bite. Plus, with endless possibilities for flavor enhancements—like adding herbs or cheesy goodness—this bread is not just quick; it’s a versatile crowd-pleaser too! Curious how to bring this homemade delight to your table in just 20 minutes? Let’s dive in!
Why is Homemade Bread a Must-Try?
Simplicity: This recipe requires no kneading, making it perfect for novice bakers or anyone short on time.
Quick Comfort: Ready in just 20 minutes, it’s your go-to solution for last-minute meals or unexpected guests.
Endless Variations: Feel free to customize by adding your favorite herbs or cheese, transforming a humble loaf into a gourmet experience!
Warmth and Aroma: The comforting scent of freshly baked bread creates an inviting atmosphere, sure to impress your family and friends.
Perfect Pairing: It complements soups like Tomato Basil beautifully or shines on its own with a pat of butter.
Get ready to enjoy your own delicious slice of homemade goodness!
Homemade Bread Ingredients
Note: Gather these simple ingredients to create your mouthwatering homemade bread in just 20 minutes!
For the Bread
- All-Purpose Flour – Provides structure and texture; substitute with bread flour for a chewier crust.
- Sugar – Activates the yeast for a better rise; omit for sugar-free versions.
- Instant Yeast – Ensures a quick rising without proofing; active dry yeast can be used but may require longer activation time.
- Salt – Enhances flavor; essential for a balanced taste.
- Warm Water (110°F) – Activates yeast when at the correct temperature; ensure it’s not too hot to avoid killing the yeast.
- Olive Oil or Melted Butter – Adds moisture and flavor; melted coconut oil can be a non-dairy alternative.
Feel free to explore with various flavor enhancements in your homemade bread!
Step‑by‑Step Instructions for Quick 20-Minute Homemade Bread
Step 1: Combine Yeast and Water
In a medium mixing bowl, combine 1 cup of warm water (110°F), 1 tablespoon of sugar, and 2 teaspoons of instant yeast. Let this mixture sit for about 5 minutes until it becomes frothy, signaling that the yeast is activated and ready to work its magic in your homemade bread.
Step 2: Mix Dry Ingredients
Once the yeast mixture is foamy, add 3 cups of all-purpose flour and 1 teaspoon of salt to the bowl. Drizzle in 2 tablespoons of olive oil or melted butter. Using a wooden spoon or your hands, gently mix until a soft, shaggy dough forms and all the ingredients are well incorporated, ensuring no flour is left behind.
Step 3: Shape the Dough
Turn the dough out onto a lightly floured surface. With floured hands, shape the dough into a rough loaf, tucking the edges underneath to create a smooth top. Place the loaf on a parchment-lined baking sheet, allowing it to keep its shape while you prepare for baking.
Step 4: Rest and Preheat
Let the loaf rest for 5 minutes to relax the gluten while you preheat the oven to 400°F (200°C). This brief resting period will enhance the texture of your quick homemade bread and ensure it bakes evenly for a perfect golden crust.
Step 5: Prepare for Baking
After the short resting time, brush the loaf generously with olive oil or melted butter, giving it a beautiful sheen. This step not only adds flavor but helps achieve that delightful crispy crust that you crave in freshly baked bread.
Step 6: Bake the Bread
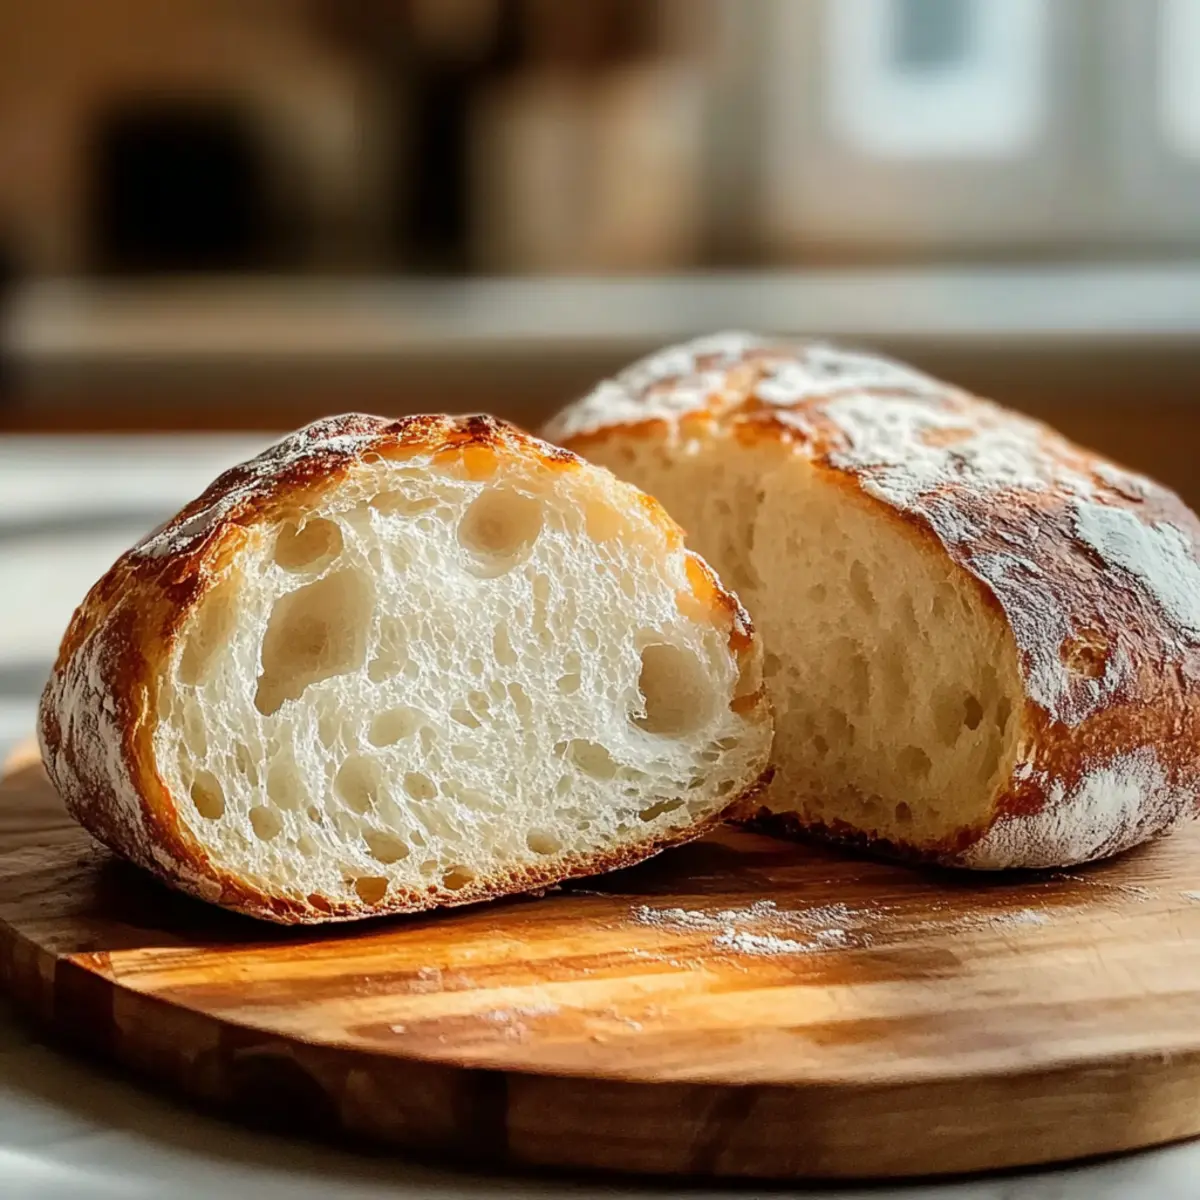
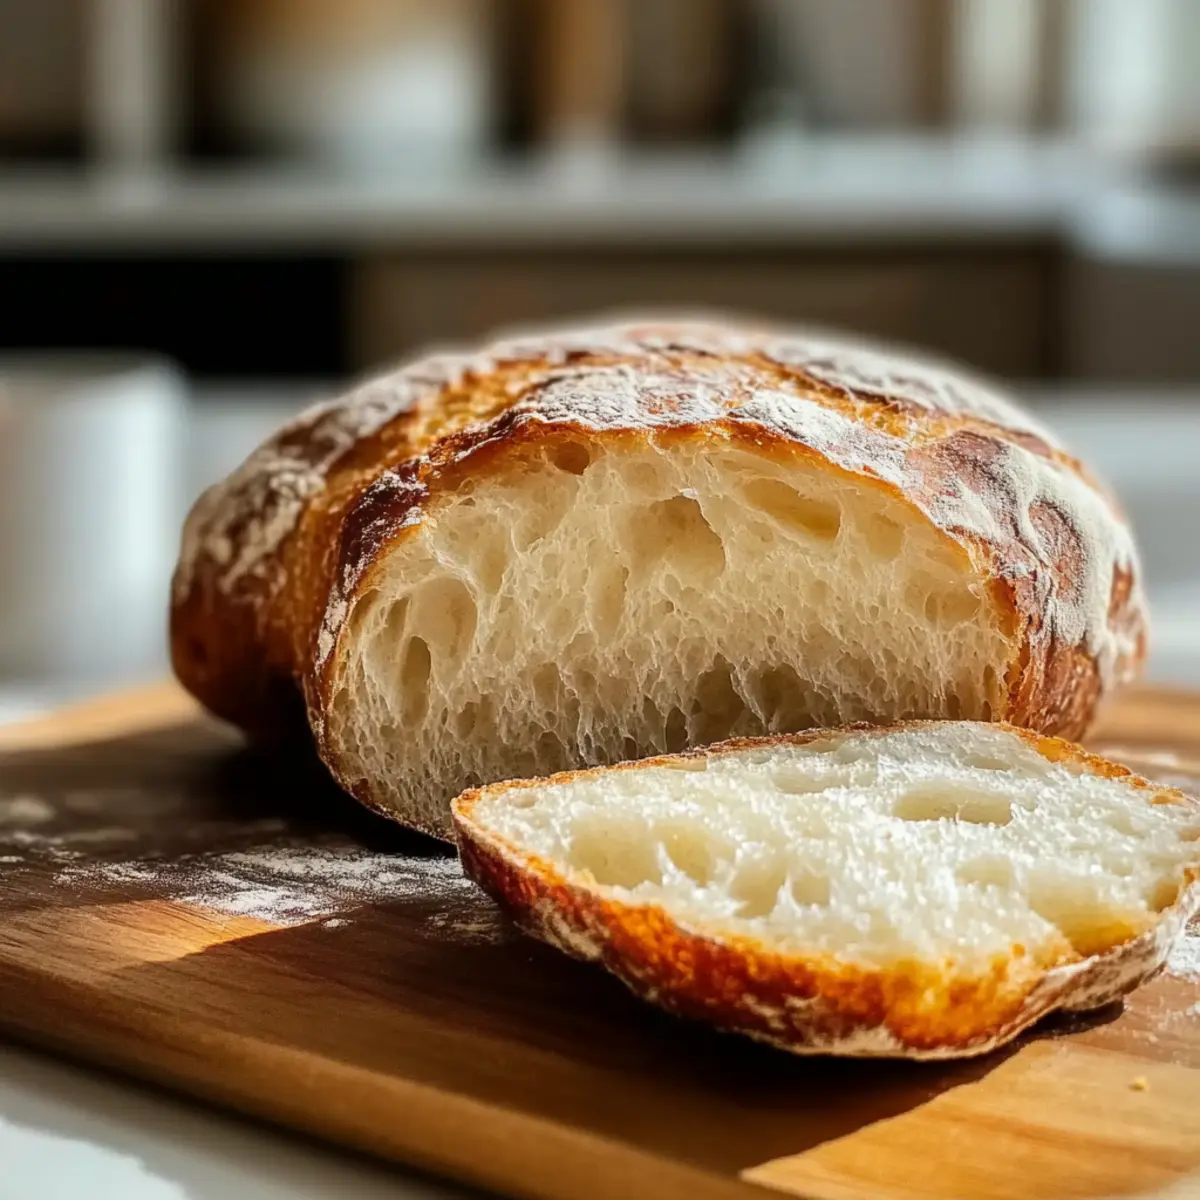
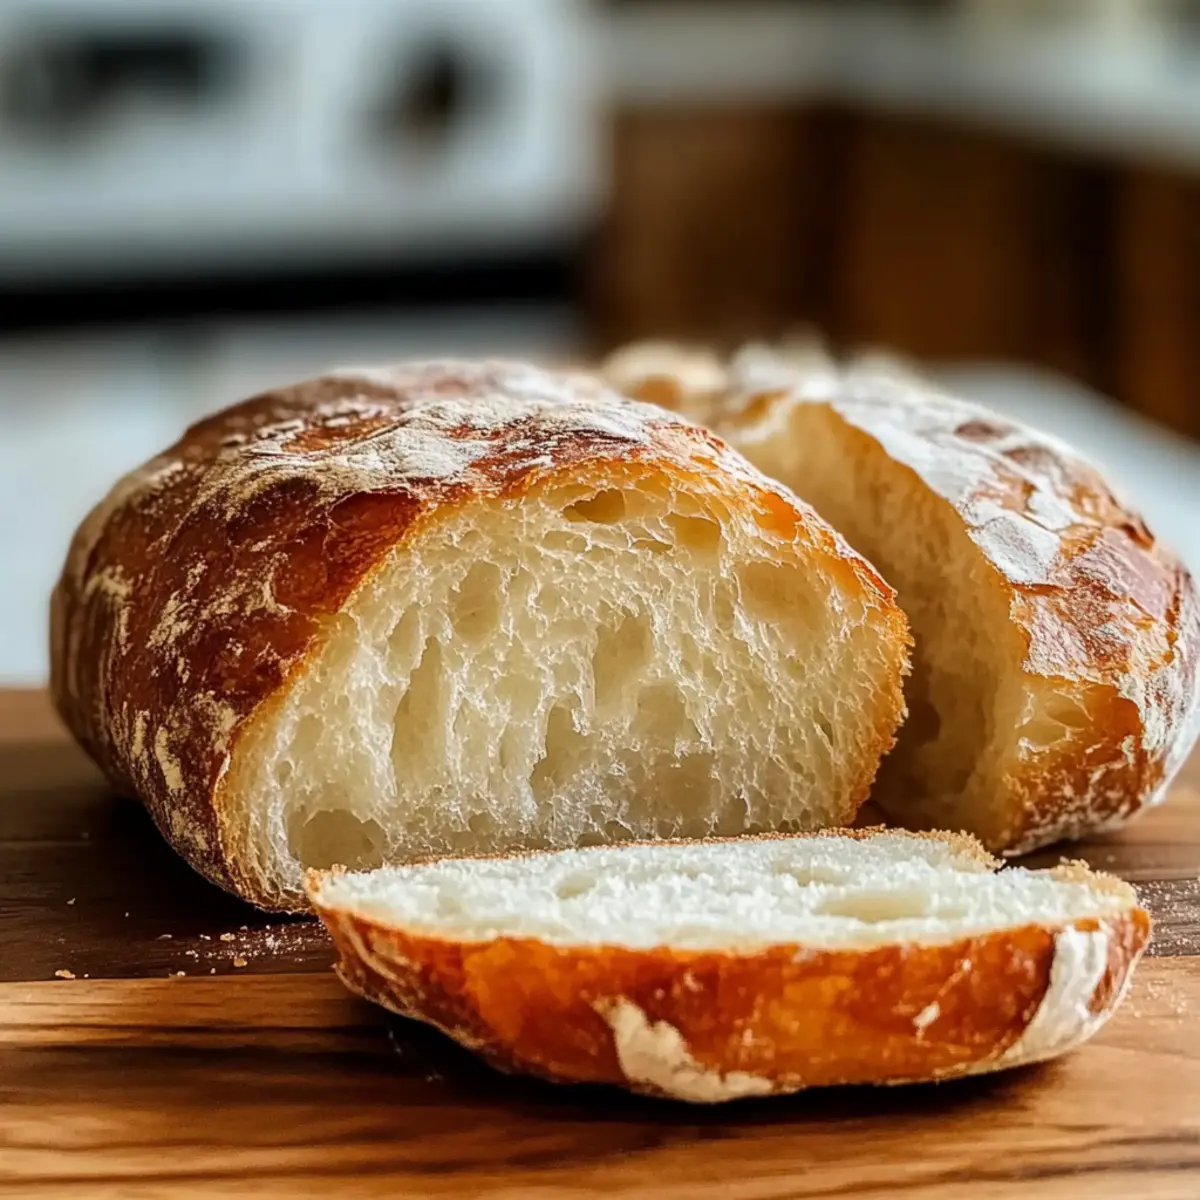
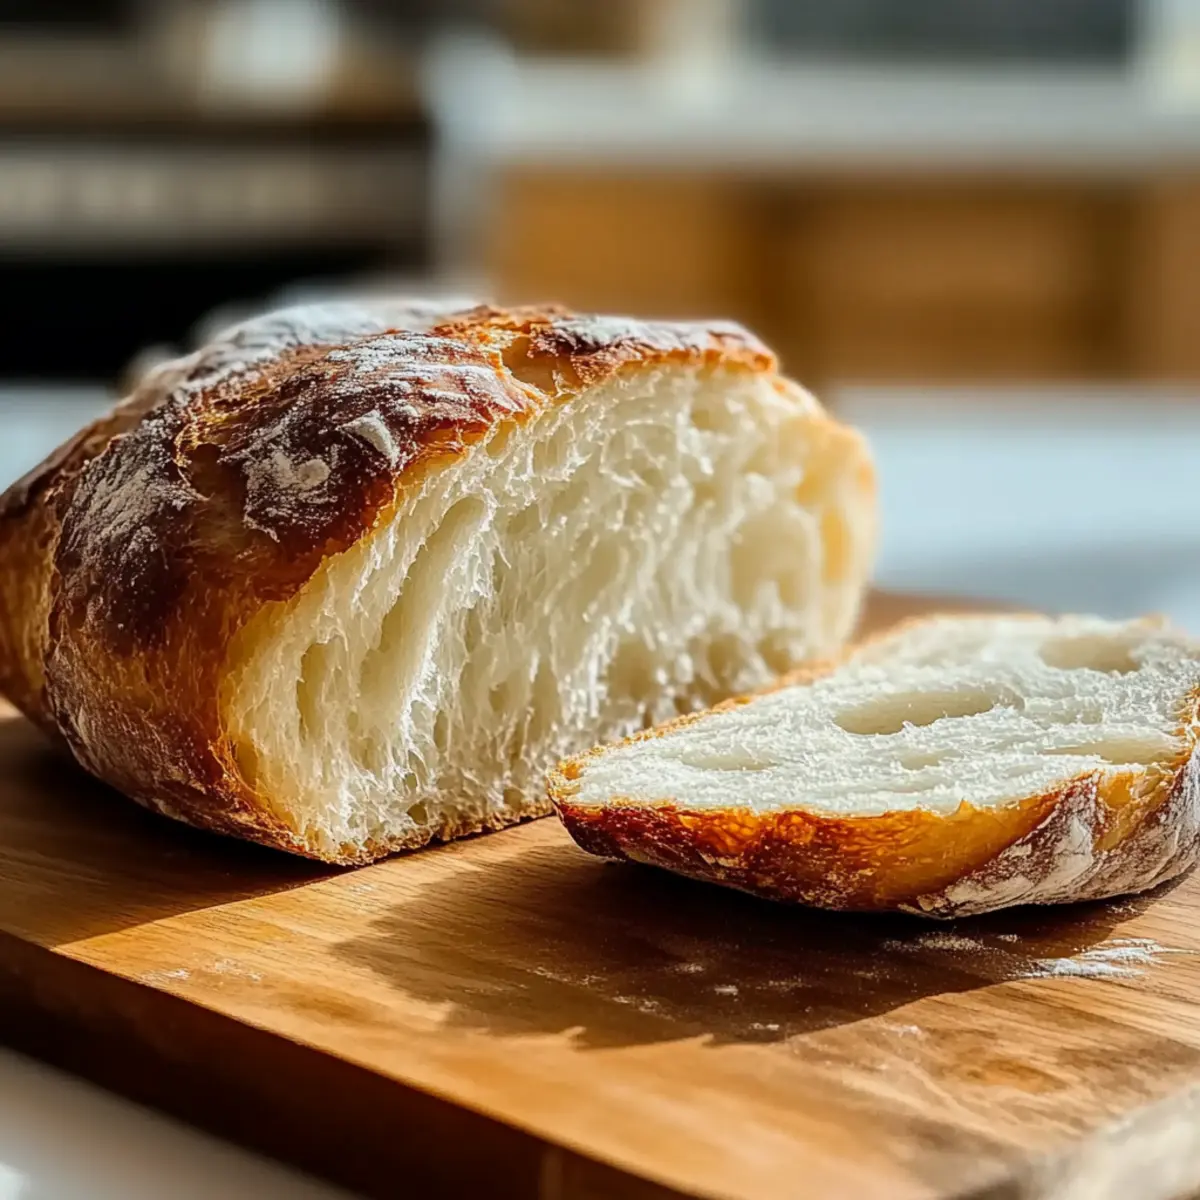
Place the baking sheet into the preheated oven and bake for about 15 minutes. Keep an eye on your bread as it bakes; it’s done when the crust is golden brown and the loaf sounds hollow when tapped on the bottom, indicating it’s fully cooked through.
Step 7: Cool and Serve
Once baked, remove the bread from the oven and let it cool on a wire rack for a few minutes. This cooling time helps set the texture; then slice and serve warm. Enjoy this quick 20-minute homemade bread alongside your favorite soup or slathered with butter for the ultimate comfort!
What to Serve with Quick 20-Minute Homemade Bread
Imagine the comforting ambiance of a family dinner transformed by the delightful aroma of warm, homemade bread on your table.
- Hearty Tomato Basil Soup: The rich flavors of this classic soup pair beautifully with warm bread, making each bite a perfect blend of comfort.
- Creamy Chicken Noodle Soup: This nourishing favorite creates a satisfying meal when dipped into the fluffy bread, enhancing the heartwarming experience.
- Spring Salad with Vinaigrette: A crisp, refreshing salad balances the bread’s warmth, adding a delightful contrast of textures to your meal.
- Savory Herb Butter: A simple compound butter infused with herbs makes for a luxurious spread, elevating each slice of your homemade bread.
- Cheesy Garlic Breadsticks: For a fun twist, cut the loaf into sticks and add cheese and garlic—perfect for dipping or snacking!
- Roasted Vegetables: The caramelized flavors of roasted veggies complement the bread’s fluffiness, creating a wholesome and delicious pairing.
- Chilled White Wine: A crisp wine works wonders with the bread’s comforting essence, making it a delightful addition to any dinner table.
- Honey and Butter: A touch of honey drizzled over warm, buttered bread creates a sweet treat that’ll leave everyone craving more.
- Chocolate Chip Cookies: For dessert, serve freshly baked cookies alongside your bread; the warm chocolate is an irresistible contrast!
Homemade Bread Variations & Substitutions
Feel free to get creative and make this homemade bread truly your own with these fun twists!
-
Cheesy Delight:
Fold in 1 cup of grated cheese before baking for a deliciously savory loaf. Gouda or cheddar adds a fantastic flavor. -
Herb Infusion:
Mix in 2–3 tablespoons of fresh herbs like rosemary or thyme for an aromatic touch. Your kitchen will smell absolutely divine while it bakes! -
Whole Grain Twist:
Substitute half of the all-purpose flour with whole wheat flour. This enhances the nutrition and gives a nuttier flavor. -
Spicy Kick:
Add 1 teaspoon of red pepper flakes to the dough for a subtle kick. It’s a great way to spice things up in your meal! -
Sweet Variations:
Stir in 1/4 cup of honey or maple syrup for a touch of sweetness. Perfect for breakfast or as a delightful side with your favorite jams. -
Seeded Crust:
Top the loaf with sesame or poppy seeds before baking for added texture and a nutty flavor. It gives your bread that artisanal finish! -
Garlic Lover’s Bread:
Blend 2-3 minced garlic cloves into the oil before brushing the dough. This transforms your bread into a yummy garlic delight, perfect for pairing with soups! -
Nutty Addition:
Fold in 1/2 cup of chopped walnuts or pecans for a rich, crunchy texture. This makes it a wonderful addition to a cheese platter.
These variations highlight how simple it is to personalize your bread recipe—just like in my irresistible Gingerbread Brownies Cozy or the delightful Sprinkle Buttermilk Bread. Enjoy experimenting!
Expert Tips for Homemade Bread
-
Water Temperature: Always ensure the water is at 110°F to activate the yeast without killing it—too hot can ruin your loaf!
-
Flavor Boost: Enhance your homemade bread by adding herbs like rosemary or thyme, or stir in grated cheese for a savory surprise.
-
Mixing Technique: Avoid over-mixing the dough; just combine until no dry flour remains. This keeps your bread fluffy and light.
-
Baking Watch: Keep a close eye on the bread while baking. If you notice it browning too quickly, cover it loosely with foil to prevent burning.
-
Resting Time: Allow the dough to rest for 5 minutes before baking; this relaxes the gluten, resulting in a tender, airy bread.
-
Storage Tip: Store leftover homemade bread in an airtight container at room temperature for maximum freshness over the next few days.
How to Store and Freeze Homemade Bread
Room Temperature: Store your homemade bread in an airtight container or wrapped in a clean kitchen towel; it will stay fresh for up to 3 days.
Fridge: While not recommended, if you live in a humid environment, you may refrigerate bread in a paper bag for up to 5 days to prevent mold.
Freezer: For longer storage, slice the bread and freeze in a single layer, then transfer to a freezer-safe bag; it keeps well for up to 2 months.
Reheating: To enjoy your homemade bread, reheat slices in a 350°F (175°C) oven for about 5 minutes to restore warmth and softness.
Make Ahead Options
These Quick 20-Minute Homemade Bread tips are perfect for busy home cooks looking to save time during the week! You can prepare the dough up to 24 hours in advance by following the instructions until shaping the loaf. After shaping, wrap the loaf tightly in plastic wrap and refrigerate it; this will prevent over-proofing and maintain its quality. When ready to bake, simply remove the bread from the refrigerator, let it rest at room temperature for about 10-15 minutes while preheating your oven to 400°F (200°C), and then bake as directed. This method ensures that you can enjoy fresh and warm homemade bread with minimal effort!
Quick 20-Minute Homemade Bread Recipe FAQs
What kind of flour should I use for homemade bread?
All-purpose flour is perfect for this recipe, giving your bread structure and texture. If you crave a chewier crust, feel free to substitute with bread flour.
How should I store the homemade bread?
Store your homemade bread in an airtight container or wrapped in a clean kitchen towel at room temperature. It stays fresh for up to 3 days. If you live in a humid area, you can refrigerate it in a paper bag for up to 5 days to prevent mold.
Can I freeze homemade bread?
Absolutely! For optimal freshness, slice the bread first, then place it in a single layer on a baking sheet in the freezer. Once frozen, transfer to a freezer-safe bag, where it can stay good for up to 2 months. Just remember to reheat slices in a 350°F (175°C) oven for about 5 minutes to bring back that freshly baked taste.
What if my bread doesn’t rise?
If your bread doesn’t rise, it could be due to the yeast being old or the water temperature being too hot. To troubleshoot, always check that your yeast is fresh and ensure your water is around 110°F. If you’re using active dry yeast instead of instant, allow it to activate in warm water with sugar for about 5-10 minutes before combining it with the other ingredients.
Can I add ingredients like cheese or herbs?
Yes, the more the merrier! For added flavor, consider folding in grated cheese or dried herbs like rosemary or thyme into the dough when combining the dry ingredients. This can turn your quick homemade bread into a delightful flavor-packed treat!
Is this recipe suitable for those with dietary restrictions?
For dairy-free options, I often use melted coconut oil instead of butter. Keep in mind some may have gluten allergies; in that case, look for gluten-free flour blends that can work for bread-making, but be sure to follow specific GF recipes for best results.
Homemade Bread Ready in 20 Minutes for Warm Comfort
Ingredients
Equipment
Method
- In a medium mixing bowl, combine warm water, sugar, and instant yeast. Let it sit for about 5 minutes until frothy.
- Add all-purpose flour and salt to the bowl. Drizzle in olive oil or melted butter, mixing until a soft, shaggy dough forms.
- Turn the dough out onto a floured surface and shape it into a rough loaf. Place on a parchment-lined baking sheet.
- Let the loaf rest for 5 minutes while preheating your oven to 400°F.
- Brush the loaf with olive oil or melted butter for flavor and sheen.
- Bake in the preheated oven for about 15 minutes, until golden brown and sounds hollow when tapped.
- Remove from oven, let cool on a wire rack, then slice and serve warm.
Leave a Reply