
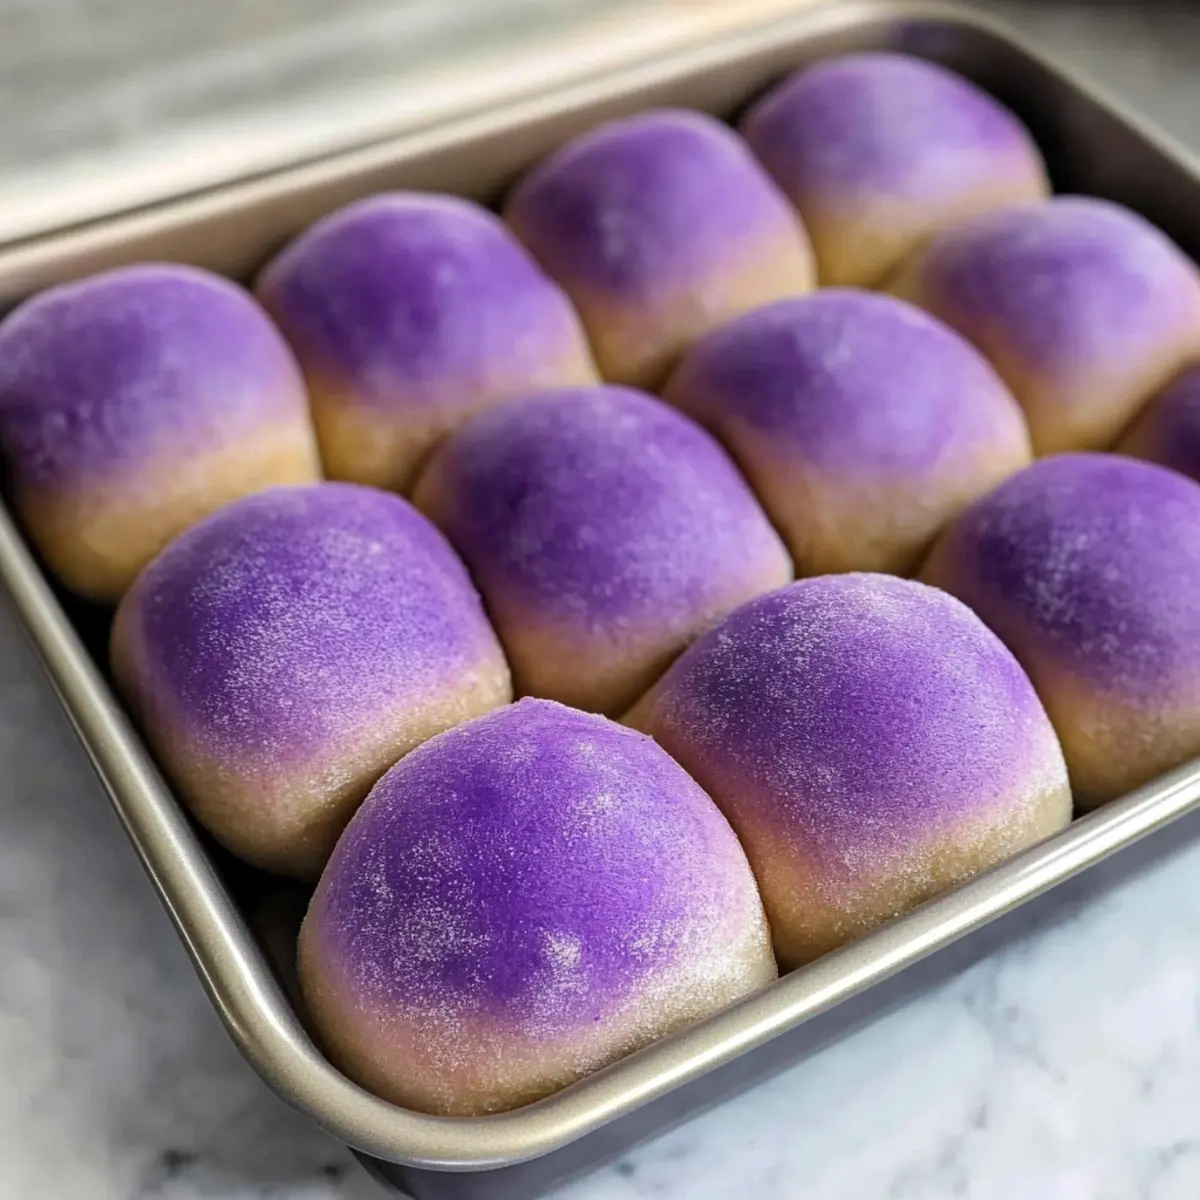
As I pulled the first batch of Hawaiian Taro Rolls from the oven, the rich purple hue captured my eye, instantly transporting me to sunny beaches and luaus. These delightful, slightly sweet rolls are not only a feast for the eyes but also a unique treat with a fluffy texture that makes them irresistible. Using taro, a staple in Hawaiian cuisine, this easy recipe is perfect for both seasoned chefs and those new to baking. With minimal prep time, you can enjoy these rolls warm and fresh, making them an excellent choice for gatherings or cozy family dinners. Whether served alongside grilled meats or paired with your favorite spreads, these taro rolls will elevate any meal. Ready to dive into this vibrant culinary adventure? Let’s whip up a batch of these fluffy purple wonders together!
Why are Hawaiian Taro Rolls a Must-Try?
Uniquely Delicious: These rolls combine the slightly sweet flavor of taro with a fluffy texture, creating a treat that’s unlike any traditional bread.
Vibrant Color: The stunning purple hue adds a pop of color to your table, making them not just food, but also a visual delight.
Simplicity: With an easy-to-follow recipe, even novice bakers can achieve perfect rolls that impress family and friends.
Cultural Twist: Embrace a taste of Hawaiian cuisine in your home, turning every meal into a mini luau.
Versatile Companions: Serve them warm with savory spreads or as a side to BBQ dishes, like these Pie Crescent Rolls for a hearty meal.
Quick Set-Up: Minimal prep time means you’ll be enjoying these rolls fresh from the oven in no time—perfect for unexpected guests!
Hawaiian Taro Rolls Ingredients
• Get ready to create this delightful dish!
For the Dough
- Bread Flour – Provides structure; opt for unbleached for the best texture.
- Sugar – Adds sweetness and aids in browning; you can use brown sugar for a richer flavor.
- Instant Yeast – Ensures the dough rises well; if using active dry yeast, remember to proof it first.
- Salt – Balances the sweetness and strengthens the gluten; don’t skip this essential ingredient!
- Warm Milk – Activates the yeast and adds moisture; substitute almond or soy milk for a dairy-free option.
- Poi – Provides unique starchiness and texture; if unavailable, replace with taro puree for a similar effect.
- Egg – Binds the ingredients and enhances moisture; a flax or chia egg works well for a vegan alternative.
- Butter (softened) – Imparts richness to the rolls; choose plant-based butter for a vegan option.
- Purple Food Coloring – Enhances visual appeal; you can skip this if using naturally purple taro.
These Hawaiian Taro Rolls will not only brighten your table but also captivate your taste buds!
Step-by-Step Instructions for Hawaiian Taro Rolls
Step 1: Prepare the Dough
In a large mixing bowl, combine 4 cups of bread flour, ½ cup of sugar, and 2 tablespoons of instant yeast. In the bowl of a stand mixer, whisk together 1 cup of warm milk, 1 cup of poi, 1 egg, and ½ cup of softened butter. Add a few drops of purple food coloring if desired. Mix these ingredients until everything is just combined, ensuring a smooth and cohesive mixture.
Step 2: Knead the Dough
Attach a dough hook to your stand mixer and gradually add the flour mixture into the wet ingredients. Knead on medium speed for about 10 minutes, until the dough becomes smooth and elastic. You want it to be slightly tacky but manageable. If necessary, dust with additional flour in small increments to achieve the right consistency without making it dry.
Step 3: Shape the Rolls
After kneading, turn the dough onto a lightly floured surface and divide it into 15 equal pieces. Gently shape each piece into a smooth ball, ensuring they are well-formed. Place the shaped rolls into a greased 9×13 baking dish, allowing for some space between each roll as they will expand. This will ensure the rolls bake evenly and are easy to separate after cooking.
Step 4: Allow to Rise
Cover the baking dish with a clean kitchen towel. Place it in a warm, draft-free spot to rise until the dough has doubled in size. This should take about 1 to 2 hours, depending on room temperature. You’ll know they are ready when they look puffy and have filled the dish nicely — like beautiful clouds of fluffy Hawaiian taro rolls!
Step 5: Preheat Oven and Bake
Once your rolls have risen, preheat your oven to 325°F (163°C). While the oven heats, you can gently brush the tops of the rolls with a whisked egg for a shiny finish. Bake the rolls in the preheated oven for 20-25 minutes. They are done when the tops are lightly browned and they emit a lovely sweet aroma that fills your kitchen with warmth.
Step 6: Cool and Enjoy
After baking, remove the Hawaiian Taro Rolls from the oven and let them cool slightly in the dish. Allow them to sit for about 5-10 minutes before serving warm. These rolls are the perfect accompaniment to any meal, melting in your mouth with their fluffy texture and slightly sweet flavor. Enjoy them fresh with butter or your choice of spread!
Expert Tips for Hawaiian Taro Rolls
-
Ingredient Accuracy: Measure your ingredients carefully. Too much flour can make your rolls dense; use a kitchen scale for the best results.
-
Dough Temperature: Ensure your milk is warm but not hot—around 110°F (43°C) is ideal. Too hot can kill the yeast, resulting in flat rolls.
-
Rising Environment: Place the dough in a warm, draft-free area to rise. If it’s too cool, the dough may not rise adequately, affecting the fluffiness.
-
Prevent Overbaking: Keep an eye on the rolls towards the end of baking. Taro rolls are done when golden brown and soft to the touch; overbaking will dry them out.
-
Storage Tips: If you have leftovers, store them in an airtight container for up to 4-5 days. For long-term storage, freeze the rolls, ensuring they’re well-wrapped to maintain quality.
-
Serving Warm: These Hawaiian taro rolls taste best fresh out of the oven. Serve them warm with butter to enhance their delightful slightly sweet flavor.
Make Ahead Options
These Hawaiian Taro Rolls are perfect for meal prep enthusiasts looking to save time on busy weeknights! You can prepare the dough up to 24 hours in advance by following the shaping step, and then cover the baking dish well with plastic wrap and refrigerate it. When you’re ready to bake, simply take them out, let them rise for about 1-2 hours at room temperature until puffy, and preheat your oven to 325°F (163°C). Brush the tops with an egg wash for that perfect golden finish, then bake for 20-25 minutes. This way, you’ll enjoy soft, fluffy Hawaiian Taro Rolls just as delicious as when made fresh!
Hawaiian Taro Rolls Variations & Substitutions
Feel free to get creative and personalize these taro rolls with your own unique twist!
-
Coconut Milk: Substitute regular milk with coconut milk for an extra tropical flavor.
-
Herb Infusion: Add dried herbs like rosemary or thyme into the dough for a savory touch. This twist enhances flavor and aroma, making each bite a delightful surprise.
-
Spiced Options: Mix in spices like cinnamon or nutmeg for a warm flavor boost that adds depth to the sweetness of taro.
-
Dairy-Free: For a completely dairy-free roll, use almond or soy milk, and incorporate plant-based butter instead of traditional butter.
-
Vegan Substitute: Use a flax or chia egg in place of the regular egg for a vegan-friendly version without compromising texture.
-
Different Color: Experiment with other natural food colorings or skip coloring altogether. This will give a unique look, especially if you use naturally colored taro!
-
Additional Sweetness: Drizzle honey or maple syrup over the warm rolls before serving for a decadent addition that pairs perfectly with their slight sweetness.
-
Flavor Boost: Incorporate some finely grated citrus zest, like lemon or orange, into the dough for a refreshing brightness that complements the rolls beautifully.
For even more inspired ideas, try serving these Hawaiian Taro Rolls warm alongside your favorite spreads or juicy meats—these flavorful Air Fryer Rolls make excellent partners too!
What to Serve with Hawaiian Taro Rolls?
These fluffy, sweet rolls invite delectable pairings that transform any meal into a vibrant feast.
- BBQ Chicken: The slight sweetness of the rolls complements smoky and tangy flavors beautifully, creating a perfect harmony on your plate.
- Grilled Fish Tacos: These rolls add a fluffy texture that balances the crispy elements of tacos while enhancing the tropical vibe.
- Savory Spreads: Serve them with garlic herb butter or a tangy cream cheese spread for a delightful contrast to their sweetness.
- Hawaiian Kalua Pork: The rich, savory flavor of kalua pork works wonderfully with the rolls, providing a satisfying and flavorful experience.
- Fresh Salad: A light, citrusy salad with avocado and mixed greens refreshes your palate between bites, enhancing the overall dining experience.
- Pineapple Salsa: The fruity zing of pineapple salsa adds a zesty note that perfectly balances the rolls’ mild sweetness.
- Sparkling Water: A glass of chilled sparkling water with lemon adds a refreshing touch and cleanses the palate beautifully.
- Tropical Fruit Salad: Delight your senses with a colorful fruit medley that echoes the rolls’ subtle sweetness and vibrant hues.
- Coconut Milk Pudding: End your meal on a sweet note with a creamy coconut pudding that echoes the tropical flair of taro rolls.
How to Store and Freeze Hawaiian Taro Rolls
Room Temperature: Allow rolls to cool completely, then store in an airtight container for up to 4-5 days to maintain freshness and softness.
Fridge: If you prefer longer storage, place the rolls in the refrigerator for up to a week, but expect a slight change in texture. Reheat before serving for best results.
Freezer: For extended storage, freeze the rolls in a single layer on a baking sheet, then transfer to an airtight container or freezer bag. They can be safely frozen for up to 3 months.
Reheating: To enjoy the Hawaiian taro rolls, reheat in a preheated oven at 350°F (175°C) for about 10-15 minutes, or until warmed through. Adding a bit of butter while reheating can revive their slightly sweet flavor beautifully.
Hawaiian Taro Rolls Recipe FAQs
How do I choose ripe taro for the recipe?
Absolutely! When selecting taro, look for smooth, firm roots with minimal dark spots or blemishes. The skin should be intact without any cracks. Avoid any that feel soft or have dark spots all over, as these can indicate spoilage. If you can, smell the taro; a fresh aroma is a good sign of quality.
How should I store leftover Hawaiian taro rolls?
Very! Once the rolls have cooled completely, place them in an airtight container. They can be stored at room temperature for up to 4-5 days. If you plan to keep them longer, consider refrigerating them where they can last about a week—but note that the texture may change slightly.
Can I freeze Hawaiian taro rolls? How?
Absolutely! To freeze, first let the rolls cool completely. Then, lay them out in a single layer on a baking sheet and put them in the freezer until firm—this prevents them from sticking together. Once frozen, transfer them to an airtight container or a freezer bag. They can be stored for up to 3 months. For reheating, simply bake them at 350°F (175°C) for about 10-15 minutes straight from the freezer.
What happens if my dough doesn’t rise?
If your dough doesn’t rise well, check your yeast—make sure it’s fresh and active. If using instant yeast, remember that it should be combined with warm liquid (about 110°F or 43°C is ideal) to activate properly. Additionally, ensure that the dough is placed in a warm, draft-free environment to encourage rising. If it’s too cool, the rising process can be slow or ineffective.
Are Hawaiian taro rolls safe for people with allergies?
Very! These rolls can be modified to accommodate various dietary restrictions. For a gluten-free version, use a gluten-free bread flour blend. For vegan options, substitute the regular milk with almond or soy milk and use flaxseed or chia seeds mixed with water as an egg replacement. Always double-check for cross-contamination if needed.
Fluffy Hawaiian Taro Rolls That Steal the Show
Ingredients
Equipment
Method
- In a large mixing bowl, combine flour, sugar, and instant yeast. In another bowl, whisk together warm milk, poi, egg, and softened butter. Mix until just combined.
- Attach a dough hook and gradually add the flour mixture to the wet ingredients. Knead on medium speed for about 10 minutes until smooth and elastic.
- Turn dough out onto a floured surface and divide into 15 equal pieces. Shape each into a ball and place in a greased baking dish.
- Cover with a towel and place in a warm area to rise until doubled in size, about 1 to 2 hours.
- Preheat oven to 325°F (163°C). Brush the tops with whisked egg and bake for 20-25 minutes until lightly browned.
- Remove from oven and let cool slightly in the dish before serving.
Leave a Reply