
As I stood in my kitchen, colorful memories of summer fairs and carnival nights flooded back—the twirling lights, laughter, and the sweet scent of cotton candy wafting through the air. That enchanting nostalgia inspired my latest creation: the Cotton Candy Cookies Recipe. Delicately infused with pastel pink and blue hues, these chewy cookies deliver a delightful sweetness reminiscent of childhood treats. Not only are they a fun twist that promises to brighten up any gathering, but they also cater to various diets, offering gluten-free and dairy-free options. Whether for a playful baking adventure or an eye-catching dessert at your next party, these cookies are sure to spark joy and whimsy. Curious to see how you can whip up these delightful treats? Let’s dive in!
Why Are Cotton Candy Cookies So Fun?
Nostalgic Flavor: These cookies pack a punch of sweet, fluffy cotton candy flavor, transporting you back to childhood fairs with every bite.
Vibrant Visuals: The pink and blue swirls not only make them Instagram-worthy but also ignite excitement at any gathering.
Easy Customization: Whether you’re gluten-free or dairy-free, I’ve got alternatives for you, ensuring everyone can indulge.
Quick Prep: In just about 30 minutes, you can transform your kitchen into a delightful bakery without the hassle.
Crowd-Pleasing Treat: Perfect for parties or bake sales, these cookies are sure to bring smiles and joy to your guests, making them a memorable addition to any event.
Cotton Candy Cookies Ingredients
• Dive into the sweet magic of Cotton Candy Cookies with these essential ingredients!
For the Dough
- All-Purpose Flour – Provides essential structure; can be swapped with a gluten-free flour blend for a gluten-free version.
- Granulated Sugar – Adds delightful sweetness and promotes a chewy texture.
- Baking Powder – Acts as a leavening agent, giving your cookies that perfect rise.
- Baking Soda – Works alongside the acidic buttermilk for an optimized lift.
- Salt – Enhances the overall flavor, balancing out sweetness.
- Unsalted Butter (Softened) – Imparts richness and creates a tender cookie crumb.
- Buttermilk – Adds moisture and activates the baking soda; substitute with plant-based milk mixed with lemon juice for a dairy-free version.
- Large Egg – Binds all ingredients together, adding moisture to the dough.
- Vanilla Extract – Envelops the cookies in warm, sweet flavor.
For the Coloring
- Gel Food Coloring (Pink and Blue) – Provides stunning pastel hues, ensuring your cookies are visually appealing and fun.
- Cotton Candy Flavoring (Optional) – Enhances the nostalgic flavor, making every bite that much sweeter.
Prepare these ingredients and let’s create some magical memories with our delicious Cotton Candy Cookies!
Step‑by‑Step Instructions for Cotton Candy Cookies Recipe
Step 1: Preheat and Prepare
Begin by preheating your oven to 350°F (175°C). While the oven is heating, line a baking sheet with parchment paper, ensuring a non-stick surface for your cotton candy cookies. This preparation step will set the stage for baking those delightful, chewy cookies while keeping cleanup simple.
Step 2: Mix Dry Ingredients
In a medium bowl, whisk together 2 cups of all-purpose flour, 1 teaspoon of baking powder, 1/2 teaspoon of baking soda, and a pinch of salt. The goal is to combine these dry ingredients thoroughly so that your cotton candy cookies rise evenly during baking. Set this bowl aside as you tackle the next step.
Step 3: Cream Butter and Sugar
In a large mixing bowl, use an electric mixer to beat together 1/2 cup of softened unsalted butter and 1 cup of granulated sugar until the mixture is light and fluffy, which should take about 2-3 minutes. This step is vital for achieving the chewy texture that cotton candy cookies are known for, so don’t rush it!
Step 4: Incorporate Wet Ingredients
Next, add in one large egg, 1 teaspoon of vanilla extract, and 1/2 cup of buttermilk to the butter-sugar mixture. Mix until it’s smooth and well combined. This creamy blending will give your cotton candy cookies added moisture and flavor, making them extra delightful.
Step 5: Combine Wet and Dry Mixtures
Slowly integrate the dry ingredients into the wet mixture, mixing on low speed just until combined. Avoid overmixing, as this could affect the chewiness of your cotton candy cookies. You’ll know it’s ready when no flour streaks remain and the dough is slightly sticky.
Step 6: Divide and Color the Dough
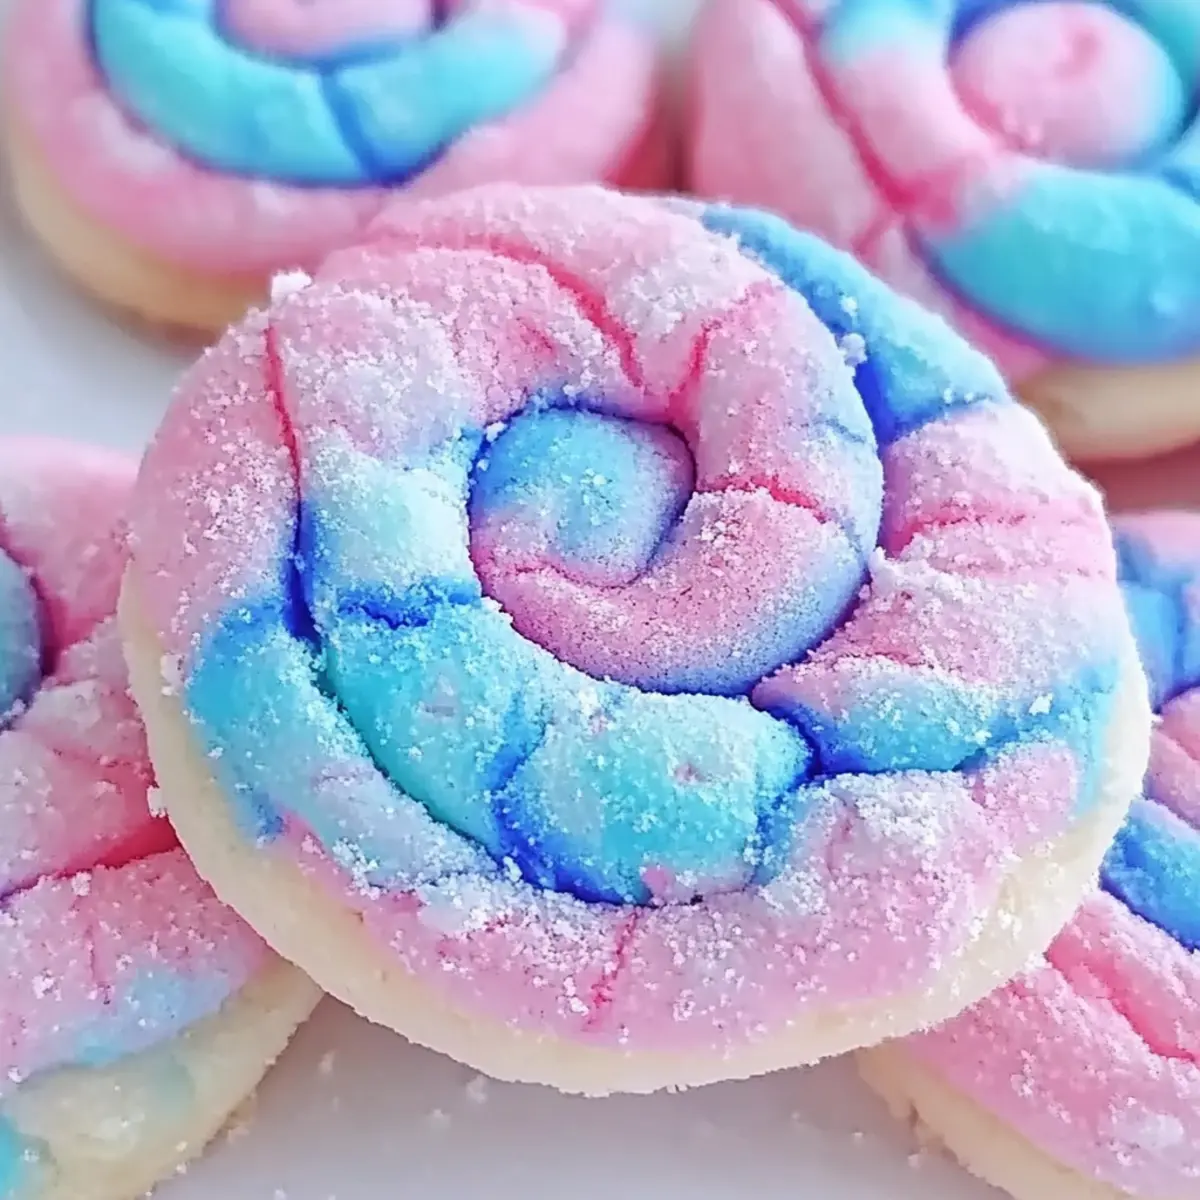
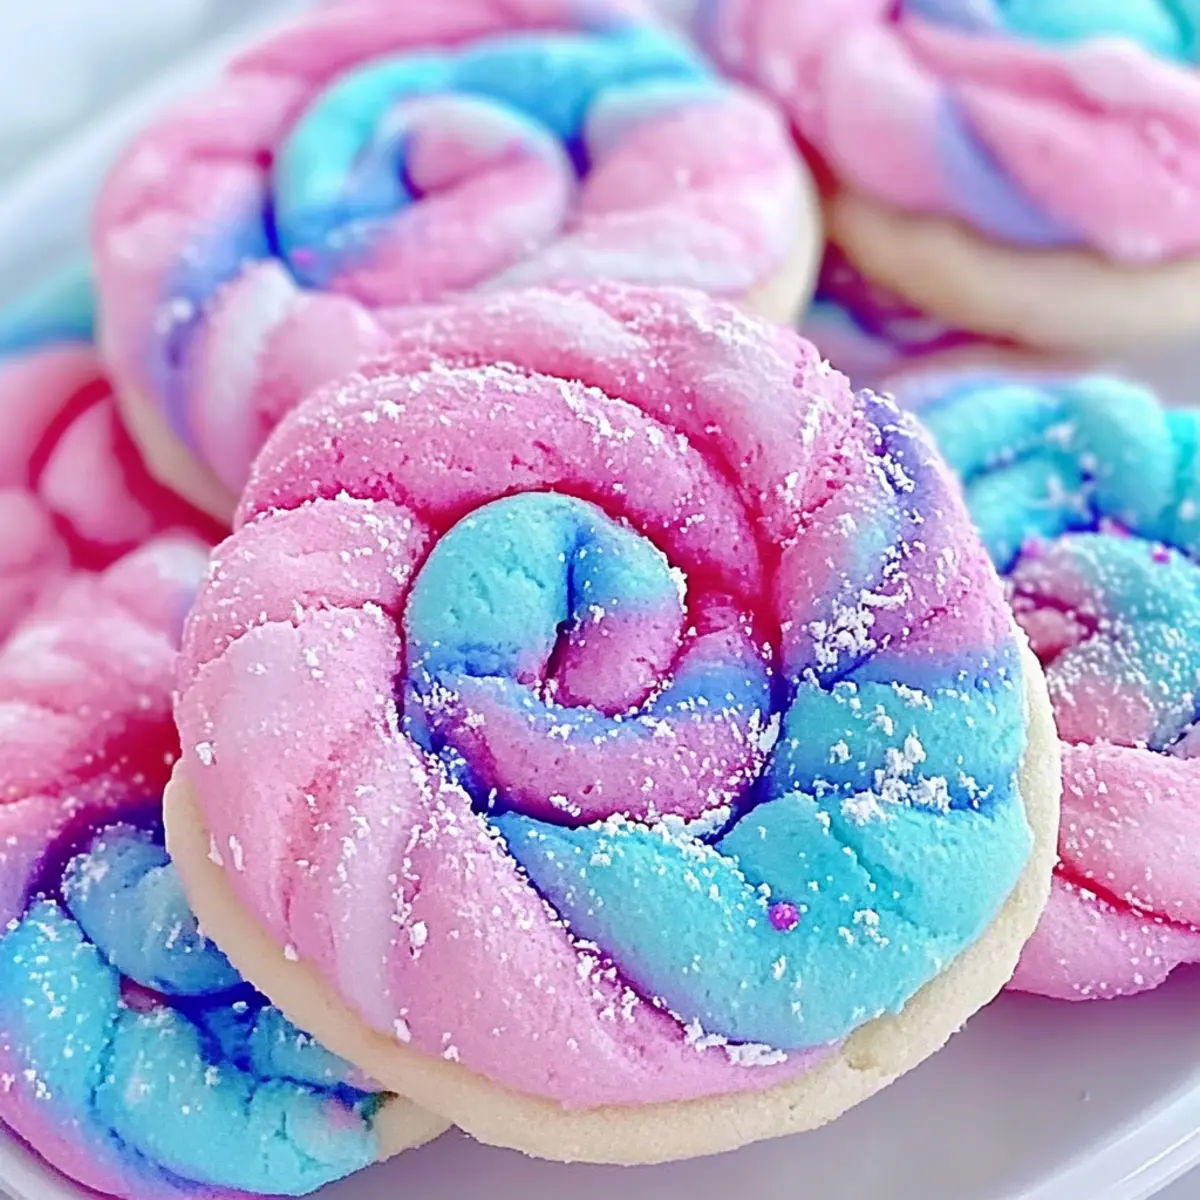
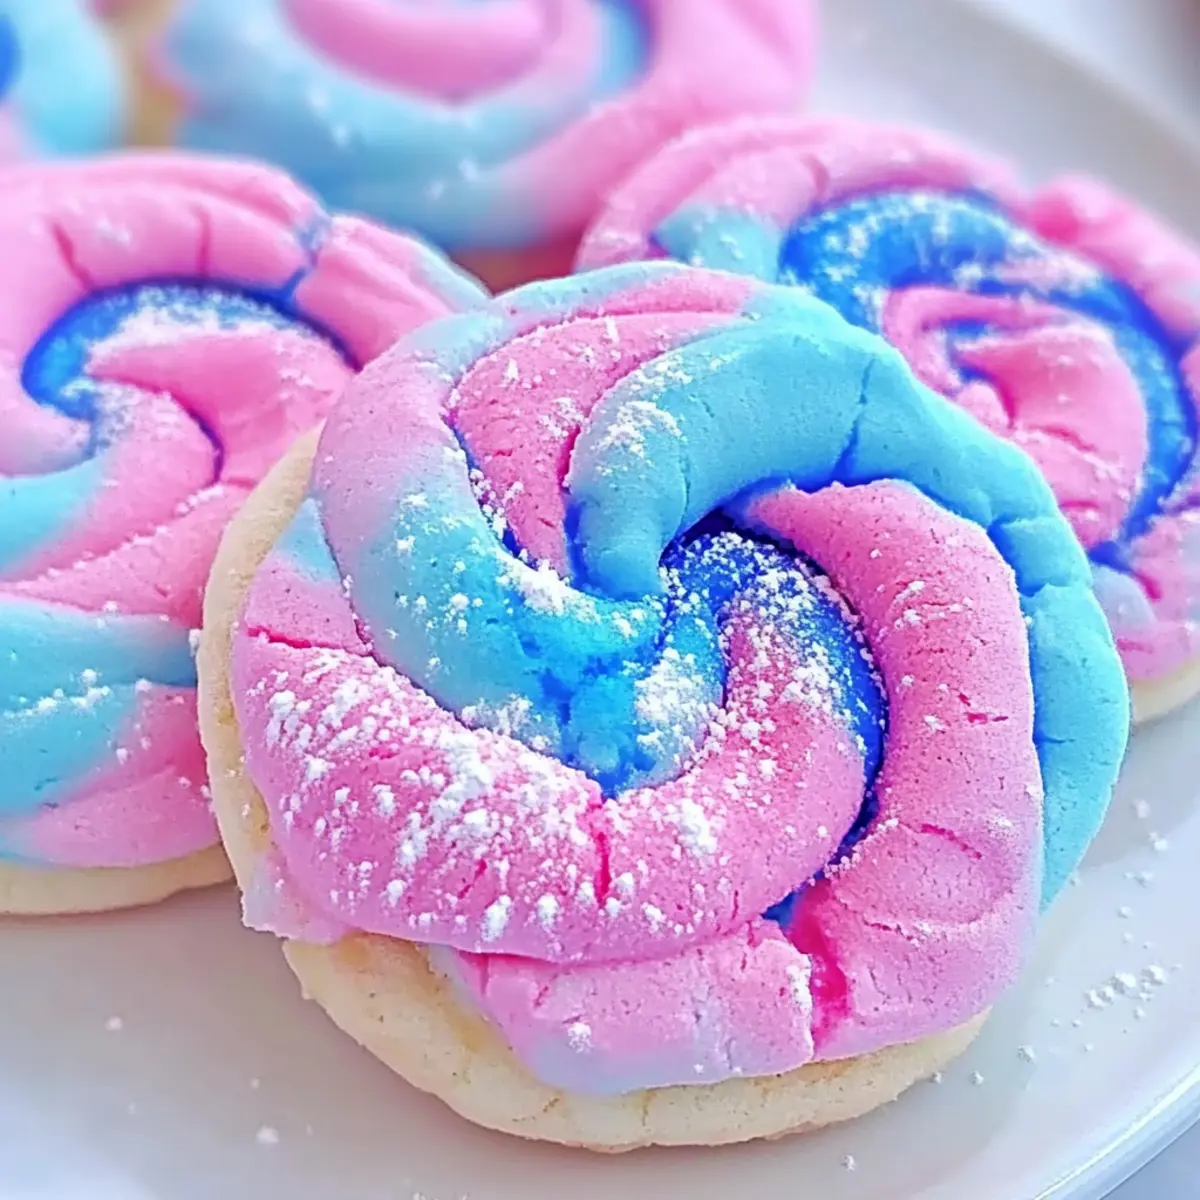
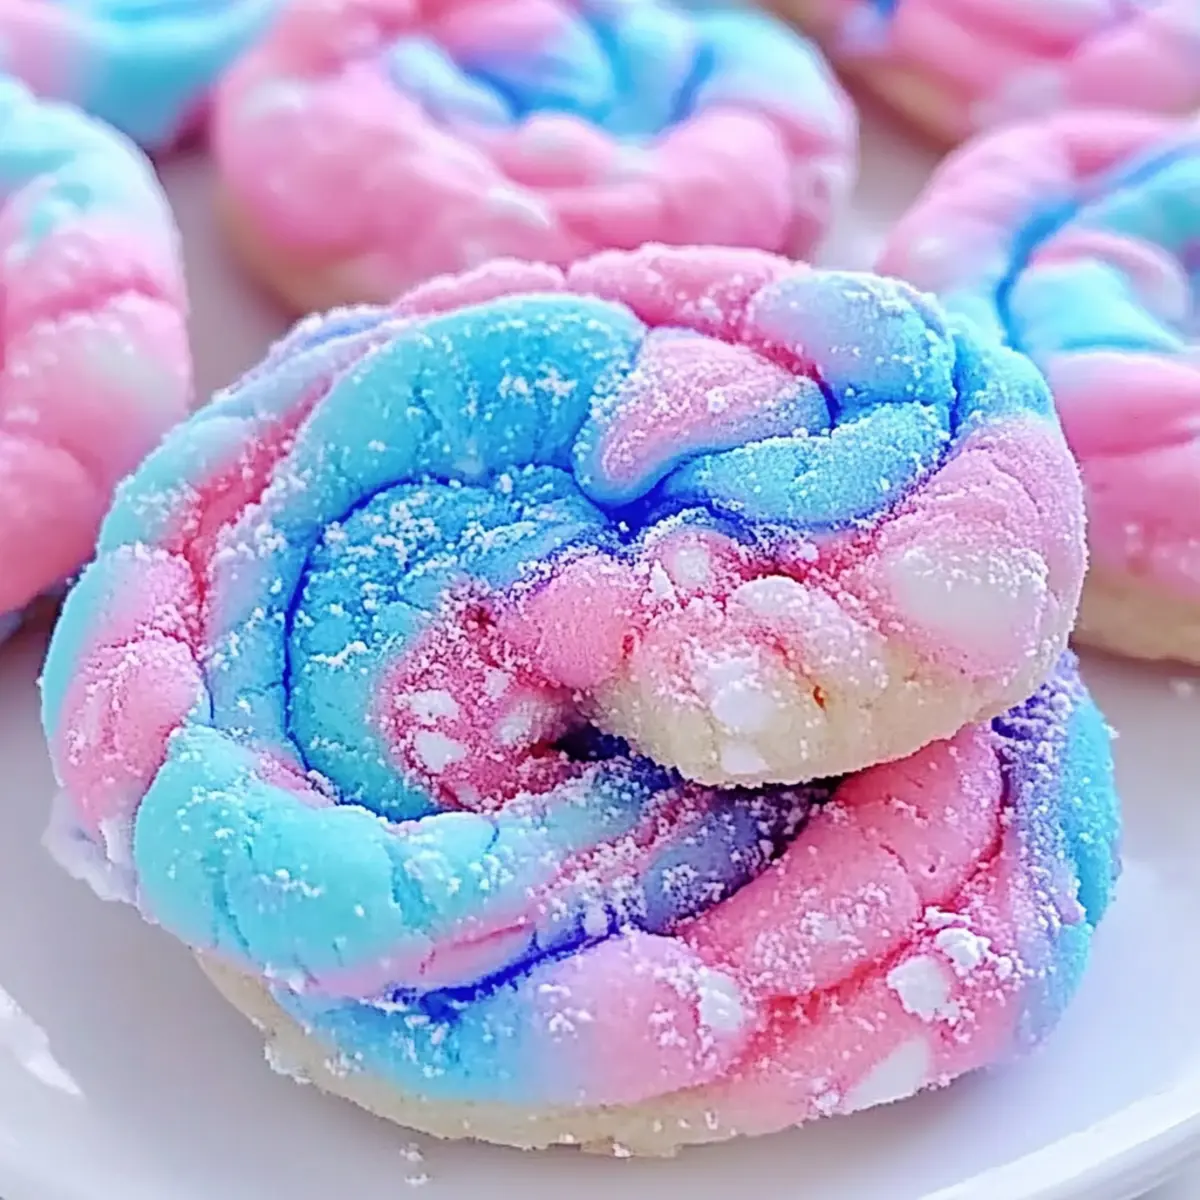
Once your dough is mixed, divide it in half. Add a few drops of pink gel food coloring to one half and blue gel food coloring to the other, mixing until the colors are vibrant and evenly distributed. This step adds that fun, carnival flair to your cotton candy cookies, making them visually enchanting.
Step 7: Shape the Cookies
Take small amounts of each colored dough and roll them into balls, about 1 inch in size. For a whimsical swirled effect, combine a pink and blue dough ball together. This method will create those striking cotton candy swirls that will make the cookies truly special as they bake.
Step 8: Arrange on Baking Sheet
Place the cookie balls on the prepared baking sheet, spacing them about 2 inches apart to allow for spreading. If desired, sprinkle some edible glitter or sprinkles on top for an extra festive touch. With this arrangement, you’ll set your cookies up for perfect baking sessions.
Step 9: Bake to Perfection
Bake your cotton candy cookies in the preheated oven for 10-12 minutes or until the edges are lightly golden. Keep an eye on them to ensure they achieve that perfect chewy texture without overbaking. The delightful aroma will fill your kitchen as they turn into beautiful treats!
Step 10: Cool and Store
After baking, let the cookies cool on the baking sheet for about 5 minutes before transferring them to a wire rack to cool completely. This initial cooling warms the cookies to a tender finish that enhances their chewy texture. Store the cooled cookies in an airtight container at room temperature for up to a week.
Expert Tips for Cotton Candy Cookies
- Avoid Overmixing: Mixing too much after adding dry ingredients can lead to tough cookies. Aim for a light touch to keep that chewy texture!
- Use Gel Coloring: Select gel food coloring for vibrant hues without impacting the dough’s consistency. Liquid colorings can alter texture.
- Watch Baking Time: Keep a close eye during baking; overbaking can turn these delightful treats into hard cookies, losing their chewy charm.
- Customize for Everyone: Don’t hesitate to play with gluten-free or dairy-free options! Using appropriate substitutes ensures everyone can enjoy your cotton candy cookies.
- Cool Properly: Allow cookies to cool to enhance their chewiness. Moving them too soon can break their delicate structure.
How to Store and Freeze Cotton Candy Cookies
Room Temperature: Store cookies in an airtight container at room temperature for up to one week. This keeps them fresh and chewy, ready for indulgence anytime!
Fridge: If you prefer, cookies can be stored in the fridge for up to 10 days. Just ensure they’re sealed well to avoid absorbing other odors.
Freezer: For longer storage, freeze cookies for up to 3 months. Wrap them in plastic wrap and place in an airtight container before freezing.
Reheating: Thaw cookies at room temperature or microwave for a few seconds before serving to restore their chewy texture. Enjoy your delightful Cotton Candy Cookies!
Make Ahead Options
These Cotton Candy Cookies are fantastic for meal prep, allowing you to indulge in whimsical flavors without the last-minute rush! You can prepare the cookie dough up to 24 hours in advance—simply mix the ingredients as directed, and then divide and color the dough. Wrap it tightly in plastic wrap and refrigerate to keep it fresh. When you’re ready to bake, allow the dough to soften slightly at room temperature for about 10 minutes before rolling and baking. This way, you’ll still achieve that delightful chewy texture without compromising on flavor. Just imagine serving fresh, warm cotton candy cookies with minimal effort after a busy day or during a fun get-together!
What to Serve with Cotton Candy Cookies
Elevate your cheerful cookie experience with delightful pairings that make every bite an adventure!
- Refreshing Milkshake: A classic, creamy milkshake complements the sweet flavors of the cookies, balancing their sugary bliss with a cool, velvety texture.
- Fruity Sorbet: The bright and tangy notes of a fruity sorbet create a refreshing contrast that cleanses the palate between bites of these sugary treats.
- Colorful Fruit Salad: A medley of vibrant seasonal fruits can add freshness and a juicy crunch, making it a light and balanced addition to your dessert table.
- Mini Cupcakes: Host a whimsical dessert spread with colorful mini cupcakes. Their moist, tender crumb and frosting will pair perfectly with chewy cotton candy cookies.
- Sparkling Lemonade: The zesty, bubbly sensation of sparkling lemonade brings a fizzy twist that enhances the fun atmosphere during parties or celebrations.
- Sweet Hot Chocolate: On cozy days, indulge in sweet hot chocolate to complement these cookies. The richness of chocolate pairs beautifully with the fluffy cotton candy flavor, creating a blissful treat.
Whether it’s for a party or a simple dessert at home, these pairings promise to enhance your Cotton Candy Cookies experience!
Cotton Candy Cookies Recipe Variations
Feel free to let your creativity soar as you customize these delightful cookies with these fun suggestions!
- Dairy-Free: Substitute buttermilk with plant-based milk mixed with lemon juice or vinegar for a scrumptious dairy-free delight.
- Gluten-Free: Swap all-purpose flour for a gluten-free flour blend to cater to gluten-sensitive friends and family.
- Add Sprinkles: Fold in colorful sprinkles or edible glitter before baking for a festive crunch that matches the carnival vibe.
- Nutty Flavor: Incorporate chopped nuts like pecans or walnuts into the dough for added texture and a delightful flavor twist.
- Chocolate Drizzle: Finish the baked cookies with a drizzle of melted chocolate for a rich contrast to the sweet cotton candy taste.
- Flavored Sugar: Use flavored sugar, like orange or raspberry, instead of granulated sugar to add a unique twist to your cookies.
- Mini Cookies: Shape smaller dough balls for bite-sized treats. Bake for a shorter time to ensure they remain chewy and delightful.
- Experiment with Extracts: Try almond or coconut extract instead of vanilla for a new flavor profile that perfectly complements the cotton candy essence.
Whether you’re crafting these for a festive celebration or a simple afternoon treat, each variation is bound to spark joy! For additional sweet delights, consider exploring Cannoli Cookies Ricotta or try your hand at Twix Style Cookies for a fun baking adventure.
Cotton Candy Cookies Recipe FAQs
What is the best way to select the right ingredients for cotton candy cookies?
Absolutely! For the best results, choose soft, slightly warm unsalted butter for easy mixing, and ensure your baking powder and soda are fresh for optimal rising. When selecting buttermilk, check for a slightly tangy smell; if you’re substituting, use 1/4 cup of plant-based milk mixed with 1 teaspoon of lemon juice or vinegar for the dairy-free version.
How do I store leftover cotton candy cookies?
Very! After cooling, store your cookies in an airtight container at room temperature for up to one week. If you prefer them a little colder, you can refrigerate them for up to 10 days, but make sure they’re well-sealed to avoid any funky flavors from the fridge.
Can I freeze cotton candy cookies for later enjoyment?
Absolutely! To freeze, wrap each cooled cookie tightly in plastic wrap and place them in an airtight container, where they can stay for up to 3 months. When you’re ready to enjoy, thaw them at room temperature for a few hours, or warm them in the microwave for about 10 seconds to regain their delightful chew.
What should I do if my cookie dough is too sticky?
No worries! If you find your dough is too sticky, simply add a little more flour, one tablespoon at a time, mixing gently until the dough reaches a workable consistency. Just remember, don’t overmix after adding flour, as this can toughen your cookies—keep it light and fluffy!
Are these cookies safe for people with dietary restrictions?
Yes! This cotton candy cookies recipe can easily cater to different diets. For a gluten-free version, use a gluten-free flour blend in place of all-purpose flour. And if you’re avoiding dairy, substitute regular buttermilk with plant-based milk mixed with lemon juice or vinegar. Always check flavorings and colors for hidden allergens, especially for those with sensitivity to gluten or dairy.
How do I make the colors more vibrant without changing the texture of my cookies?
Great question! I recommend using gel food coloring rather than liquid, as gel provides intense color without altering the dough’s consistency. Start with a tiny drop and mix—add more gradually until you achieve your desired vibrant pastel pink and blue!
Chewy Cotton Candy Cookies Recipe for Sweet Nostalgic Joy
Ingredients
Equipment
Method
- Preheat your oven to 350°F (175°C) and line a baking sheet with parchment paper.
- In a medium bowl, whisk together the flour, baking powder, baking soda, and salt.
- In a large mixing bowl, beat together the butter and sugar until light and fluffy, about 2-3 minutes.
- Add the egg, vanilla extract, and buttermilk to the butter-sugar mixture and mix until smooth.
- Slowly integrate the dry ingredients into the wet mixture until just combined.
- Divide the dough in half and add pink gel food coloring to one half and blue to the other.
- Roll the colored dough into 1-inch balls, combining them for a swirled effect.
- Place the cookie balls on the baking sheet, spacing them 2 inches apart.
- Bake for 10-12 minutes or until the edges are lightly golden.
- Cool the cookies on the baking sheet for 5 minutes before transferring to a wire rack.
Leave a Reply