
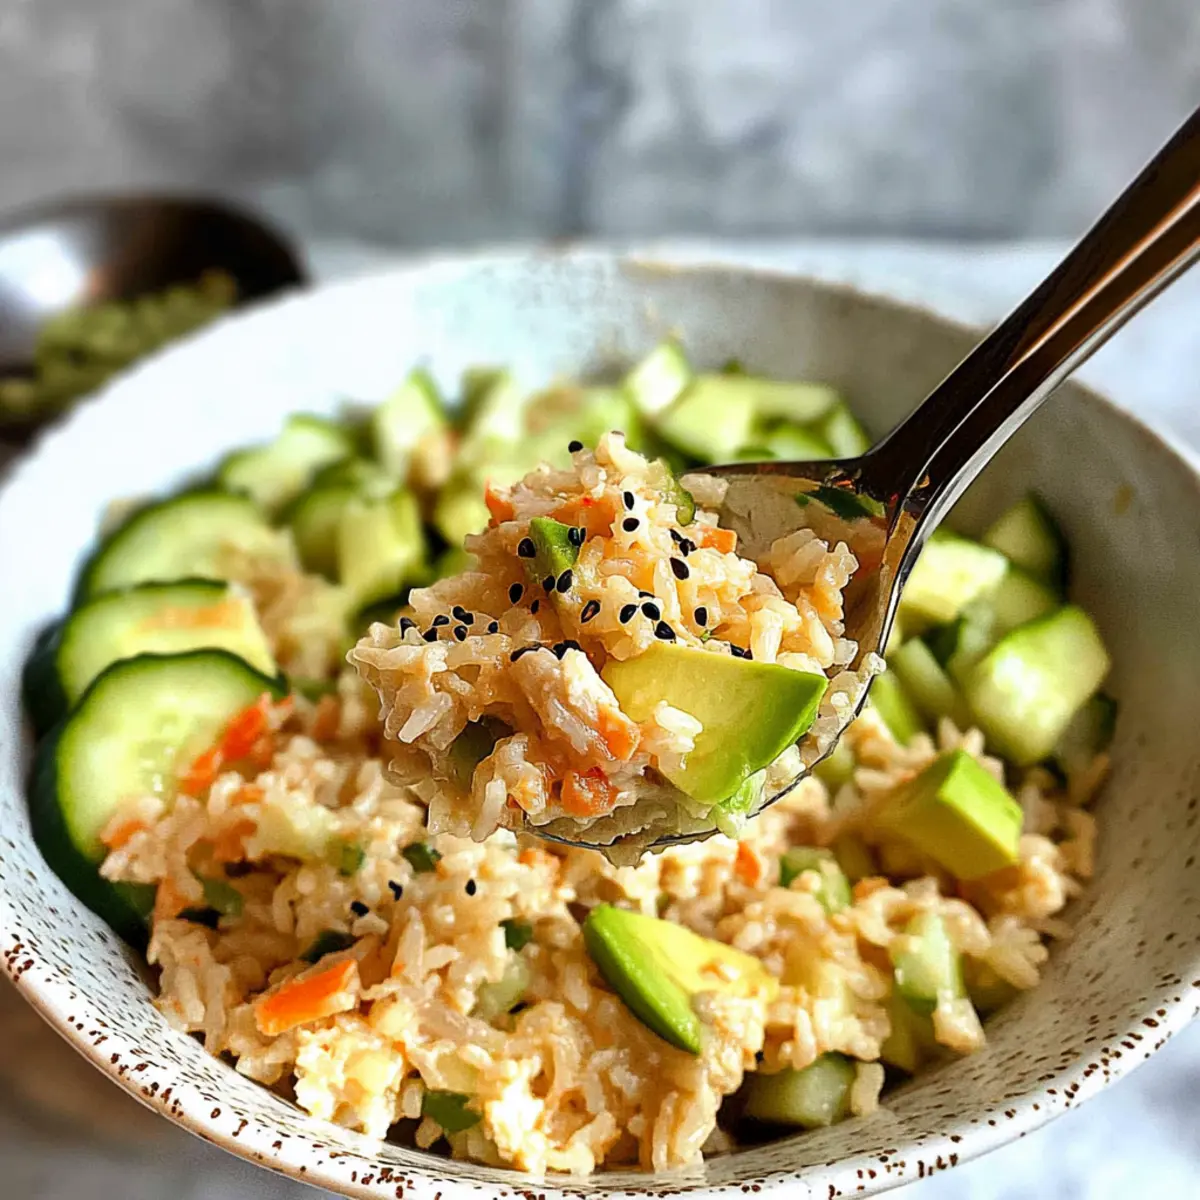
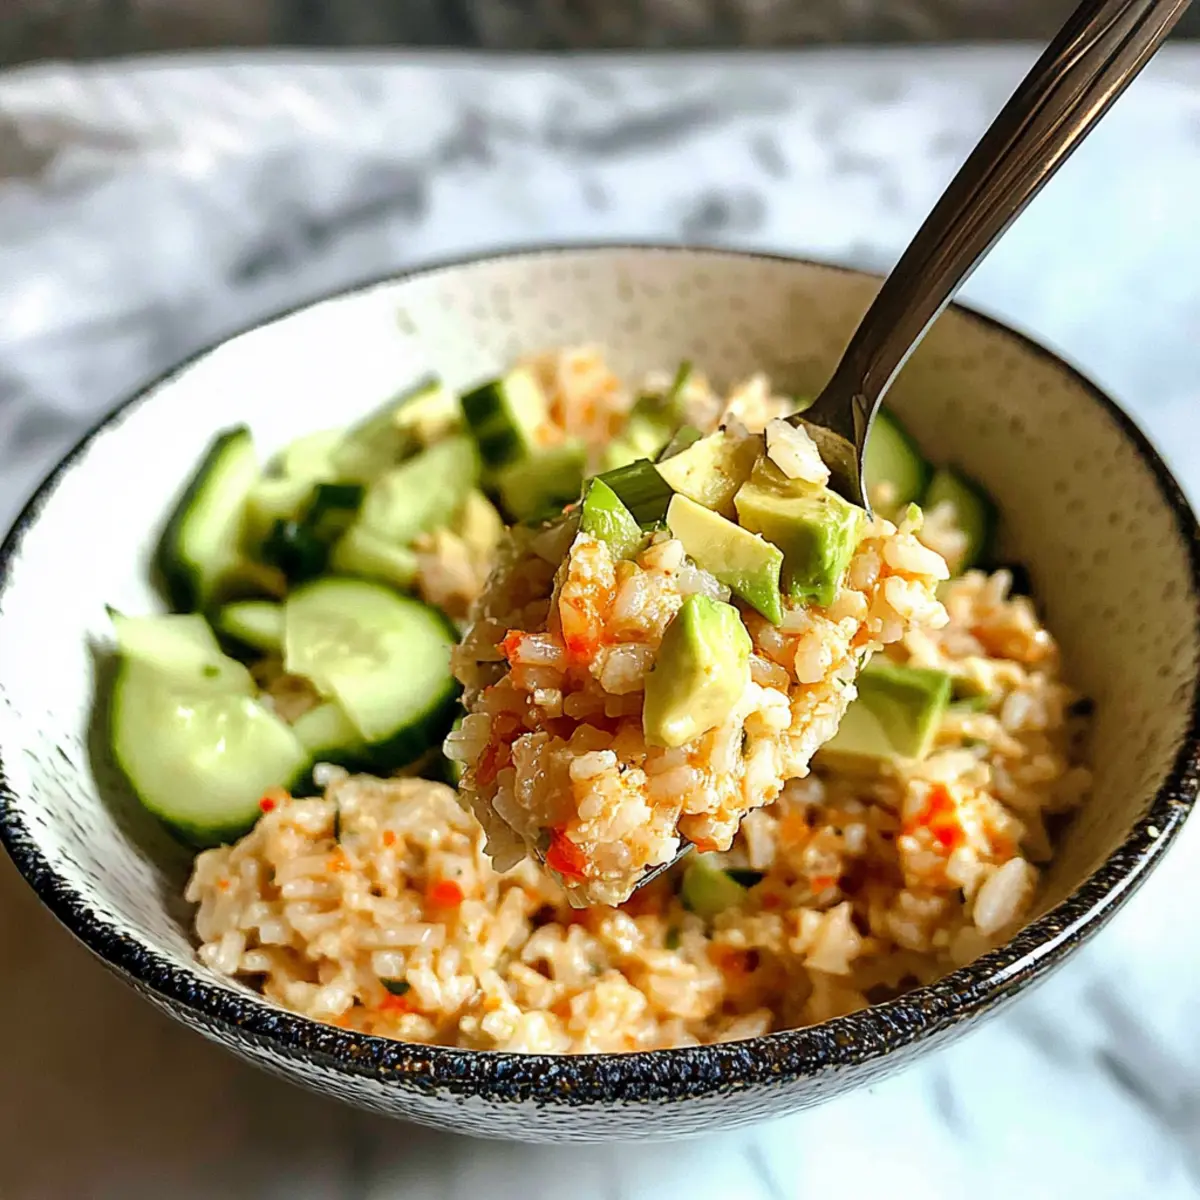
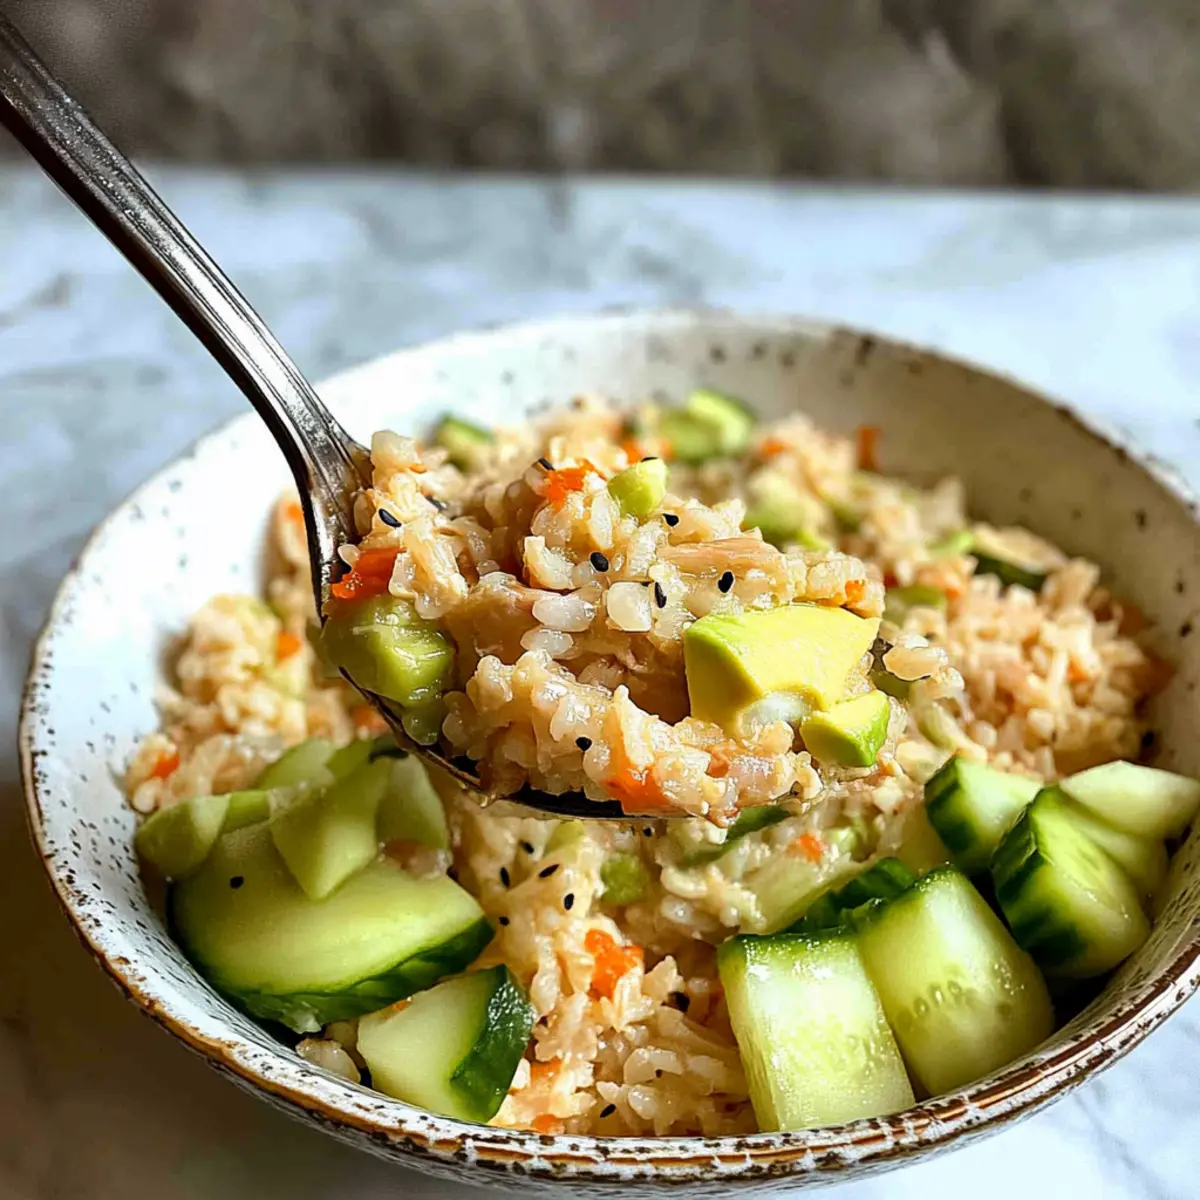
As I stood in my kitchen, the clock ticking down my evening, I couldn’t help but think of a solution that brought excitement to meal prep without a hint of stress. Enter the Spicy Canned Tuna Rice Bowl! This dish effortlessly combines creamy avocado with the crunch of fresh cucumbers, making it not only a vibrant feast for the senses but also a protein-rich powerhouse. Perfect for those hectic weeknights, it takes just minutes to whip up and allows for endless customization based on what you have on hand. Toss in some carrots or peas for a colorful twist, and you’ve got a winning meal that pleases even the pickiest of eaters. Curious about how to put this delightful bowl together? Let’s dive into the delicious details!
Why Choose This Canned Tuna Rice Bowl?
Simplicity: This recipe is a breeze to prepare, making it the perfect choice for busy weeknights.
Endless Customization: Experiment with various vegetables and proteins to create your perfect bowl. Swap canned tuna for salmon or shrimp for a fun twist!
Rich in Flavor: The combination of creamy avocado, zesty sriracha, and toasted sesame oil delivers a flavor explosion that will leave your taste buds dancing.
Nutritious and Satisfying: Packed with protein and healthy fats, this dish keeps you full and energized, making it a guilt-free option for any meal.
Quick Prep Time: Just a few minutes and one bowl is all you need to make this vibrant meal. Pair it with a side of pickled ginger for a delightful finishing touch!
Canned Tuna Rice Bowl Ingredients
For the Rice Base
• Cooked Sushi Rice – This serves as the foundation of your bowl; use short-grain rice for that perfect sticky texture.
For the Spicy Tuna Mixture
• Canned Tuna – A protein-rich star of the dish; make sure to drain excess liquid for the best consistency.
• Kewpie Mayonnaise – Adds delightful creaminess; if unavailable, feel free to substitute with regular mayonnaise.
• Sriracha – A spicy kick that enhances flavor; adjust to taste or replace with extra mayo if you prefer milder heat.
• Fresh Lemon Juice – Brightens the overall flavors and balances richness.
• Toasted Sesame Oil – Provides a rich, nutty note; regular sesame oil works well if you’re in a pinch.
For the Fresh Toppings
• Avocado – Adds a creamy element along with healthy fats; can be omitted if you’re not an avocado fan.
• Cucumbers – Provides crunch and freshness; try using other veggies like shredded carrots or peas based on what you have available.
Optional Final Touches
• Green Onions – Fresh and zesty, they enhance the dish’s texture and flavor profile.
• Sesame Seeds – For a lovely, crunchy garnish; sprinkle on top just before serving for an extra layer of flavor.
This Canned Tuna Rice Bowl is not just quick and easy, but a delightful canvas for your culinary creativity!
Step‑by‑Step Instructions for Canned Tuna Rice Bowl
Step 1: Prepare the Rice
Begin by cooking your sushi rice according to package instructions, typically 20 minutes at medium heat. Once the rice is tender and sticky, remove it from heat and let it cool for about 5 minutes. Fluff the rice with a fork, allowing it to reach room temperature while you prepare the spicy tuna mixture.
Step 2: Mix the Spicy Tuna
In a medium bowl, combine the drained canned tuna, Kewpie mayonnaise, sriracha, fresh lemon juice, and toasted sesame oil. Use a fork to break up the tuna and mix until all the ingredients are well combined and creamy, about 2 minutes. This spicy tuna mix will serve as the flavorful star of your Canned Tuna Rice Bowl.
Step 3: Prepare the Vegetables
While the tuna mixture is coming together, wash and chop your fresh ingredients. Dice the cucumbers and slice the avocado into thin wedges, adding a pop of color and texture to the dish. Keep your vegetables ready for assembly, ensuring every bite of the Canned Tuna Rice Bowl is fresh and crunchy.
Step 4: Assemble Your Bowl
In a large serving bowl, layer the cooked sushi rice at the bottom as the base. On top of the rice, artfully pile the spicy tuna mixture, followed by the diced cucumbers and sliced avocado. This colorful arrangement not only looks appetizing but also balances the flavors in each bite.
Step 5: Final Touches
Drizzle extra Kewpie mayonnaise and sriracha over the top for added richness and heat, if desired. For an extra burst of flavor, sprinkle chopped green onions and sesame seeds over your Canned Tuna Rice Bowl. Serve this vibrant dish immediately to enjoy the mix of textures and flavors at their best.
How to Store and Freeze Canned Tuna Rice Bowl
Fridge: Enjoy your Canned Tuna Rice Bowl fresh for the best taste, but you can store leftovers in an airtight container for up to 24 hours.
Freezer: While not ideal, you can freeze the rice and spicy tuna mixture (without fresh toppings) for up to 1 month. Thaw overnight in the fridge before reheating.
Reheating: Gently reheat the rice mixture in the microwave or stovetop with a splash of water, then add fresh toppings like avocado and cucumbers right before serving.
Room Temperature: It’s best to avoid leaving the Canned Tuna Rice Bowl at room temperature for longer than 2 hours to ensure food safety and freshness.
Expert Tips for Canned Tuna Rice Bowl
-
Drain Well: Ensure the canned tuna is thoroughly drained to prevent sogginess in your bowl. No one enjoys a waterlogged meal!
-
Rice Texture: Use short-grain sushi rice for that delightful stickiness. Long-grain rice can lead to a dry dish; keep it cozy!
-
Customize Vegetables: Mix it up! Opt for seasonal veggies like shredded carrots or peas based on your taste and what’s in the fridge.
-
Heat Level: Adjust the sriracha according to your spice preference. Start with a small amount and increase for a spicier kick.
-
Quick Assembly: For a warm bowl, rinse your serving dish with hot water before adding the rice. It elevates the entire dining experience!
Make Ahead Options
These Spicy Canned Tuna Rice Bowls are perfect for busy home cooks looking to save time during hectic weeknights! You can prepare the spicy tuna mixture (mix canned tuna with Kewpie mayonnaise, sriracha, lemon juice, and sesame oil) up to 3 days in advance; simply store it in an airtight container in the refrigerator to maintain its creamy texture and freshness. The sushi rice can also be cooked ahead of time and refrigerated for up to 24 hours before assembling. When you’re ready to serve, simply reheat the rice gently in the microwave and assemble your bowls with fresh toppings. This way, you’ll enjoy a delicious meal with minimal effort and maximum flavor!
What to Serve with Spicy Canned Tuna Rice Bowl
Start your meal adventure with thoughtfully chosen sides that elevate the vibrant flavors of your bowl!
-
Pickled Ginger: Offers a zesty contrast that cleanses the palate and enhances each bite of tuna and rice. This traditional pairing complements the dish’s flavors beautifully.
-
Seaweed Salad: This dish adds a delightful umami flavor, bringing the essence of Japanese cuisine to your meal. Its light, crunchy texture balances the creamy components of your bowl.
-
Edamame: Their slightly nutty flavor and protein-packed profile make them a fantastic sidekick. Lightly salted edamame can serve as a delightful finger food while you enjoy your rice bowl.
-
Miso Soup: A warm and comforting addition that adds depth to your dining experience. This savory broth enriches your meal while introducing a soothing element.
-
Crispy Tempura Vegetables: These are a delicious option for a crunchy side, offering a delightful contrast to the smooth toppings of your rice bowl. Sweet potatoes and zucchini tempura can be especially enjoyable!
-
Fresh Fruit Salad: For a light, refreshing finish, a bowl of seasonal fruit provides a sweet contrast to your savory dish. The juicy burst of flavors will cleanse your palate beautifully.
-
Green Tea: The gentle, earthy flavor of green tea serves as a perfect drink accompaniment. It adds a calming element that enhances the overall experience of your meal.
-
Chocolate Mousse: For dessert lovers, a light chocolate mousse pairs wonderfully after a savory meal, blending indulgence with richness. Its velvety texture will add a nice finish to your dining journey.
Canned Tuna Rice Bowl Variations
Feel free to let your creativity shine as you customize this dish for your taste buds and pantry!
-
Switch Up Proteins: Try canned salmon or shrimp for a delightful twist. It adds a new flavor profile while keeping it protein-rich.
-
Go Vegan: Substitute the tuna with mashed chickpeas or a hearty black bean mix. You won’t miss the fish, trust me!
-
Add Sweetness: Incorporate diced mango or pineapple for a juicy, tropical vibe. The sweetness beautifully contrasts with the spicy flavors.
-
Extra Crunch: Toss in shredded carrots or bean sprouts for added texture. They provide a satisfying crunch with every bite.
-
Bump Up the Heat: Increase the sriracha or sprinkle in some chili flakes for a fiery kick. Your taste buds will tingle with delight!
-
Pickled Vegetables: Garnish with pickled radishes or jalapeños for an additional layer of flavor. The tanginess will brighten the entire bowl.
-
Herb Infusion: Fresh cilantro or basil can elevate your dish with a burst of freshness. Experiment with different herbs to find your favorite combination!
-
Rice Variety: Swap sushi rice for quinoa or brown rice for a whole-grain option. It changes the texture while keeping it wholesome.
These variations make every bowl an adventure! And if you’re looking for more tasty ideas, check out my Hummus Veggie Rice for an exciting twist, or dive into the fusion flavors of a Mediterranean Steak Bowl. Happy cooking!
Canned Tuna Rice Bowl Recipe FAQs
How do I choose ripe avocados for my Canned Tuna Rice Bowl?
Absolutely! Look for avocados that yield slightly when gently pressed to the touch. If they feel too firm, they need more time to ripen. On the other hand, avoid any with dark spots all over, as those could be overripe. If you have an unripe avocado, place it in a paper bag at room temperature for a day or two to speed up the ripening process.
How should I store leftovers of the Canned Tuna Rice Bowl?
Very! For best results, store any leftovers in an airtight container in the fridge for up to 24 hours. To keep the freshness of the ingredients intact, I recommend separating the rice and the spicy tuna mixture from the fresh toppings like avocado and cucumbers. That way, you can enjoy your bowl almost as if it were freshly made!
Can I freeze the Canned Tuna Rice Bowl?
Yes! While you can freeze the rice and spicy tuna mixture without the fresh toppings for up to 1 month, I advise against freezing the fresh ingredients, as they won’t hold up well. To freeze, place the chilled rice and tuna mix in an airtight container, ensuring to squeeze out excess air. When you’re ready to enjoy, thaw it overnight in the fridge, reheat gently, and add your fresh toppings just before serving.
What if my canned tuna seems too dry?
No worries at all! If your canned tuna seems a bit dry, try adding a little more Kewpie mayonnaise or even a splash of tuna oil from the can if you have it. Mix thoroughly until you achieve that creamy, satisfying texture. Additionally, incorporating a few drops of lemon juice can brighten up the flavors while adding moisture.
Is this Canned Tuna Rice Bowl suitable for people with seafood allergies?
Not really. If you or someone dining with you has a seafood allergy, I recommend substituting the canned tuna with canned chickpeas or cooked, shredded chicken. These alternatives still provide that comforting texture and allow you to enjoy a nutritious and satisfying meal without worry.
Savory Canned Tuna Rice Bowl for Quick Weeknight Wins
Ingredients
Equipment
Method
- Cook sushi rice according to package instructions, typically 20 minutes at medium heat. Let it cool for 5 minutes.
- In a medium bowl, mix drained canned tuna, Kewpie mayonnaise, sriracha, lemon juice, and sesame oil until well combined.
- Wash and chop fresh ingredients: dice cucumbers and slice avocado.
- In a large bowl, layer cooked sushi rice, followed by spicy tuna mixture, cucumbers, and avocado.
- Drizzle extra Kewpie mayonnaise and sriracha on top, and sprinkle with green onions and sesame seeds before serving.
Leave a Reply