
The aroma of freshly made pancakes wafts through the air, instantly turning an ordinary morning into a special occasion. When it comes to comfort food, there’s nothing quite like homemade Perfect Buttermilk Pancakes to elevate your breakfast game. This delightful small-batch recipe serves just two, making it perfect for a cozy weekend brunch or a simple weekday treat. With a light and fluffy texture that practically melts in your mouth, these pancakes provide a rich buttery flavor, enlivened by the tanginess of buttermilk. Best of all, they come together in no time, ensuring you won’t be stuck in the kitchen when you could be enjoying them! Are you ready to indulge in a sweet, nostalgic breakfast that feels like a warm hug? Let’s get started!
Why Are These Pancakes So Irresistible?
Simplicity: This recipe is perfectly designed for small batches, requiring just a few basic ingredients you likely already have at home.
Fluffiness Guaranteed: With the right balance of buttermilk and baking soda, you’ll enjoy pancakes that are incredibly light and fluffy, making every bite a delight.
Speedy Preparation: Whip these up in no time—ideal for busy mornings or spontaneous weekend brunches!
Crowd-Pleaser: Whether you’re cooking for two or just yourself, these pancakes are sure to impress, pairing beautifully with toppings like fresh fruit or pure maple syrup.
Versatile Options: Feel free to make them your own by adding a splash of vanilla or some whole grain flour for added nutrition. You might also love these Marry Me Chicken Pasta for a complete cozy meal!
Perfect Buttermilk Pancakes Ingredients
To create these delightful pancakes, gather the following ingredients.
For the Batter
- All-purpose Flour – Provides structure; for a gluten-free option, use gluten-free flour.
- Baking Soda – Acts as a leavening agent for fluffiness; ensure it’s fresh for optimal results.
- Sugar – Adds sweetness and helps with browning; feel free to reduce for less sweetness.
- Salt – Enhances flavor; an essential ingredient even in sweet recipes.
- Buttermilk – Creates a tender texture and enables the batter to rise; store-bought is best, but homemade can work in a pinch.
- Egg – Binds the ingredients and contributes moisture.
- Oil (Avocado or Neutral Oil) – Keeps pancakes moist; you can substitute with melted butter if desired.
For Cooking
- Butter – Adds richness for cooking and serving; optional but highly recommended.
For Serving
- Pure Maple Syrup – Provides a delicious topping that enhances the flavor of your Perfect Buttermilk Pancakes; don’t skip this for the ultimate experience!
- Fresh Fruit or Bacon – These serve as delightful additions, adding extra flavor and texture.
Step‑by‑Step Instructions for Perfect Buttermilk Pancakes
Step 1: Mix Dry Ingredients
In a medium bowl, whisk together all-purpose flour, baking soda, sugar, and salt until well blended. This should take about 30 seconds of vigorous whisking. The mixture should look uniform and free of lumps. This step is essential to ensure that your Perfect Buttermilk Pancakes turn out fluffy and delicious.
Step 2: Combine Liquid Ingredients
In a small bowl, vigorously whisk the egg for about 15 seconds until it’s light and frothy. Then, add the oil and buttermilk, continuing to mix until everything is well integrated. The liquid mixture should appear smooth and creamy, ready to bring richness and moisture to your pancake batter.
Step 3: Prepare Batter
Pour the liquid ingredients into the bowl with the dry mixture. Using a rubber spatula, gently stir until just combined, taking care not to overmix; some lumps are perfectly fine. This method will help ensure your Perfect Buttermilk Pancakes remain tender and light, so avoid worrying about a perfectly smooth batter.
Step 4: Heat Cooking Surface
Preheat a non-stick griddle or cast-iron skillet over medium heat for 5 minutes. You want the surface hot enough that you can feel it from a few inches away but not smoking. A heated cooking surface is crucial for achieving that golden-brown crust on your pancakes, so be patient as it warms up.
Step 5: Cook Pancakes
Lightly grease the hot skillet with either oil or butter. Using a ¼ cup measuring cup, scoop the batter onto the skillet, allowing space for spreading. Cook for 2-3 minutes or until bubbles form on the surface and the edges look set. Flip each pancake gently and cook for another 1-2 minutes until both sides are golden brown.
Step 6: Keep Warm
If you aren’t serving the pancakes immediately, transfer finished pancakes to a preheated oven set at 200°F. This will keep them warm and fluffy while cooking the remaining batter, ensuring your Perfect Buttermilk Pancakes are enjoyed fresh and hot.
Step 7: Serve
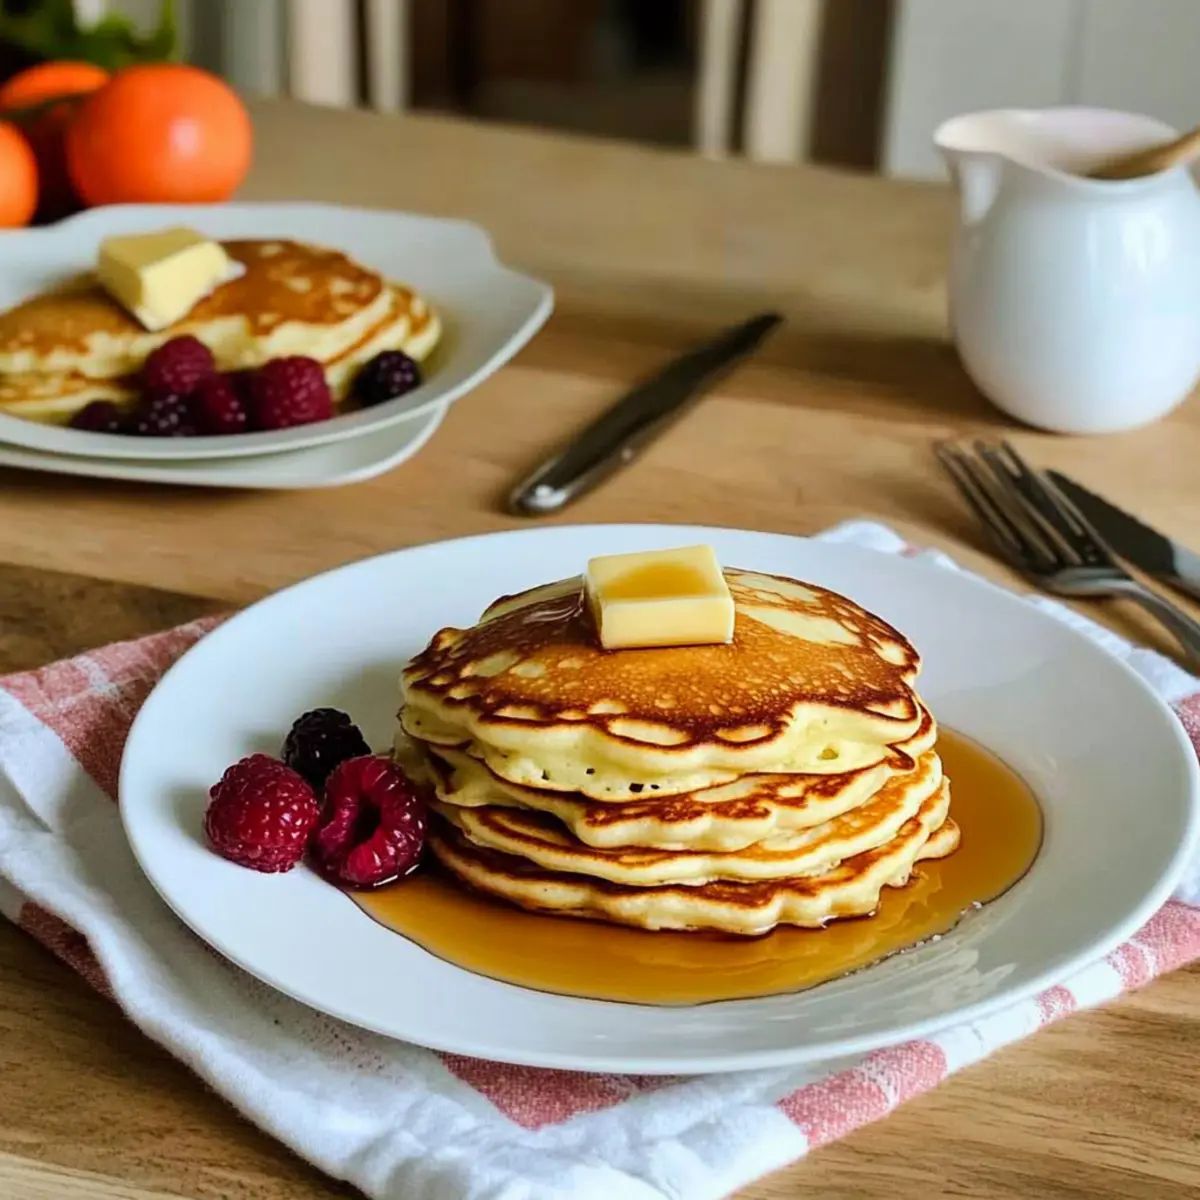
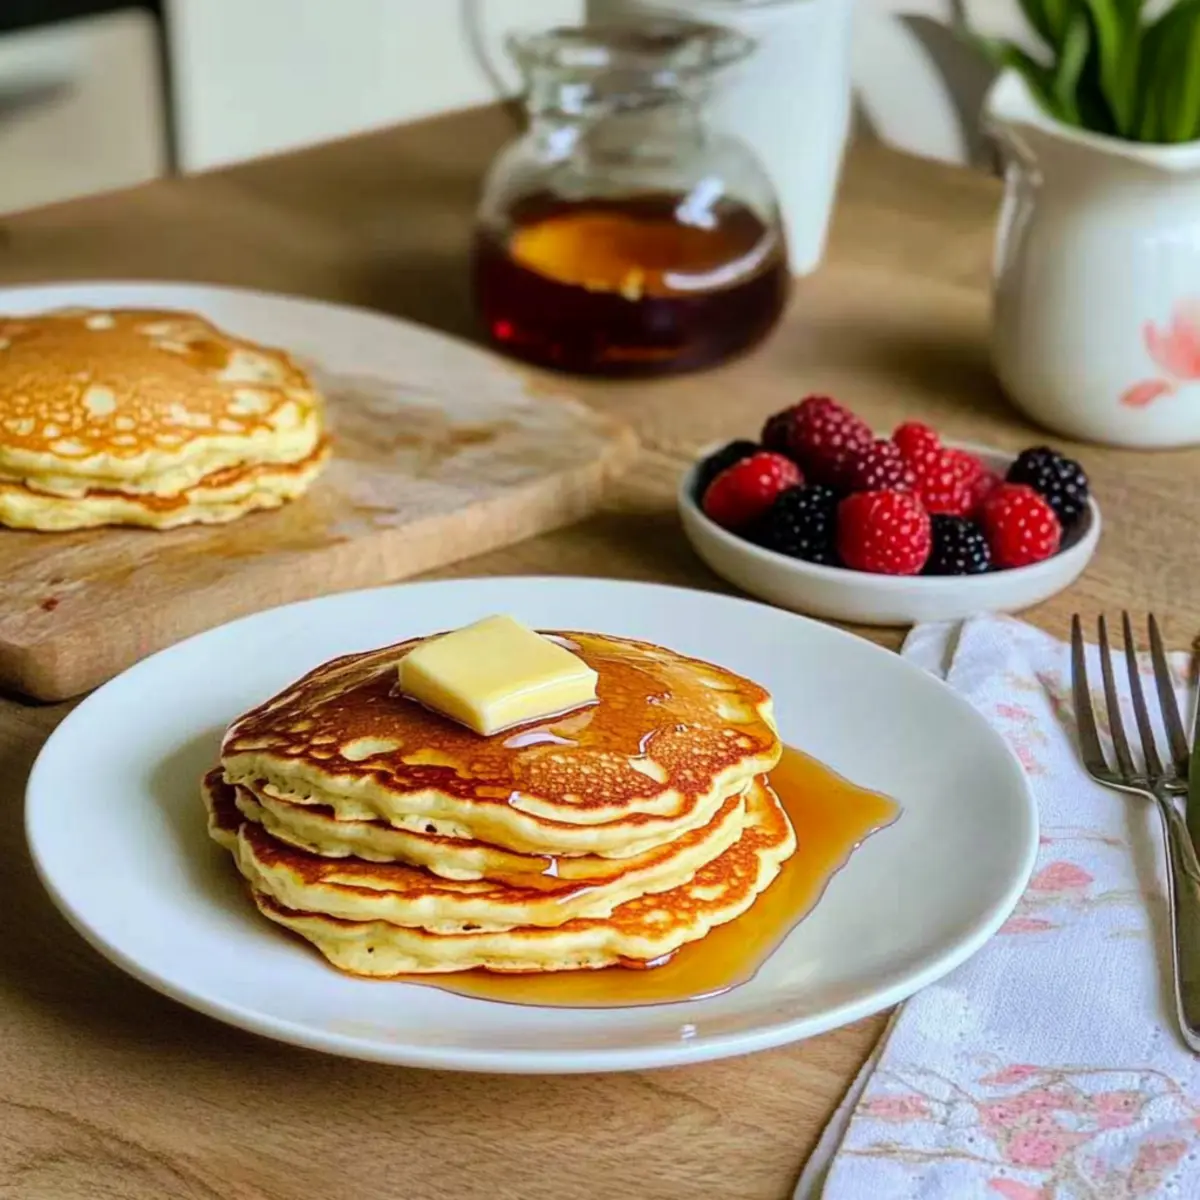
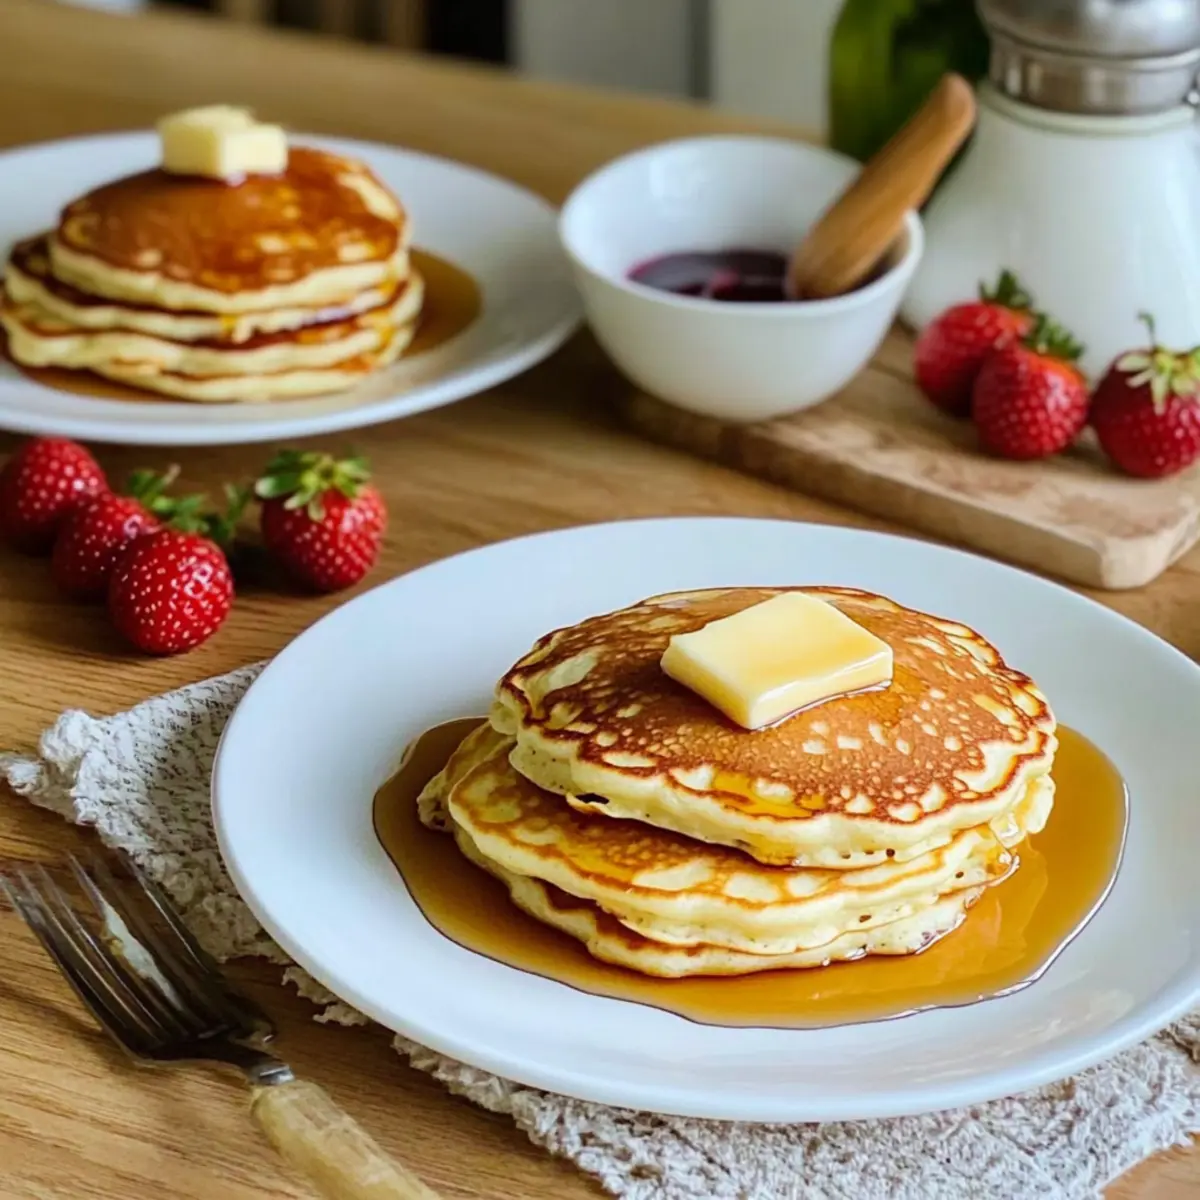
Once cooked, stack the pancakes on plates. Serve them with a dollop of butter and a generous drizzle of pure maple syrup. Feel free to enhance your meal further with fresh fruit or crispy bacon, creating a delightful breakfast experience that highlights the light and fluffy nature of your Perfect Buttermilk Pancakes.
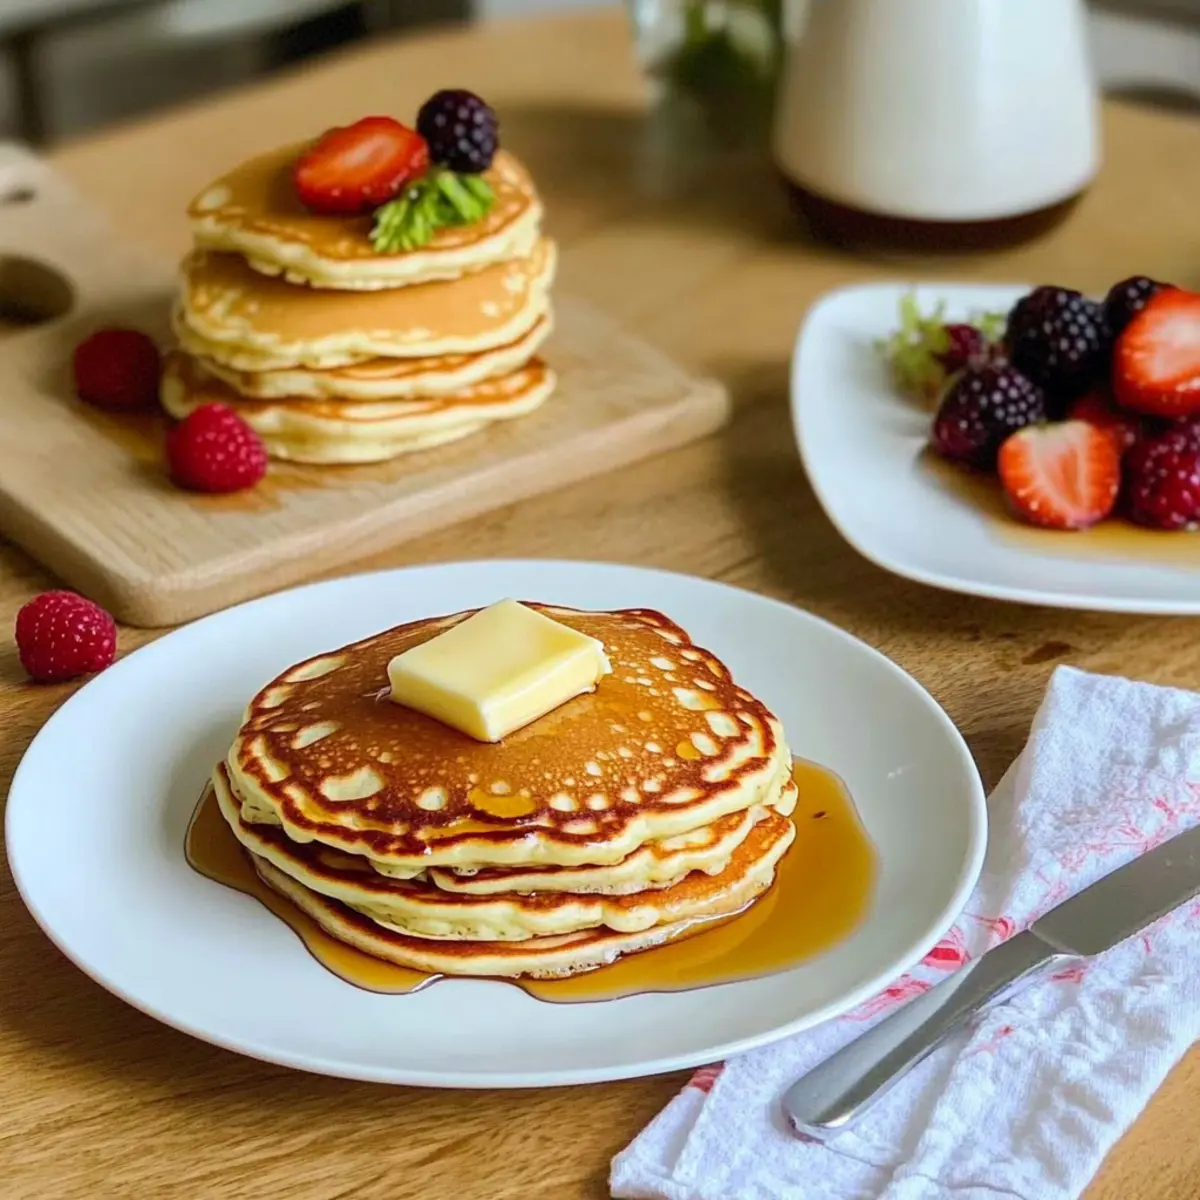
What to Serve with Perfect Buttermilk Pancakes for Two
A stack of warm pancakes isn’t just a breakfast; it’s the beginning of a culinary story waiting to unfold.
-
Crispy Bacon: The salty, savory crunch of crispy bacon adds a delightful contrast to the sweet, fluffy pancakes, making every bite satisfying.
-
Fresh Seasonal Fruit: Bright strawberries, blueberries, or banana slices bring a burst of freshness and natural sweetness, perfectly balancing the richness of the pancakes.
-
Light Whipped Cream: A dollop of airy whipped cream contributes a creamy texture that complements the pancakes’ fluffiness, elevating them to a dessert-like experience.
-
Maple Syrup Drizzle: The warm, gooey sweetness of pure maple syrup enhances the buttery flavor of the pancakes, creating a classic combination that feels indulgent.
-
Yogurt Parfait: Pair your pancakes with a layered yogurt parfait for a creamy, tangy contrast, filled with granola and fruit for an extra crunch.
-
Nutty Granola: A sprinkle of granola adds a delightful crunch and wholesome flavor, creating a breakfast that’s both delicious and nourishing.
-
Herbal Tea or Coffee: A warm cup of herbal tea or freshly brewed coffee adds a comforting element to your breakfast spread, making it a memorable morning ritual.
Indulging in these accompaniments next to your Perfect Buttermilk Pancakes crafts a beautiful breakfast experience, turning an ordinary meal into something truly special.
Expert Tips for Perfect Buttermilk Pancakes
-
Use Fresh Ingredients: Check the expiration date on your baking soda and buttermilk. Fresh ingredients ensure the pancakes rise properly and taste their best.
-
Don’t Overmix: Stir the batter gently. Lumps are acceptable; overmixing can create dense pancakes. Achieving light and fluffy Perfect Buttermilk Pancakes requires a delicate touch!
-
Control the Heat: Adjust your skillet temperature as needed. If pancakes are browning too fast, lower the heat. Perfect cook time is key for fluffiness and flavor.
-
Flip Smartly: Only flip the pancakes once, when you see bubbles forming on the surface. This ensures they maintain that delightful fluffiness.
-
Serve Immediately: For the best taste and texture, serve pancakes right after cooking. If needed, keep them warm in a low oven, but enjoy them fresh!
How to Store and Freeze Perfect Buttermilk Pancakes
Fridge: Store leftover pancakes in an airtight container for up to 3 days. To keep them from sticking together, place parchment paper between layers.
Freezer: For longer storage, freeze pancakes in a ziplock bag with layers separated by parchment paper for up to 2 months.
Reheating: To reheat, pop them in a toaster or microwave until warmed through. This will help restore their light and fluffy texture.
Freshness Tip: Always allow pancakes to cool completely before freezing to maintain their quality and prevent ice crystals.
Perfect Buttermilk Pancakes Variations
Feel free to get creative with these delicious pancakes and personalize them to match your taste!
- Flavor Boost: Add vanilla extract to the batter for a sweet aroma and richer flavor.
- Nutty Twist: Fold in chopped nuts like walnuts or pecans for added texture and taste.
- Fruit-Infused: Incorporate fresh blueberries or sliced bananas into the batter for a delightful fruity surprise.
- Whole Grain: Substitute half of the all-purpose flour with whole wheat flour for a heartier, nutrient-rich pancake.
- Cocoa Lovers: To satisfy your chocolate cravings, mix in a few tablespoons of cocoa powder for chocolate pancakes.
- Zesty Kick: Grate in a little lemon zest to your batter for a refreshing zing that complements the buttermilk beautifully.
- Dairy-Free Delight: For a dairy-free version, switch buttermilk with almond milk mixed with vinegar to mimic the tanginess.
- Savory Option: Transform them into savory pancakes by adding chopped green onions and cheese; perfect for brunch or dinner alongside savory toppings.
These variations not only let you tailor every pancake experience but also create a wonderful opportunity to explore flavors! And if you’re a fan of delicious main dishes, consider trying your hand at Marry Me Chicken Pasta after you’ve indulged in these fluffy delights. You might also enjoy a simple sweet treat like Basque Burnt Cheesecake for dessert!
Make Ahead Options
These Perfect Buttermilk Pancakes are ideal for meal prep, allowing you to enjoy a warm breakfast on busy mornings! You can mix the dry ingredients (flour, baking soda, sugar, and salt) and store them in an airtight container for up to 3 days. The wet ingredients (buttermilk, oil, and egg) can be combined and kept in the fridge for up to 24 hours. When you’re ready to cook, just combine the wet and dry mixtures, stir gently, and follow the cooking instructions as usual. This way, you’ll have homemade pancakes ready in minutes, ensuring that you savor every fluffy bite without the stress of morning rush!
Perfect Buttermilk Pancakes for Two Recipe FAQs
What should I look for when selecting buttermilk?
Absolutely! When choosing buttermilk, look for a thick, creamy texture and a slightly tangy aroma. It should be fresh, without any visible separation or off-putting smells. If using store-bought, avoid any containers that have dark spots all over, as that indicates spoilage.
How long can I store leftover pancakes in the fridge?
You can store leftover Perfect Buttermilk Pancakes in an airtight container in the fridge for up to 3 days. To prevent them from sticking together, I recommend placing parchment paper between each pancake layer. Enjoy them warm for a lovely second serving!
Can I freeze Perfect Buttermilk Pancakes?
Absolutely! To freeze your pancakes, allow them to cool completely, then layer them between sheets of parchment paper in a ziplock bag. They can be stored in the freezer for up to 2 months. When you’re ready to enjoy them, simply reheat in a toaster or microwave until warmed through.
Why are my pancakes dense instead of fluffy?
Very! If your pancakes turn out dense, it’s likely due to overmixing the batter—remember, a few lumps are perfectly fine! Additionally, ensure your baking soda is fresh; expired leavening agents can fail to help the pancakes rise, leading to a less fluffy result. Another great tip is to watch your cooking temperature; too-hot surfaces can also contribute to dense pancakes.
Are these pancakes suitable for my kids with allergies?
It’s essential to consider dietary restrictions! If your kids have gluten or dairy allergies, you can substitute the all-purpose flour with a gluten-free blend and use a dairy-free milk mixed with vinegar or lemon juice in lieu of buttermilk. Just monitor for any specific allergies and adapt accordingly to keep everyone safe and happy!
How can I know if my pancake batter is the right consistency?
For sure! The ideal pancake batter should be somewhat thick but still pourable; it should slowly drop off the mixing spoon but not be runny. When mixed, it’s okay to have some lumps. If it’s too runny, consider adding a bit more flour, and if it appears too thick, a splash of milk or buttermilk can help achieve that perfect pour!
Perfect Buttermilk Pancakes Just for Two: Light & Fluffy Delight
Ingredients
Equipment
Method
- In a medium bowl, whisk together all-purpose flour, baking soda, sugar, and salt until well blended.
- In a small bowl, vigorously whisk the egg until light and frothy, then add oil and buttermilk, mixing until smooth.
- Pour the liquid ingredients into the dry mixture and gently stir until just combined; some lumps are fine.
- Preheat a non-stick griddle or cast-iron skillet over medium heat for about 5 minutes.
- Lightly grease the skillet with oil or butter, scoop the batter onto the skillet, and cook until bubbles form.
- Flip the pancakes gently and cook until both sides are golden brown.
- If not serving immediately, transfer pancakes to a preheated oven set at 200°F to keep warm.
- Serve the pancakes stacked with butter and maple syrup, and add fresh fruit or bacon as desired.
Leave a Reply