
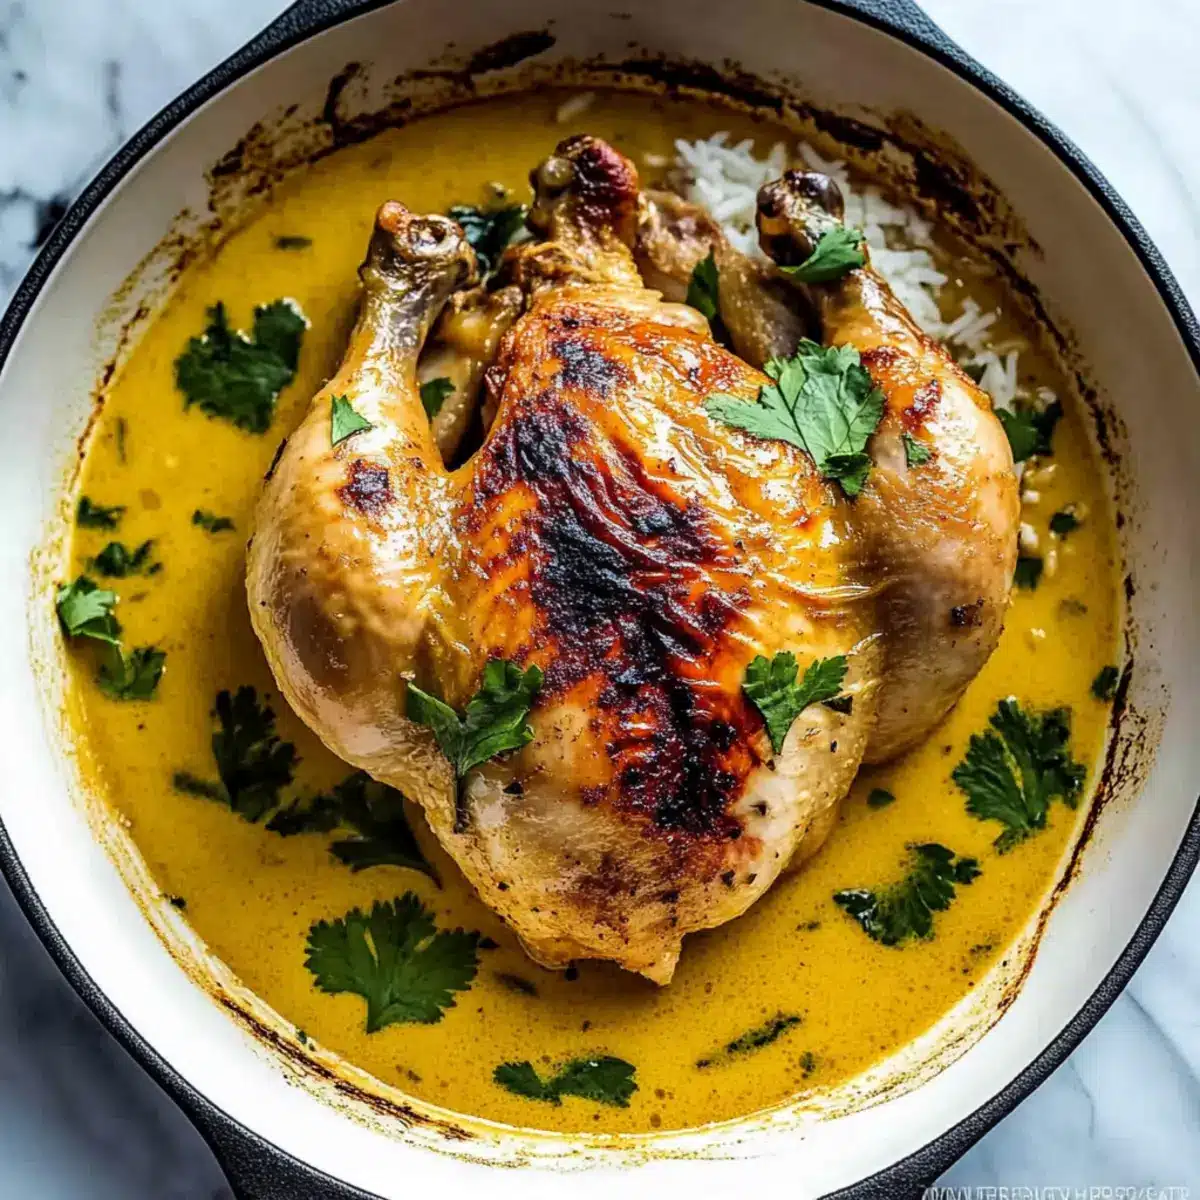
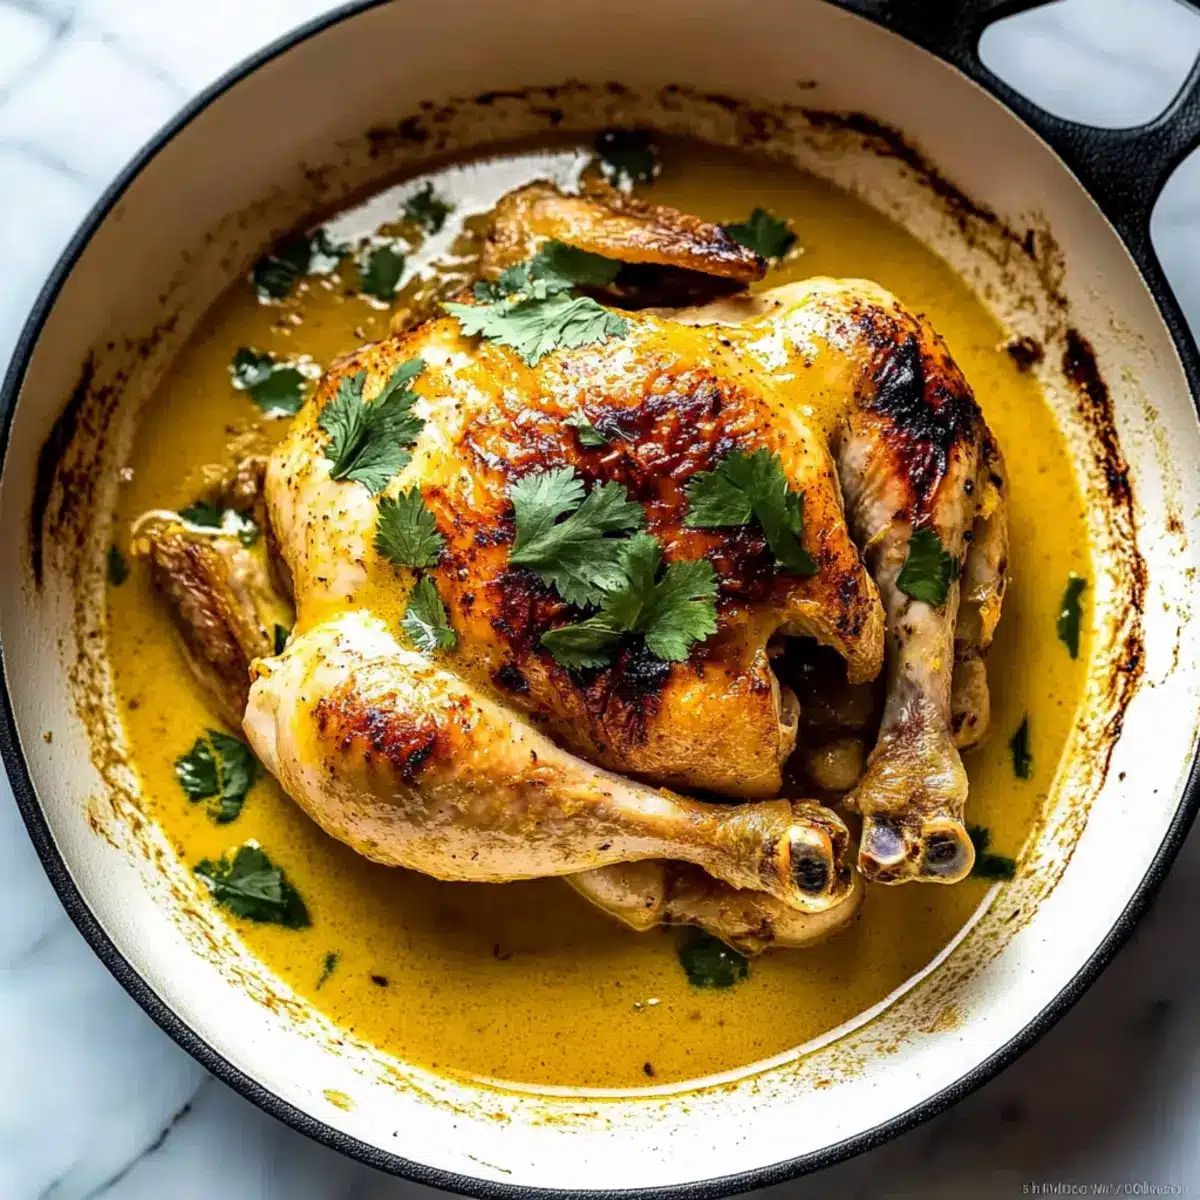
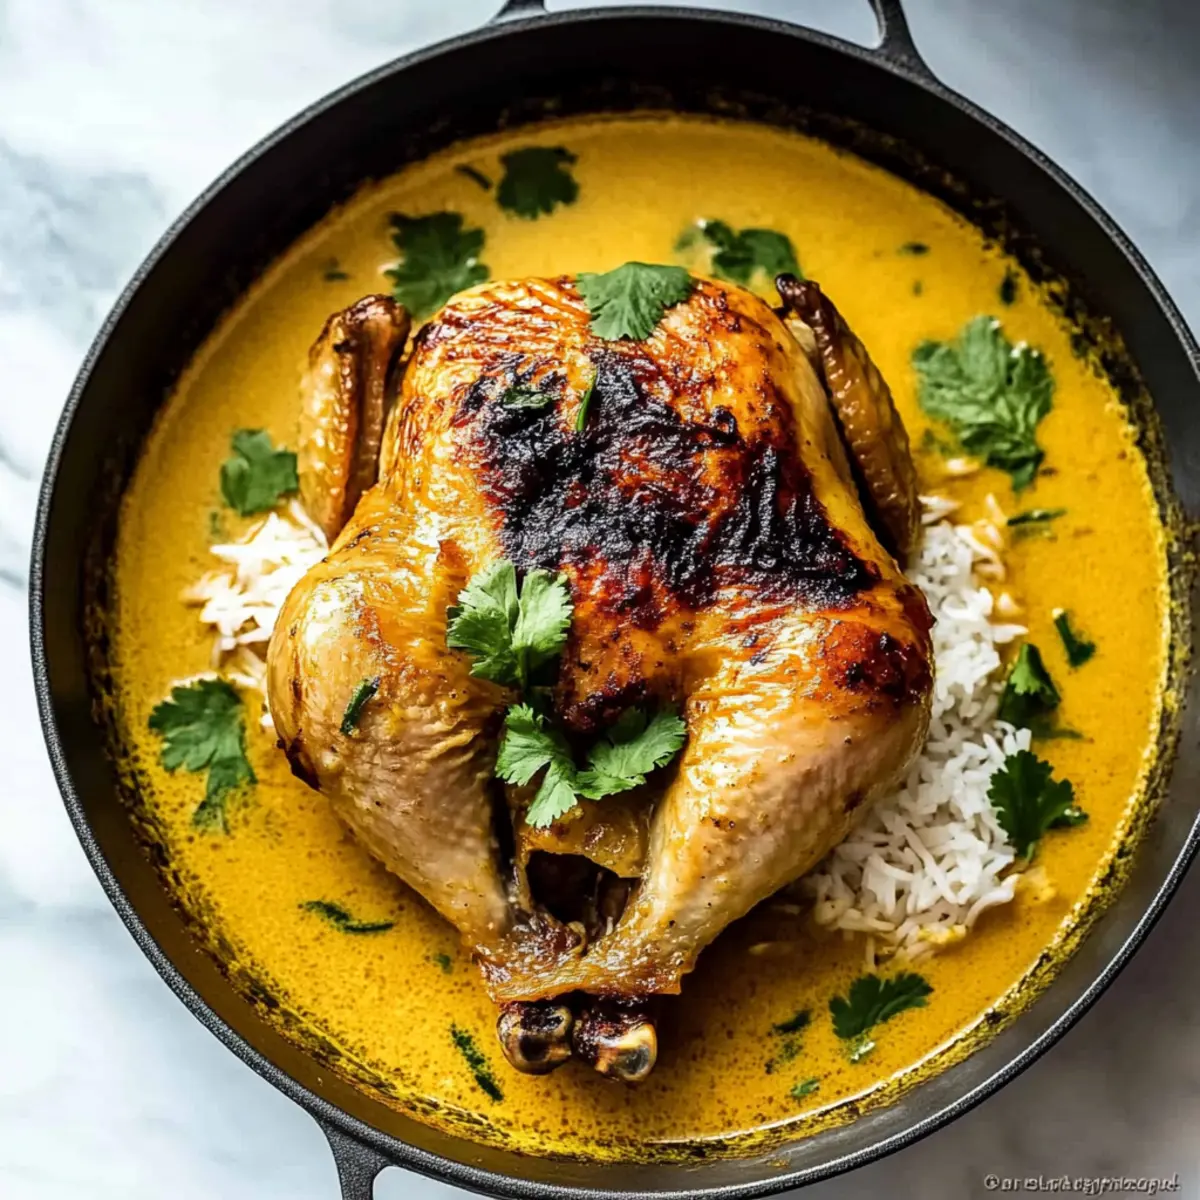
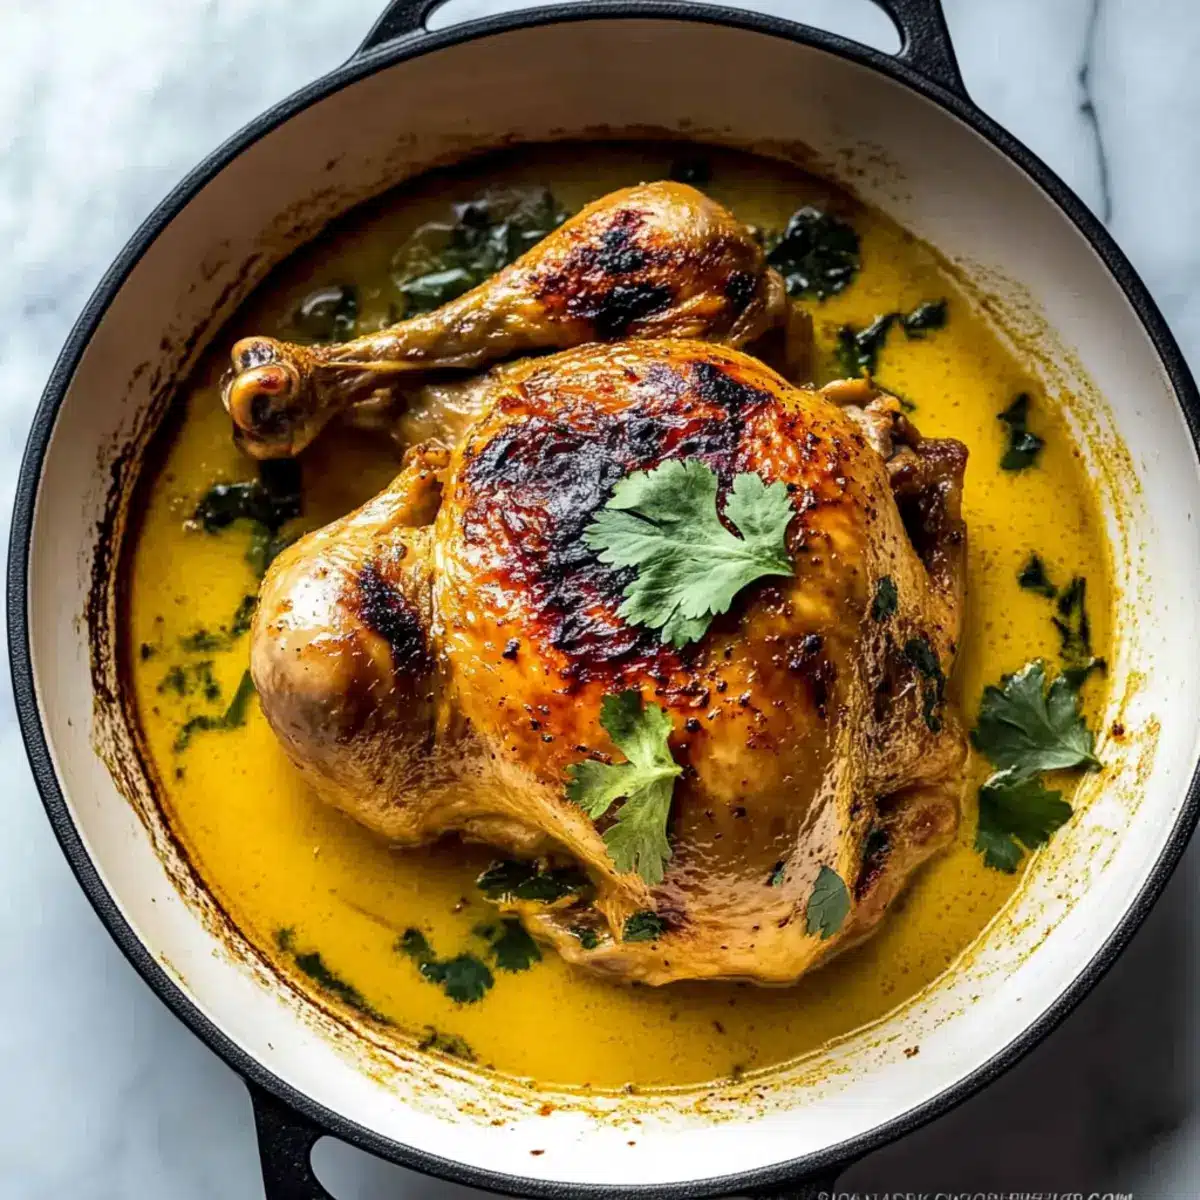
When I first tasted Coconut Milk Braised Chicken, I was transported to a sun-drenched Thai market where the air is thick with fragrant spices and tropical aromas. This recipe captures that essence beautifully, featuring a whole chicken slow-cooked to tender perfection in creamy coconut milk. With zesty lime, aromatic ginger, and invigorating lemongrass, it’s a dish that not only comforts but also excites the taste buds. Plus, it’s incredibly easy to prepare—just 20 minutes of hands-on time—making it perfect for those busy weeknights when you still crave something wholesome. Dive into this mouthwatering journey with me, and discover just how effortless it can be to bring a slice of Thailand right to your dinner table. Ready to taste and explore the magic of this succulent dish?
Why is Coconut Milk Braised Chicken a Must-Try?
Incredibly Simple: With just 20 minutes of hands-on prep, you can create a dish that tastes like you’ve spent hours in the kitchen.
Authentic Thai Flavors: Experience the vibrant combination of ginger, lemongrass, and lime that brings a refreshing zing.
Melt-in-Your-Mouth Tenderness: The slow-cooking process results in a chicken that is so tender it practically falls off the bone, making each bite a delight.
Versatile Serving Options: This dish shines when served over fluffy jasmine or coconut rice, allowing the luscious sauce to soak in every grain. Pair it with a side of Spicy Chicken Fillet for an exciting meal.
Crowd-Pleaser: Whether for family dinners or gatherings with friends, this recipe always gets rave reviews, satisfying various palates.
Get ready to indulge in this comforting, flavorful feast that transforms dinner into a memorable experience!
Coconut Milk Braised Chicken Ingredients
For the Chicken
- Whole Chicken – The star of the dish, absorbing all the delicious coconut flavors while cooking.
- Fine Sea Salt – Enhances the overall flavor of the chicken, making it more savory.
For the Marinade
- Melted Coconut Oil (4 tablespoons, divided) – Adds richness and amplifies the coconut flavor; can swap with olive oil if desired.
- Ginger Paste (1 tablespoon + 1 teaspoon, divided) – Offers a warming spice note; substitute with freshly grated ginger for added freshness.
- Lemongrass Paste (1 tablespoon) – Imparts a bright, citrusy flavor characteristic of Thai cuisine; use fresh lemongrass for a more robust taste.
- Garlic (4 cloves, minced) – Delivers depth and aromatic richness; feel free to use garlic powder in a pinch.
For the Sauce
- Thai Green Curry Paste (1 tablespoon) – Introduces complexity and a touch of heat; a red curry paste can be a great alternative for different flavors.
- Zest and Juice of 1 Lime – Adds a delightful acidity and freshness; lemon juice can work in a momente’s notice.
- Coconut Milk (14-ounce can, about 2 cups) – The creamy, luscious base that makes this dish irresistible; can be replaced with any plant-based milk for a lighter profile.
For Garnish
- Cilantro (10 stems, leaves and stems separated) – Enhances flavor and adds a pop of color; fresh parsley is an excellent substitute if cilantro isn’t available.
This Coconut Milk Braised Chicken recipe promises a delightful culinary escape straight to Thailand, igniting your senses with tropical flair!
Step‑by‑Step Instructions for Coconut Milk Braised Chicken
Step 1: Preheat Oven
Begin by preheating your oven to 325°F (160°C). This temperature is ideal for slow braising, allowing the chicken to cook thoroughly while absorbing all the rich flavors of the coconut milk. As the oven warms, gather your ingredients and equipment to ensure everything is ready for a smooth cooking experience.
Step 2: Prepare Rub
In a mixing bowl, combine 4 tablespoons of melted coconut oil, 1 tablespoon of ginger paste, 1 tablespoon of lemongrass paste, and 1 teaspoon of fine sea salt. Stir these ingredients together until you achieve a pasty consistency. This aromatic rub will not only flavor your chicken but also infuse the dish with tantalizing Thai-inspired notes.
Step 3: Season Chicken
Take your whole chicken and remove any trussing string. Pat it dry with paper towels to remove excess moisture, which aids in browning. Gently separate the skin from the breast meat with your fingers and spread the prepared rub generously beneath the skin, ensuring even coverage for maximum flavor throughout.
Step 4: Sear Chicken
In a large braiser or heavy pot, heat 2 tablespoons of coconut oil over medium heat until shimmering. Once hot, add the chicken, searing it for about 4-5 minutes on each side, or until it turns a deep golden brown. This step not only enhances flavor but also creates a beautiful crust. After searing, carefully remove the chicken and set it aside, discarding excess oil from the pot.
Step 5: Add Aromatics
In the same pot, incorporate the remaining 1 teaspoon of ginger paste, lime zest, lime juice, minced garlic, and 1 tablespoon of Thai green curry paste. Stir continuously for about 1 minute until the mixture is fragrant. This will create a robust base of flavors for your Coconut Milk Braised Chicken, setting the stage for the next steps.
Step 6: Add Coconut Milk
Pour in the 14-ounce can of coconut milk, scraping up any caramelized bits from the bottom of the pot for added flavor. Carefully place the seared chicken breast side up into the pot. Make sure the coconut milk covers the chicken at least halfway. Cover the pot with a lid and let it braise gently for 2 hours, allowing the chicken to become tender and soak in all those delicious flavors.
Step 7: Serve
Once the braising time is complete, remove the pot from the oven and allow the chicken to rest for about 10 minutes. This brief resting period helps retain moisture. Finally, carve the chicken and serve it generously with the luscious coconut sauce drizzled over fluffy jasmine or coconut rice, creating a perfectly comforting dish ready to impress.
Coconut Milk Braised Chicken Variations
Feel free to explore these delightful variations that can elevate your Coconut Milk Braised Chicken experience even further!
-
Herb Swap: Use basil or mint instead of cilantro for a refreshing twist that adds another layer of flavor. The aromatic notes will transport your dish to another level of deliciousness.
-
Spice it Up: Add sliced red chilies for a spicy kick. If you love heat, this simple addition will turn up the flavor profile, making it a fiery delight!
-
Veggie Boost: Toss in carrots or bell peppers during the braising process. They will add color and nutrition while soaking up the wonderful coconut flavors.
-
Zesty Infusion: Try using orange juice and zest instead of lime. This substitution will lend a subtly sweet citrus note that beautifully complements the coconut.
-
Coconut Alternatives: For a lighter option, substitute coconut milk with any plant-based milk. Almond or oat milk can offer a unique twist while still achieving creaminess.
-
Savory Crunch: Top your dish with toasted cashews or peanuts for a satisfying crunchy texture. The nutty flavors will add a nice contrast to the creamy sauce.
-
Saucy Richness: Add a spoonful of peanut butter to the sauce for a rich, nutty flavor that pairs beautifully with the coconut. It’s an unexpected yet enjoyable twist!
-
Creamy Delight: For that extra indulgence, fold in a bit of heavy cream or crème fraîche before serving. This simple trick creates an even silkier sauce, making it simply irresistible.
Explore these variations and don’t hesitate to mix and match! For a complete meal experience, consider serving your delicious Coconut Milk Braised Chicken with some Healthy Baked Chicken on the side—it’s a wonderful way to create a feast that everyone will remember. Enjoy your culinary adventures!
Expert Tips for Coconut Milk Braised Chicken
Dry First: Ensure the chicken is thoroughly dried before applying the rub. This promotes better browning and flavor.
Sear Well: Don’t rush the searing process! Sear until each side is a deep golden brown to enhance the overall flavor of the dish.
Use Fresh Ingredients: Whenever possible, opt for fresh ingredients like ginger and lemongrass. They significantly amplify the flavors in your Coconut Milk Braised Chicken.
Don’t Skip Resting: Allow the chicken to rest for 10 minutes post-braising. This ensures the meat remains juicy and flavorful.
Check Liquid Level: While braising, make sure the coconut milk covers the chicken at least halfway for optimal tenderness and flavor infusion.
What to Serve with Coconut Milk Braised Chicken
Begin your culinary journey by creating a delightful spread that perfectly complements the rich flavors of this dish.
-
Fluffy Jasmine Rice: This classic pairing soaks up the luscious coconut sauce and adds a gentle texture that balances the tender chicken. The aromatic notes of jasmine elevate the meal.
-
Stir-Fried Vegetables: A colorful medley of bell peppers, snap peas, and broccoli adds crunch and freshness to your plate. Their vibrant hues not only brighten the dish visually but also provide a nutritious contrast.
-
Cucumber Salad: A refreshing cucumber salad with lime vinaigrette brings a zesty crunch that cuts through the richness of the braised chicken. The coolness of cucumber is the perfect refreshing partner.
-
Thai Mango Sticky Rice: For dessert, indulge in this sweet treat that combines sticky rice with ripe mangoes and coconut milk. The creaminess of the dessert echoes the main dish while offering a delightful sweet contrast.
-
Thai Iced Tea: This creamy, sweetened tea pairs beautifully as a beverage, providing a soothing balance to the bold flavors of the chicken. The rich color and flavor can enhance the dining experience.
-
Grilled Pineapple: Serve grilled pineapple slices as a sweet, caramelized side that complements the savory dish. The natural sweetness and smoky flavors create a delightful contrast with the savory chicken.
-
Chili Garlic Noodles: For those craving an extra kick, chili garlic noodles deliver a spicy, garlicky element that harmonizes well with the coconut flavors. Their chewy texture adds a pleasing contrast, while the heat keeps things exciting.
Let your meal come alive with these pairings, turning a delicious dish into a memorable feast for your family and friends!
How to Store and Freeze Coconut Milk Braised Chicken
Fridge: Store leftovers in an airtight container for up to 4 days. Make sure to let the chicken cool before sealing to maintain its moisture.
Freezer: For longer storage, freeze portions in airtight containers for up to 3 months. Thaw overnight in the fridge before reheating.
Reheating: Gently reheat on the stovetop over low heat, adding a splash of coconut milk or water to maintain moisture and prevent drying out.
Room Temperature: Avoid keeping cooked Coconut Milk Braised Chicken at room temperature for more than 2 hours to prevent foodborne illness.
Make Ahead Options
These Coconut Milk Braised Chicken preparations are a fantastic way to save time on busy weeknights! You can marinate the chicken with the rub (coconut oil, ginger paste, lemongrass paste, and salt) up to 24 hours in advance, allowing the flavors to infuse deeply. Additionally, you can chop the aromatics (garlic, lime zest, and curry paste) and store them in an airtight container in the refrigerator for up to 3 days. When ready to cook, simply sear the marinated chicken and add the prepared aromatics with the coconut milk. This technique ensures your dish remains just as delicious and flavorful, providing you with a comforting meal with minimal effort when it’s time to serve!
Coconut Milk Braised Chicken Recipe FAQs
What type of chicken should I use for Coconut Milk Braised Chicken?
Absolutely! Using a whole chicken for this recipe is ideal, as it allows the meat to absorb the rich flavors of the coconut milk and braising spices. When selecting your chicken, look for one that is plump with an even color and no dark spots, as that indicates freshness. Organic or free-range chickens tend to have richer flavors and better texture.
How do I store leftovers from this dish?
Very easy! Store any leftover Coconut Milk Braised Chicken in an airtight container in the refrigerator for up to 4 days. Be sure to let the chicken cool fully before placing it in the fridge to help maintain moisture. When ready to enjoy again, simply reheat gently on the stovetop to keep it tender.
Can I freeze Coconut Milk Braised Chicken?
Yes, you can! To freeze, portion the chicken into airtight containers, ensuring to include some of the sauce for flavor. It can be stored in the freezer for up to 3 months. When you’re ready to enjoy it again, thaw overnight in the refrigerator. Then, to reheat, gently warm it on the stovetop over low heat, adding a splash of coconut milk or water to keep it moist.
What if my chicken isn’t tender after braising?
A common hiccup! If your chicken isn’t tender after the braising time, it may need more time in the pot. Simply cover it back up and let it braise for another 30 minutes, checking occasionally to ensure the liquid doesn’t evaporate completely. Also, ensure that the temperature is low enough for a gentle simmers, which helps break down the meat fibers for that melt-in-your-mouth texture.
Is Coconut Milk Braised Chicken suitable for people with allergies?
Great question! This dish is naturally gluten-free and dairy-free, making it suitable for many dietary needs. However, be cautious with the Thai green curry paste, as it can contain traces of allergens like peanuts or shellfish. Always check the label and opt for a brand that aligns with your dietary restrictions. If you’re unsure, you can replace it with homemade curry paste using safe ingredients.
How can I enhance the flavors while cooking?
Enhancing flavors is what cooking is all about! During the cooking process, consider adding chopped carrots or bell peppers to the pot when you’re adding the aromatics. This not only boosts nutrition but also adds depth to the sauce. Additionally, using freshly grated ginger and lemon zest instead of paste will elevate the dish with freshness that’s hard to resist!
Coconut Milk Braised Chicken for Comforting Thai Flavor
Ingredients
Equipment
Method
- Preheat your oven to 325°F (160°C).
- In a mixing bowl, combine the melted coconut oil, ginger paste, lemongrass paste, and fine sea salt until you achieve a pasty consistency.
- Pat the whole chicken dry with paper towels and apply the rub generously beneath the skin for maximum flavor.
- Sear the chicken in a large pot over medium heat until it turns a deep golden brown.
- Add the remaining ginger paste, lime zest, lime juice, minced garlic, and green curry paste to the pot; stir until fragrant.
- Pour in the coconut milk, place the chicken breast side up into the pot, cover, and braise gently in the oven for 2 hours.
- Remove the pot from the oven, let the chicken rest for 10 minutes, then carve and serve over rice with the coconut sauce drizzled on top.
Leave a Reply