
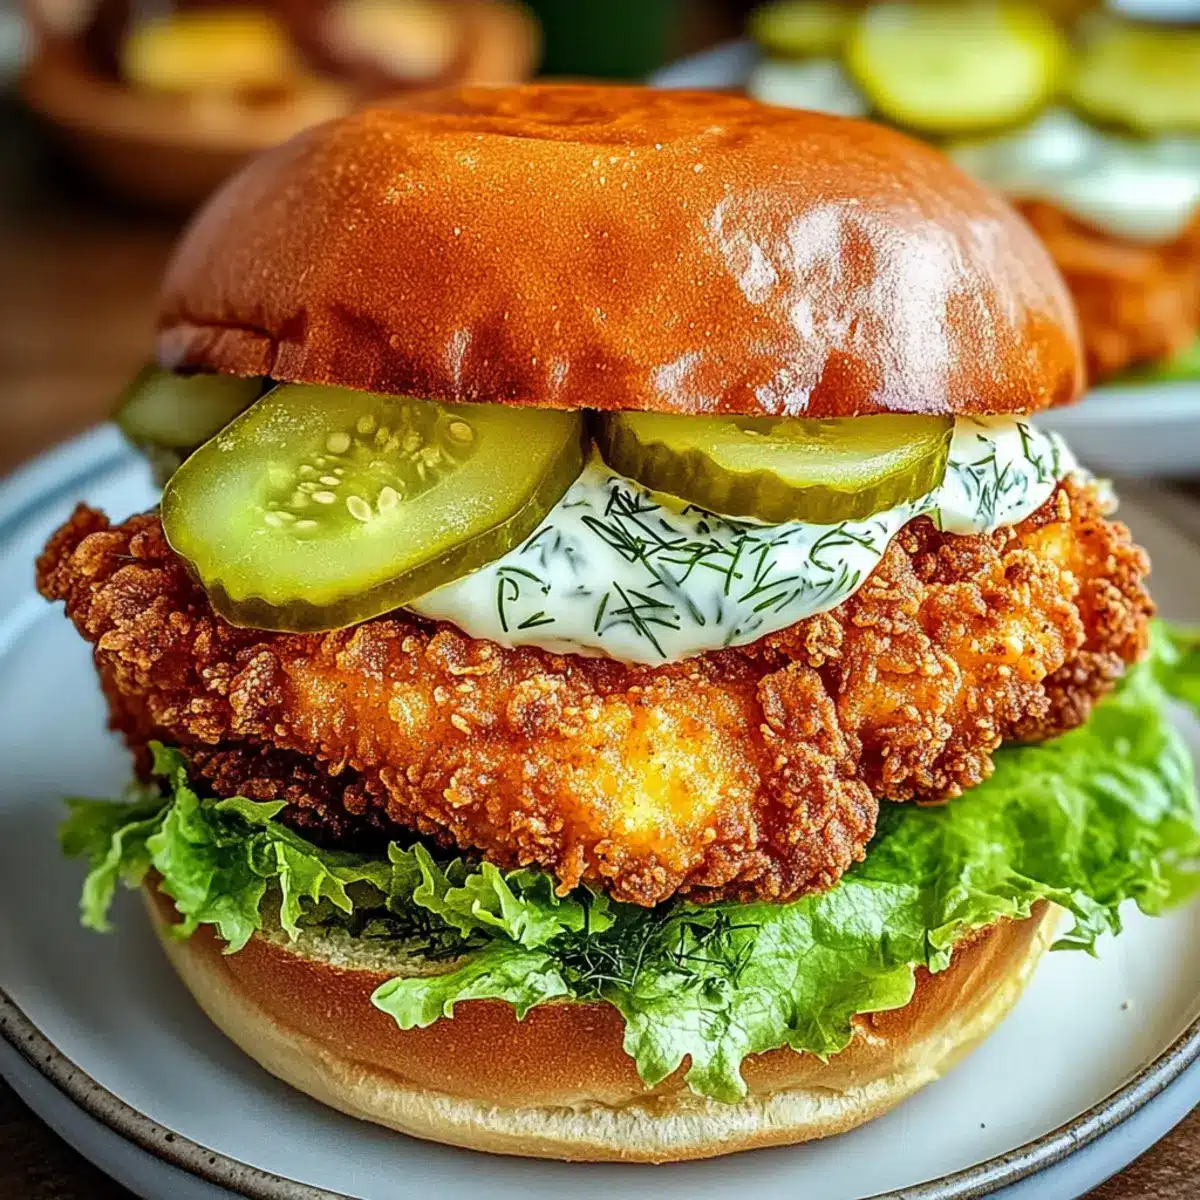
Crispy, golden chicken sandwiches are more than just a meal; they’re a celebration of comfort in every bite. The moment I take a bite into a Crispy Dill Chicken Sandwich, I’m transported to sunny picnics and casual backyard gatherings. This recipe elevates a classic chicken sandwich with a crunchy panko crust and a zesty dill mayo that creates a delightful balance of flavors. Not only is this easy lunch recipe perfect for satisfying cravings, but it’s also a fast dish to throw together during busy weekdays. Topped with fresh veggies nestled in a soft brioche bun, it’s a feast that promises to impress your friends and family. Are you ready to create a sandwich that redefines your lunch experience?
Why is this sandwich a must-try?
Irresistible Crunch: Each bite delivers a satisfying crisp with a panko coating that keeps you coming back for more.
Flavor Explosion: Tangy dill mayo enhances the juicy chicken, creating a delightful contrast that’s simply unforgettable.
Quick & Easy: This recipe gets you a gourmet sandwich in no time, perfect for busy days when you crave homemade goodness.
Versatile Meal: Pair it with sweet potato fries or a refreshing slaw for a well-rounded meal that impresses at any gathering.
Crowd-Pleaser: Ideal for family lunches or casual get-togethers, this sandwich is sure to impress with its gourmet flair—just like our delicious Healthy Baked Chicken!
Crispy Dill Chicken Sandwich Ingredients
Transform your lunch with these delightful ingredients!
For the Chicken
• Chicken Breasts – The star of the show, juicy and tender; swap for thighs for extra flavor.
• All-Purpose Flour – Helps coatings stick; substitute with whole wheat for a healthier touch.
• Salt – Essential for flavor enhancement and balance; never skip it!
• Black Pepper – A dash adds mild heat; adjust to your spice comfort level.
• Garlic Powder – Infuses warm, garlicky notes; fresh garlic provides bolder flavor.
• Onion Powder – Adds sweet and savory depth; fresh onion can change texture slightly.
• Dried Dill – Gives a refreshing herbaceous flavor; fresh dill is perfect for the mayo.
• Eggs – Binds the coating; use flax eggs for a delicious vegan alternative.
• Milk – Lightens the egg wash for a smooth coating; any non-dairy milk works too.
• Panko Breadcrumbs – Creates that perfect crunchy texture; regular breadcrumbs aren’t as crunchy.
For the Frying
• Vegetable Oil – Needed for frying to achieve crispiness; canola or peanut oil are great alternatives.
For the Sandwich
• Brioche Buns – Soft and slightly sweet, holding everything together; try whole wheat for a healthier version.
• Mayonnaise – Forms the creamy base for the dill sauce; vegan mayo is a simple swap.
• Fresh Dill – Brightens the mayo with herbal freshness; optional if you prefer less dill flavor.
• Lemon Juice – Adds a zesty kick that balances the mayo’s creaminess; lime juice works well too.
• Shredded Lettuce – Offers crunch and freshness; spinach or arugula can be a tasty substitute.
• Dill Pickle Slices – Adds a tangy bite; bread and butter pickles add sweetness for variety.
Ready to bring the Crispy Dill Chicken Sandwich to life? With this ingredient lineup, your lunch will never be the same again!
Step‑by‑Step Instructions for Crispy Dill Chicken Sandwich
Step 1: Prepare Chicken
Begin by slicing the chicken breasts in half horizontally to create thinner cutlets, about 1/2-inch thick. Using a meat mallet, gently pound each piece to ensure even cooking. This step is crucial for achieving that juicy texture in your Crispy Dill Chicken Sandwich, so take your time and ensure they’re uniform in thickness.
Step 2: Mix Coatings
In a shallow dish, combine all-purpose flour, salt, black pepper, garlic powder, onion powder, and dried dill. Stir these dry ingredients together until well mixed. This flour mixture will serve as the first layer of coating, providing flavor and help the other layers stick. Make sure it’s evenly blended to avoid any pockets of seasoning.
Step 3: Create Egg Wash
In a separate bowl, whisk together the eggs and milk until fully combined and the mixture is smooth. This egg wash serves as the adhesive for the delicious coatings to follow. The light texture will keep your chicken moist while frying, giving that satisfying crunch when you bite into your Crispy Dill Chicken Sandwich.
Step 4: Prepare Breadcrumbs
Spread the panko breadcrumbs evenly in another shallow dish. This will be the final coating for your chicken, creating that irresistible crispy texture. Ensure the breadcrumbs are evenly distributed, as they’ll give the chicken that delightful crunch you crave in your sandwich.
Step 5: Coat Chicken
Take each piece of chicken and first dredge it in the flour mixture, shaking off any excess. Next, dip the coated chicken in the egg wash, ensuring it’s fully covered before transferring it into the panko breadcrumbs. Press gently to adhere the breadcrumbs, creating a thick, crispy layer on each piece.
Step 6: Fry Chicken
In a large skillet, heat vegetable oil over medium-high heat until it reaches about 350°F. Carefully add the coated chicken to the hot oil, frying for 4-5 minutes on each side or until golden brown and crispy. You’ll know they’re done when they reach an internal temperature of 165°F. Remove the cooked chicken and place it on paper towels to drain excess oil.
Step 7: Make Dill Mayo
While the chicken fries, take a small bowl and combine mayonnaise, fresh dill, and lemon juice. Mix until smooth and all ingredients are well incorporated. This tangy dill mayo will not only enhance the flavor of your Crispy Dill Chicken Sandwich but will also add a creamy texture that complements the crunch.
Step 8: Toast Buns
To add an extra touch, lightly toast the brioche buns in a toaster or on a skillet for 1-2 minutes until they are golden brown. This step will enhance the overall flavor and provide a sturdy base for your sandwich. A warm, toasty bun just elevates the experience while keeping everything together beautifully.
Step 9: Assemble Sandwich
Spread the dill mayo generously on the inner sides of both toasted brioche buns. Layer shredded lettuce on the bottom bun, followed by the crispy chicken piece. Top with tangy dill pickle slices for that perfect crunch and a burst of flavor. Place the top bun on your Crispy Dill Chicken Sandwich and serve while warm!
What to Serve with Crispy Dill Chicken Sandwich
Transform your lunch experience into a delightful feast with complementary sides that brighten every bite.
-
Sweet Potato Fries: Deep-fried or baked, these crispy fries bring a sweet balance that pairs beautifully with tangy dill mayo.
-
Crisp Coleslaw: A fresh, crunchy slaw adds a vibrant contrast. The tangy dressing enhances the sandwich’s flavors while keeping things light.
-
Garden Salad: A simple mix of greens, cherry tomatoes, and vinaigrette brings freshness and balances the richness of the sandwich, creating a harmonious plate.
-
Pickle Chips: Crunchy and tangy, pickle chips echo the flavors of the sandwich’s dill, introducing that familiar taste in a playful form.
-
Garlic Butter Corn on the Cob: Tender corn, brushed with garlic butter, complements the chicken’s flavors seamlessly. The sweetness enhances the rich panko crust.
-
Iced Tea Lemonade: Quench your thirst with this refreshing drink that adds a zesty punch, highlighting the dill flavors without overpowering them.
-
Chocolate Chip Cookies: For dessert, these classic cookies provide a comforting finish, with gooey chocolate chips adding a sweet note to your meal’s conclusion.
-
Fruit Side Salad: A medley of seasonal fruits brightens the meal. The natural sweetness and juiciness offer a fresh contrast to the crispy sandwich.
Make Ahead Options
Planning your Crispy Dill Chicken Sandwich ahead of time can save you precious moments during busy weekdays! You can prepare the chicken (coated but uncooked) and refrigerate it in an airtight container for up to 24 hours. Additionally, the dill mayo can be mixed and stored in the fridge for up to a week, allowing the flavors to meld beautifully. When you’re ready to serve, fry the chicken directly from the fridge to ensure it stays crispy while cooking. Toast the buns right before assembling to maintain their soft texture. With these make-ahead preparations, your lunch will come together effortlessly, delivering restaurant-quality results with minimal effort!
Variations & Substitutions for Crispy Dill Chicken Sandwich
Feel free to get creative with this recipe and make it your own; there are endless possibilities to enhance your Crispy Dill Chicken Sandwich!
-
Chicken Thighs: Swap chicken breasts for thighs for a juicier, richer flavor. The tender meat adds moisture and enhances the sandwich experience tremendously.
-
Vegan Alternative: Use chickpea patties or tofu instead of chicken for a delightful plant-based version. Marinate tofu in dill and lemon juice for additional flavor, keeping it fresh and satisfying.
-
Gluten-Free: Substitute panko breadcrumbs with gluten-free breadcrumbs or crushed rice cereal for a satisfying crunch. This way, everyone can enjoy this delicious sandwich without compromising on texture.
-
Whole Wheat Buns: Choose whole wheat or sprouted buns instead of brioche for a healthier, hearty option. These add a nuttier flavor and pair perfectly with the dill mayo.
-
Extra Veggie Crunch: Add sliced tomatoes, cucumbers, or bell peppers for an extra layer of freshness and texture. A simple addition, yet it elevates the balance of flavors beautifully.
-
Spicy Kick: For some heat, incorporate sliced jalapeños into your sandwich or mix some sriracha into the dill mayo. This spicy twist will tantalize your taste buds and awaken your senses!
-
Creamy Twist: Swap out regular mayo for Greek yogurt to lighten up the sauce while maintaining a creamy texture. It’s an easy way to sneak in some protein and probiotics!
-
Herb Variations: Mix fresh herbs like parsley or basil into the mayo for a unique flavor profile. Each herb adds its own charming depth to complement the dill beautifully.
Explore these variations and create a unique Crispy Dill Chicken Sandwich that suits your cravings! You might also enjoy pairing this with our flavorful Spicy Korean Chicken Wings with Gochujang Sauce, or try a refreshing slaw on the side.
Expert Tips for Crispy Dill Chicken Sandwich
-
Pound Evenly: Ensure chicken is pounded to an even thickness; this promotes uniform cooking and prevents some parts from drying out while others are undercooked.
-
Oil Temperature: Monitor oil temperature closely—ideally, it should be 350°F. Too hot can burn the breadcrumbs, while too cool results in soggy chicken.
-
Drain Excess Oil: After frying, allow chicken to rest on paper towels. This will absorb excess oil, ensuring your Crispy Dill Chicken Sandwich is not greasy.
-
Prepping Ahead: Consider making the dill mayo sauce in advance. This allows the flavors to meld beautifully, intensifying the taste of your sandwich.
-
Breadcrumb Variations: If using regular breadcrumbs, remember they won’t provide the same crunch as panko. Stick with panko for that superb crispy texture!
How to Store and Freeze Crispy Dill Chicken Sandwich
Fridge: Store the components (fried chicken, buns, toppings) separately in airtight containers. The chicken will remain fresh for up to 3 days, while the dill mayo lasts about a week.
Freezer: For best results, freeze the fried chicken in a single layer before transferring to a freezer-safe bag. It can last up to 3 months. Reheat directly from frozen for a quick meal.
Reheating: When ready to enjoy, reheat the chicken in an oven at 400°F for about 15-20 minutes until crispy. Assemble the sandwich fresh with thawed buns and toppings for the best flavor experience.
Assembly Tip: For the freshest taste, consider preparing the sandwich just before serving, rather than freezing the assembled Crispy Dill Chicken Sandwich.
Crispy Dill Chicken Sandwich Recipe FAQs
What type of chicken is best for this sandwich?
Absolutely! I recommend using chicken breasts for their tenderness, but you can also use thighs for an even juicier bite. Just keep in mind that thighs will add a slightly different flavor profile to your Crispy Dill Chicken Sandwich.
How should I store leftover chicken and sandwich components?
To maintain the best quality, store the components (fried chicken, buns, and toppings) separately in airtight containers. Your fried chicken will last up to 3 days in the fridge, while the dill mayo can last about a week. Remember, it’s best to assemble the sandwich just before serving for optimal freshness!
Can I freeze the fried chicken?
Yes! For freezing, I recommend placing the fried chicken on a baking sheet in a single layer for a couple of hours. Once frozen, transfer it to a freezer-safe bag. It can last up to 3 months. To reheat, pop it in a preheated oven at 400°F for about 15-20 minutes until crispy, and enjoy it fresh with your favorite toppings!
Why is my chicken not crispy when I fry it?
Very good question! If your chicken isn’t turning out crispy, it might be due to the oil temperature being too low. Make sure the oil reaches 350°F before adding the chicken. Also, ensure you’re using panko breadcrumbs, as they create that unbeatable crunch. Finally, allowing the chicken to drain on paper towels after frying helps get rid of excess oil, keeping it crispy!
What if I have a dill allergy?
I completely understand; you can definitely substitute the dried dill in the coating with other herbs like thyme or oregano for flavor. Alternatively, if you want a twist on the mayo, consider using lemon zest or a mix of other herbs that you enjoy. The Crispy Dill Chicken Sandwich is versatile, so feel free to adapt it to your preference!
Crispy Dill Chicken Sandwich That Redefines Lunch Delight
Ingredients
Equipment
Method
- Slice the chicken breasts in half horizontally to create thinner cutlets, about 1/2-inch thick.
- In a shallow dish, combine all-purpose flour, salt, black pepper, garlic powder, onion powder, and dried dill.
- In a separate bowl, whisk together the eggs and milk until fully combined.
- Spread the panko breadcrumbs evenly in another shallow dish.
- Dredge each piece of chicken in the flour mixture, dip in the egg wash, and coat with panko breadcrumbs.
- Heat vegetable oil in a large skillet over medium-high heat, then fry chicken for 4-5 minutes on each side.
- Combine mayonnaise, fresh dill, and lemon juice in a bowl for dill mayo.
- Lightly toast the brioche buns in a toaster or on a skillet for 1-2 minutes.
- Spread dill mayo on the inner sides of both toasted brioche buns, layer shredded lettuce, fried chicken, and dill pickles.
Leave a Reply