
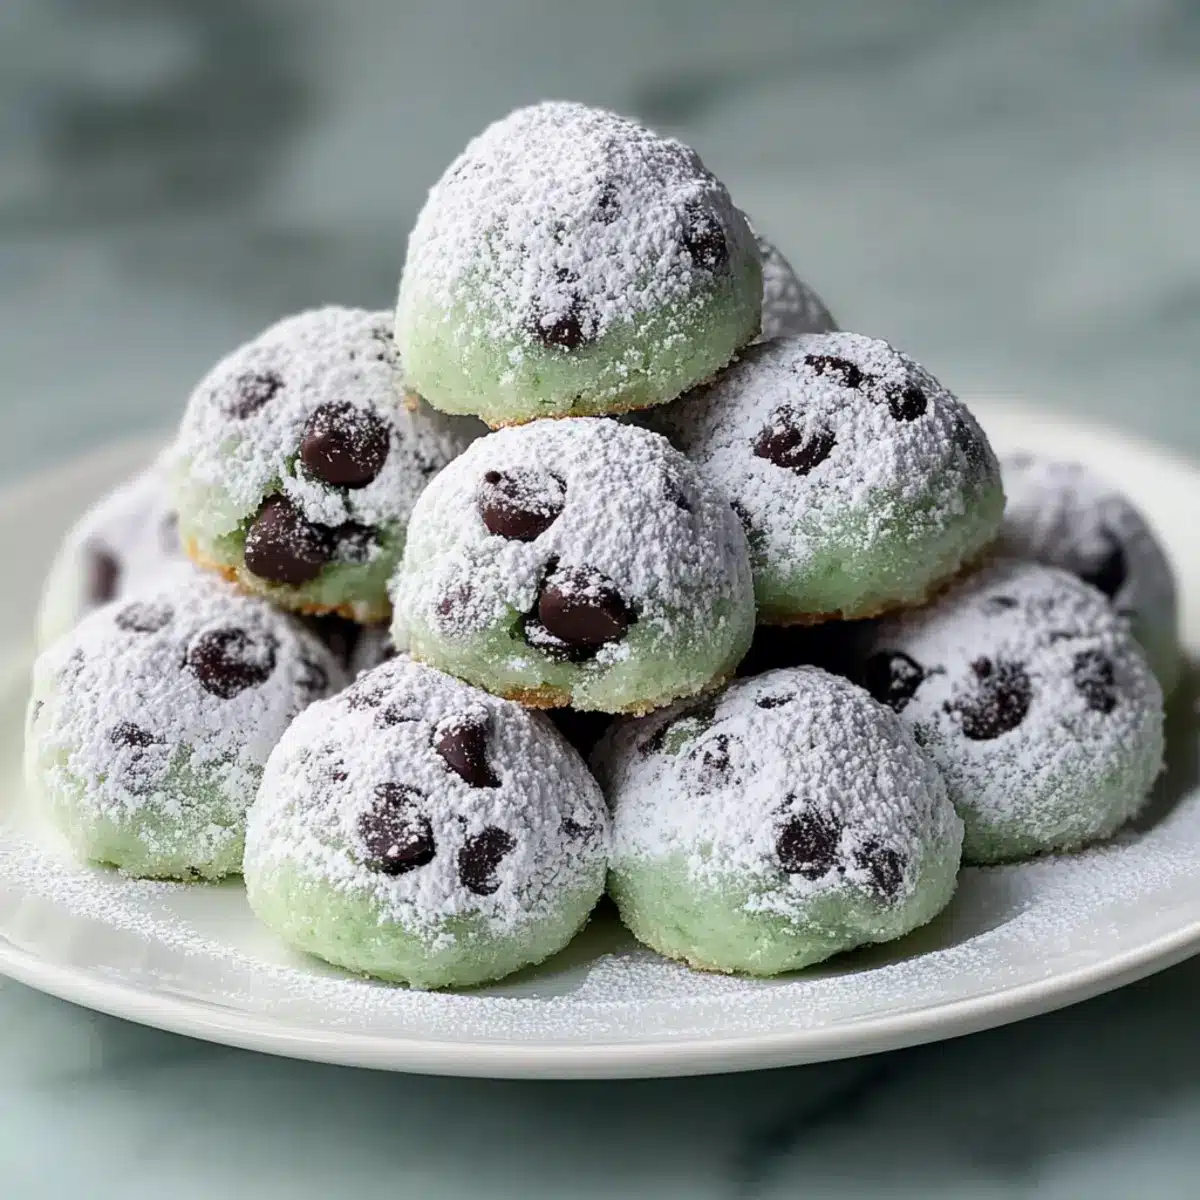
As I scrolled through festive dessert ideas the other day, one caught my eye that instantly transported me back to a winter wonderland—Mint Chocolate Chip Snowball Cookies. These little bites of joy promise not just a melt-in-your-mouth texture but a refreshing burst of mint harmonized with rich chocolate. The beauty of this recipe is its simplicity, making it perfect for anyone eager to escape the mundane and rediscover the pleasure of homemade treats. Whether you’re hosting a holiday gathering or looking for a thoughtful gift, these cookies fit the bill with ease. Plus, they freeze beautifully, so you can whip up a batch in advance and savor the sweetness whenever you wish! Ready to create your own delightful snowballs this season?
Why Are These Cookies a Must-Try?
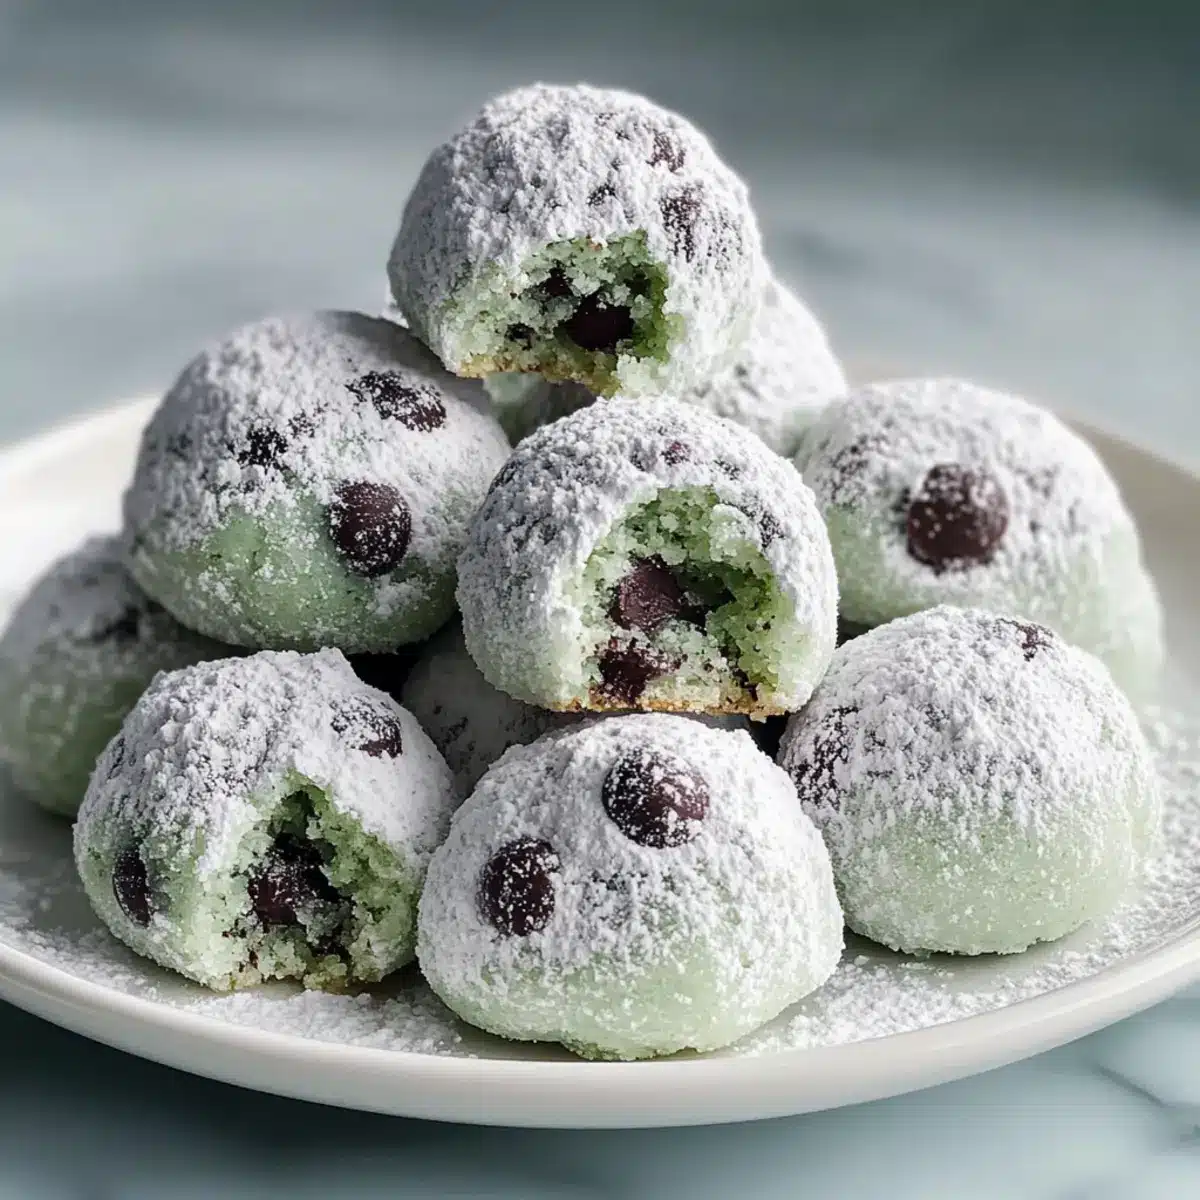
Melt-in-your-mouth texture: The soft, crumbly consistency of these cookies will bring a delightful experience with each bite, making them a holiday favorite.
Fresh minty flavor: A vibrant burst of peppermint paired with rich chocolate creates an irresistibly refreshing treat.
Easy to make: With minimal ingredients and simple steps, these Mint Chocolate Chip Snowball Cookies are perfect even for beginner bakers!
Festive appearance: Dusted in powdered sugar, these cookies resemble little snowballs, perfect for holiday parties or gifting.
Versatile variations: Get creative by swapping chocolate types or adding crushed candy canes for a fun twist! Paired with a cup of hot cocoa, they’re the ultimate festive delight. Plus, if you love cookies, don’t forget to try the Twix Style Cookies for a different flavor profile!
Mint Chocolate Chip Snowball Cookies Ingredients
• Get ready to create delightful treats!
For the Dough
- Unsalted Butter – 1 cup (2 sticks) adds rich tenderness; if using salted butter, reduce added salt.
- Granulated Sugar – 1/2 cup sweetens and helps achieve that perfect tender texture.
- Pure Vanilla Extract – 1 teaspoon enhances the depth of flavors in every bite.
- Peppermint Extract – 1 teaspoon provides the refreshing signature mint flavor; adjust to taste for more minty goodness.
- All-Purpose Flour – 2 1/4 cups forms the core structure; swap for a gluten-free blend if needed.
- Salt – 1/4 teaspoon balances the sweetness and enhances all flavors.
- Mini Chocolate Chips – 1 cup enriches each cookie with chocolatey goodness; feel free to substitute with your favorite chocolate type.
For the Coating
- Powdered Sugar – 1 1/2 cups (divided) gives that snowy, festive appearance; an essential ingredient for rolling!
- Optional: Green Food Coloring – Add a splash of color for a fun holiday twist!
These delicious Mint Chocolate Chip Snowball Cookies will be a hit on your dessert table!
Step‑by‑Step Instructions for Mint Chocolate Chip Snowball Cookies
Step 1: Preheat and Prepare
Begin by preheating your oven to 350°F (175°C). While it warms up, line your baking sheets with parchment paper to prevent sticking and ensure easy cleanup. This is the perfect stage to get your kitchen ready for the delightful Mint Chocolate Chip Snowball Cookies you’re about to create!
Step 2: Mix Dry Ingredients
In a medium bowl, whisk together 2 1/4 cups of all-purpose flour and 1/4 teaspoon of salt until well combined. This step not only blends the ingredients but also aerates the flour, ensuring a light texture in your cookies. Set this mixture aside as you prepare the buttery base for your flavorful dough.
Step 3: Cream Butter and Sugar
In a large mixing bowl, cream 1 cup of softened unsalted butter and 1/2 cup of granulated sugar together using an electric mixer on medium speed. Beat this mixture until it becomes light and fluffy—about 3-4 minutes. Then, add in 1 teaspoon of pure vanilla extract and 1 teaspoon of peppermint extract. If you like—now’s the time to add a few drops of green food coloring for a festive touch!
Step 4: Combine Dry with Wet
Gradually add the flour and salt mixture to your creamy butter mixture. Mix on low speed until just combined, which will help maintain that tender texture in your Mint Chocolate Chip Snowball Cookies. Be careful not to overmix—this step is key for achieving perfectly soft cookies.
Step 5: Fold in Chocolate Chips
Gently fold in 1 cup of mini chocolate chips using a spatula or wooden spoon. This ensures even distribution of chocolate throughout the dough, creating delightful pockets of sweetness in each cookie. Once incorporated, it’s time to chill the dough for that classic snowball texture!
Step 6: Chill the Dough
Cover the mixing bowl with plastic wrap or transfer the dough into an airtight container. Refrigerate the cookie dough for at least 30 minutes to 1 hour. Chilling helps the cookies maintain their shape while baking and allows the flavors to meld beautifully together.
Step 7: Shape the Cookies
After chilling, scoop out tablespoon-sized portions of dough and roll them into 1-inch balls. Place them on your prepared baking sheets, spacing them about 2 inches apart. This ensures even baking, allowing room for the Mint Chocolate Chip Snowball Cookies to spread slightly without crowding each other.
Step 8: Bake to Perfection
Bake the cookies in your preheated oven for 10-12 minutes until the edges are lightly golden, but the centers remain pale. Keep an eye on them, as cookies should not brown too much to maintain their melt-in-your-mouth quality. Once perfect, remove them from the oven and let them cool on the baking sheets for a few minutes.
Step 9: Roll in Powdered Sugar
While the cookies are still warm, roll each one in 1 cup of powdered sugar until evenly coated. The warm dough will help the sugar stick beautifully, creating that charming snowy appearance. Allow the cookies to cool completely before giving them a second roll in powdered sugar for an extra festive touch!
Step 10: Serve and Enjoy
Your Mint Chocolate Chip Snowball Cookies are now ready to be enjoyed! Serve them alongside a cup of hot cocoa or coffee for a cozy treat. Store any leftovers in an airtight container at room temperature for up to a week, making it easy to savor their delightful flavor at any time during the holiday season.
Mint Chocolate Chip Snowball Cookies Variations
Feel free to make these delightful cookies your own with a few simple swaps or creative twists!
- Dairy-Free: Use coconut oil or dairy-free butter in place of unsalted butter for a vegan version. They’ll still be rich and tender!
- Gluten-Free: Substitute all-purpose flour with a gluten-free flour blend for a gluten-free treat that everyone can enjoy lavishly.
- Chocolate Swap: Experiment with dark, milk, or even white chocolate chips for varied taste profiles that can surprise your senses.
- Extra Crunch: Add crushed candy canes or chopped nuts like pecans or walnuts for added texture and a holiday crunch!
- Minty Freshness: If you prefer a milder mint flavor, reduce peppermint extract to ½ teaspoon while still keeping the refreshing essence.
- Cocoa Coating: Roll cookies in a mix of cocoa powder and powdered sugar instead of just powdered sugar for a deliciously chocolatey twist.
- Boozy Flavoring: A splash of peppermint schnapps can add a fun, adult twist that elevates the festive delight; just use carefully!
- Festive Coloring: Use different food coloring to match holiday themes or personalize the appearance of your cookies for special occasions.
Whether you follow the classic recipe or try one of these variations, these cookies are sure to become a cherished favorite. Don’t forget to explore the delicious Triple Chocolate Mousse for even more decadent sweetness!
How to Store and Freeze Mint Chocolate Chip Snowball Cookies
Room Temperature: Store cookies in an airtight container at room temperature for up to 7 days. This keeps them fresh and ensures you can enjoy their delightful texture anytime!
Fridge: For longer freshness, you can store cookies in the fridge for up to 2 weeks. Just be sure to seal them in an airtight container to prevent them from drying out.
Freezer: Freeze Mint Chocolate Chip Snowball Cookies for up to 3 months. Place them in a single layer on a baking sheet to freeze them initially, then transfer to a freezer-safe container or bag.
Reheating: When you’re ready to enjoy the frozen cookies, simply thaw them at room temperature for a few hours. For a warm treat, pop them in a preheated oven at 350°F (175°C) for about 5-7 minutes!
What to Serve with Mint Chocolate Chip Snowball Cookies
Treat your guests to a delightful feast that complements the fresh mint and chocolate sweetness of these festive cookies!
- Hot Cocoa: The rich flavors of hot cocoa pair beautifully, creating a comforting, cozy atmosphere perfect for winter gatherings.
- Coffee or Espresso: A warm cup enhances the minty notes in the cookies, making each bite even more satisfying.
- Vanilla Ice Cream: The creaminess contrasts with the cookies’ texture, adding an indulgent element to every mouthful.
- Chocolate Fondue: Dip each cookie in warm chocolate for a luxurious twist that’s sure to impress.
- Candied Nuts: Their crunchy texture offers a delightful contrast to the soft, melt-in-your-mouth cookies.
Indulge in a plate of these Snowball Cookies with your favorite beverage and enjoy the delightful symphony of textures and flavors that will warm your heart this holiday season!
Expert Tips for Mint Chocolate Chip Snowball Cookies
- Use Room Temperature Butter: Ensure your butter is softened to room temperature, not melted, for the ideal creamy consistency that helps achieve a tender cookie.
- Chill the Dough: Refrigerating the dough for at least 30 minutes is crucial to avoid overly flat cookies. This step enhances the snowball shape!
- Watch the Bake Time: Keep a close eye on your cookies; they should remain pale in color in the center. Overbaking can lead to a dry result.
- Roll Right Away: Roll cookies in powdered sugar while still warm for better adhesion. Don’t forget to give them a second dusting for that perfect snowy finish!
- Experiment with Add-Ins: Feel free to get creative with variations! Try adding crushed candy canes or different types of chocolate chips for unique flavor twists in your Mint Chocolate Chip Snowball Cookies.
Make Ahead Options
These Mint Chocolate Chip Snowball Cookies are perfect for busy home cooks looking to save time! You can prepare the cookie dough up to 24 hours in advance by chilling it in the refrigerator. Simply follow the recipe up to the point of chilling, then cover the bowl with plastic wrap or transfer the dough to an airtight container. This not only helps the flavors meld but also maintains their melt-in-your-mouth quality. When you’re ready to bake, scoop and shape the dough into balls as instructed, then bake as usual for delicious results that taste freshly made! Enjoy the ease of homemade cookies without the last-minute stress!
Mint Chocolate Chip Snowball Cookies Recipe FAQs
How do I select ripe ingredients?
Absolutely! For the best Mint Chocolate Chip Snowball Cookies, ensure that your butter is softened to room temperature for a creamy consistency. When it comes to extracts, opt for pure vanilla and peppermint extracts rather than imitation for a richer flavor. Mini chocolate chips should be of good quality; check the expiration date and choose a brand you love to ensure delightful pockets of chocolate in every bite!
What’s the best way to store these cookies?
Very good question! Store your Mint Chocolate Chip Snowball Cookies in an airtight container at room temperature for up to 7 days. This helps maintain their soft texture and keeps them fresh. If you’re keeping them in the fridge, they can last for up to 2 weeks, but remember to seal them well to prevent drying out. A handy tip is to place parchment paper between layers of cookies to prevent sticking!
Can I freeze Mint Chocolate Chip Snowball Cookies?
Certainly! To freeze your cookies, first place them in a single layer on a baking sheet and freeze for about an hour until firm. Then, transfer them to a freezer-safe container or bag, ensuring to remove as much air as possible to avoid freezer burn. They will be good for up to 3 months! When you’re ready to enjoy, simply thaw them at room temperature for a few hours, or for a warm treat, reheat in your preheated oven at 350°F (175°C) for 5-7 minutes.
What if my cookies turn out too flat?
If you find that your Mint Chocolate Chip Snowball Cookies are too flat, it could be due to a few common reasons. First, make sure that your butter is softened, not melted; melted butter will lead to spread out cookies. Additionally, chilling the dough for at least 30 minutes is key to maintaining the snowball shape, as it allows the fats to firm up. Lastly, ensure that you’re measuring your flour correctly—too little flour can also cause flat cookies, so I recommend using a kitchen scale for accuracy!
Are there any dietary considerations I should keep in mind?
Absolutely! If you have dietary restrictions, you can easily adapt this recipe. For a gluten-free option, simply substitute the all-purpose flour with a gluten-free blend. When it comes to allergies, be cautious with mint extracts, as some people may have sensitivities. Additionally, always check the labels on your chocolate chips to avoid any dairy ingredients if you’re looking for a dairy-free or vegan version. If you’re baking for pets, ensure none of the ingredients—like chocolate—are harmful to them!
Can I add other flavors or ingredients?
Very much! Feel free to get creative with your Mint Chocolate Chip Snowball Cookies. You can experiment by incorporating different types of chocolate chips, such as dark or white chocolate. Adding crushed candy canes or even a sprinkle of sea salt on top before baking can elevate the flavor profile and make for a delightful holiday treat! Enjoy the process and make them your own!
Melt-in-Your-Mouth Mint Chocolate Chip Snowball Cookies
Ingredients
Equipment
Method
- Preheat your oven to 350°F (175°C) and line baking sheets with parchment paper.
- In a medium bowl, whisk together 2 1/4 cups of all-purpose flour and 1/4 teaspoon of salt until combined. Set aside.
- In a large bowl, cream 1 cup of softened unsalted butter and 1/2 cup of granulated sugar until light and fluffy, about 3-4 minutes. Mix in 1 teaspoon of pure vanilla extract and 1 teaspoon of peppermint extract. Optionally add green food coloring.
- Gradually add the flour and salt mixture to the butter mixture, mixing on low speed until just combined.
- Gently fold in 1 cup of mini chocolate chips.
- Cover the bowl and refrigerate the dough for at least 30 minutes to 1 hour.
- Scoop tablespoon-sized portions of dough and roll them into 1-inch balls. Place on baking sheets, spaced about 2 inches apart.
- Bake for 10-12 minutes until edges are golden and centers remain pale. Remove from oven and let cool slightly.
- While warm, roll each cookie in 1 cup of powdered sugar until coated. Allow to cool completely before rolling again in powdered sugar.
- Serve and enjoy with hot cocoa or coffee, and store leftovers in an airtight container for up to a week.
Leave a Reply