
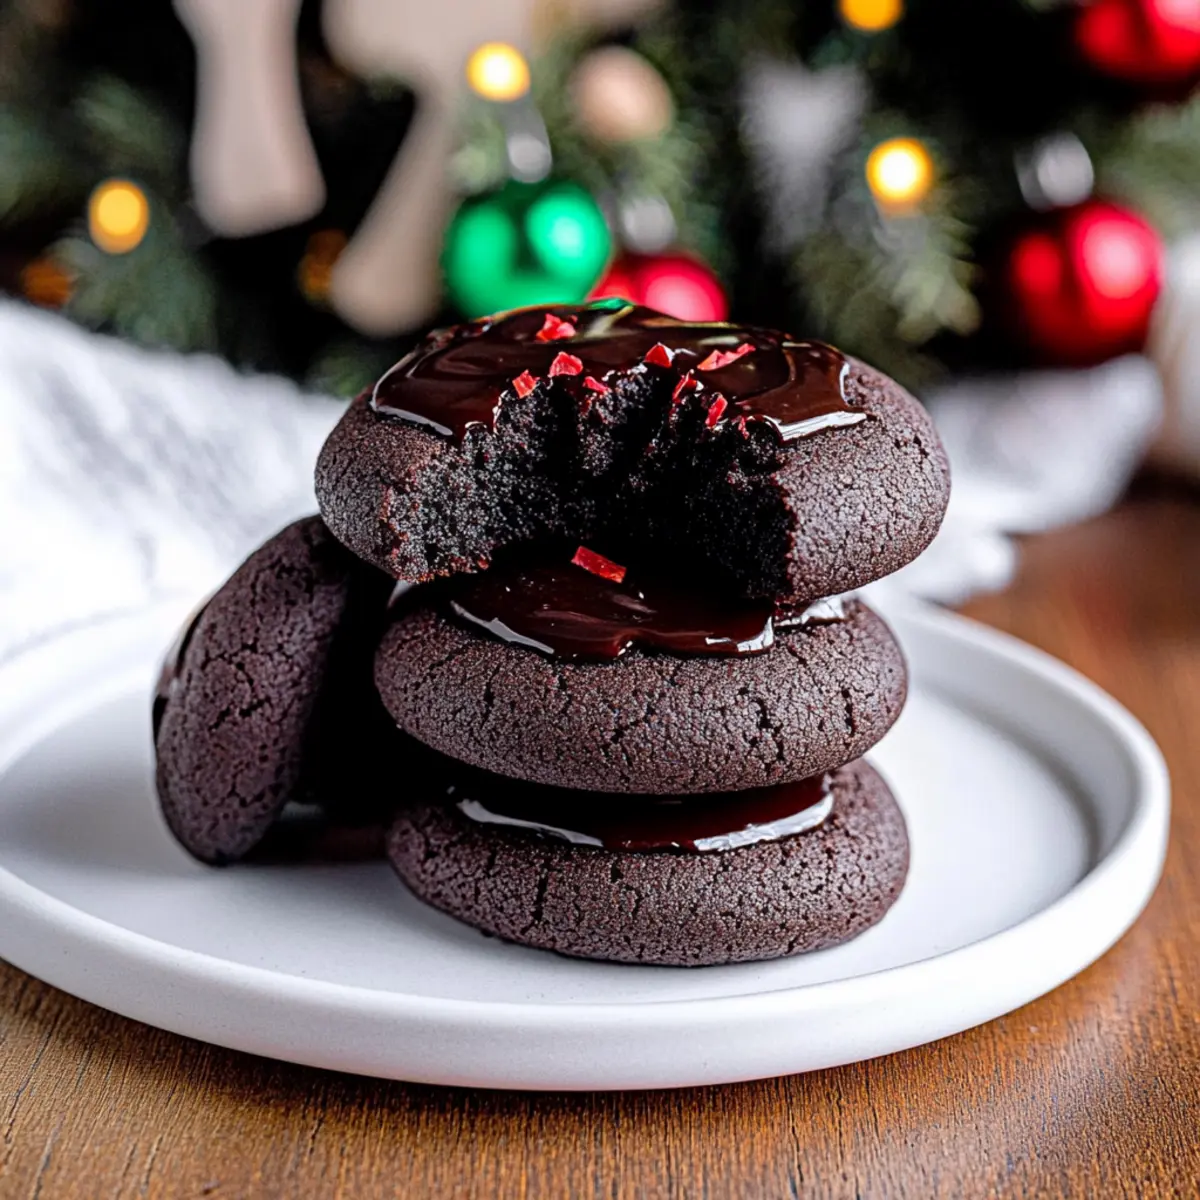
As the scent of melting chocolate wafts through the air, I can’t help but feel a wave of warmth wash over me—just like a cozy hug on a chilly day. These Chewy Chocolate Thumbprint Cookies are my go-to for spreading joy during the holiday season. Not only are they easy to whip up with just a handful of ingredients, but their rich, fudgy texture coupled with a delicious silky ganache filling makes them a true crowd-pleaser. Whether you’re hosting a festive gathering or simply treating yourself after a long day, these cookies offer that perfect homemade comfort. So, who’s ready to become the star baker this year?
Why are Chocolate Thumbprint Cookies irresistible?
Indulgence at Its Best: These cookies boast a rich, fudgy texture that melts in your mouth, making every bite a delightful experience.
Easy Baking: You don’t need to be a master chef to whip these up—just a few simple steps and you’re on your way to a delicious treat!
Perfect for Any Occasion: Whether it’s a holiday celebration or a cozy night in, these cookies are a sweet way to bring joy and share love with friends and family.
Versatile Treats: Don’t be shy! You can play around with fillings—try a mint ganache for a twist or enjoy them as they are, just like in my Triple Chocolate Mousse cake.
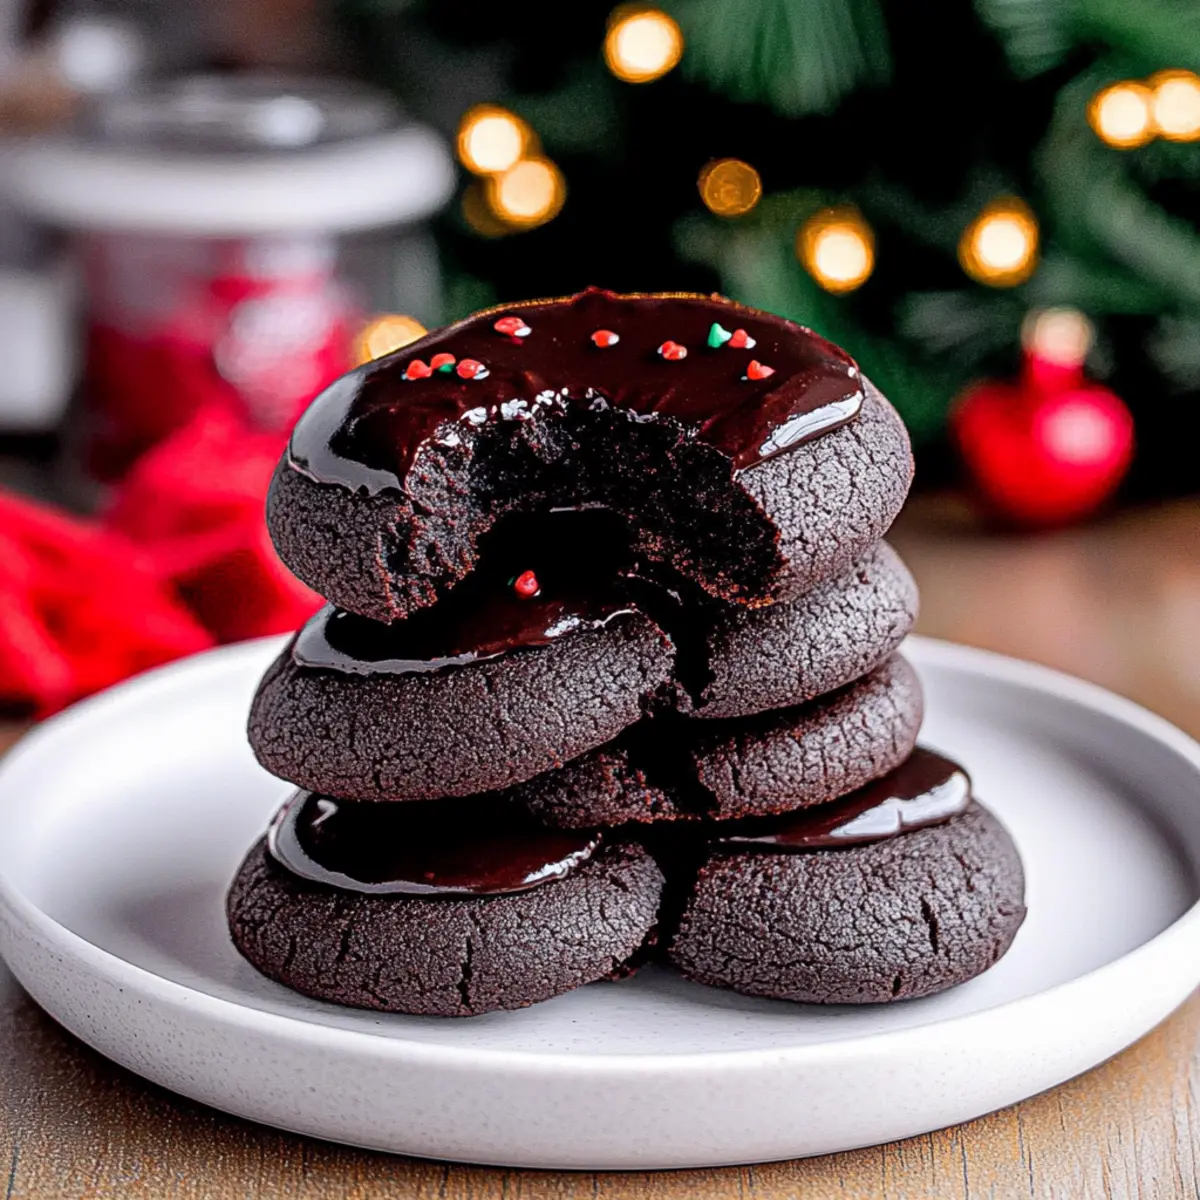
Impressive Presentation: Topped with colorful sprinkles or crushed candy canes, they make for stunning gifts or eye-catching desserts at any gathering!
Chocolate Thumbprint Cookies Ingredients
For the Cookies
- All-Purpose Flour – Provides structure; ensure you spoon and level it for accuracy.
- Cocoa Powder (Dutch Process) – Adds a deep chocolate flavor; unsweetened can be a substitute but may change the taste slightly.
- Salt – Essential to enhance flavor; don’t skip this ingredient!
- Baking Powder – Helps achieve that chewy texture; necessary for the cookies to rise perfectly.
- Unsalted Butter – Brings richness and moisture; margarine can be substituted but may alter the taste.
- Light Brown Sugar – Adds sweetness and moisture for a deeper flavor profile; granulated sugar can work in a pinch but affects texture.
- Granulated White Sugar – Balances the sweetness; consider using more brown sugar for a chewier experience.
- Egg Yolks – Provide richness; avoid using egg whites for this recipe to achieve the best results.
- Vanilla Bean Paste/Extract – Imparts depth of flavor; pure vanilla extract makes a great substitute.
For the Ganache
- Semi-Sweet Chocolate Chips – Key for creating that rich ganache; dark chocolate can enhance the flavor if desired.
- Heavy Whipping Cream – Mixes with chocolate chips for a creamy ganache; light cream can replace it but may affect richness.
For Decoration
- Nonpareils Sprinkles (optional) – Adds a festive touch; crushed candy canes make a delightful seasonal substitute.
Dive into the delightful world of Chocolate Thumbprint Cookies that are not only delicious but bring warmth and joy to every occasion!
Step‑by‑Step Instructions for Chocolate Thumbprint Cookies
Step 1: Prepare Baking Sheets
Start by lining two baking sheets with parchment paper to prevent sticking and ensure easy cleanup. This initial step will make your chocolate thumbprint cookies a breeze to transfer once they’re ready to bake. Set the sheets aside as you move on to mixing your dry ingredients.
Step 2: Mix Dry Ingredients
In a medium bowl, whisk together 1 cup of all-purpose flour, ⅓ cup of Dutch-processed cocoa powder, ¼ teaspoon of salt, and ½ teaspoon of baking powder. Stir until well combined, ensuring there are no lumps. This dry mixture is crucial for the foundation of your cookies, so take your time to thoroughly mix.
Step 3: Cream Butter and Sugars
In a large mixing bowl, cream together ½ cup of softened unsalted butter, ½ cup of light brown sugar, and ¼ cup of granulated sugar using an electric mixer. Beat the mixture for about 2 minutes until it becomes light and fluffy, showcasing a pale color. This step adds richness and helps incorporate air, giving your chocolate thumbprint cookies a nice rise.
Step 4: Incorporate Wet Ingredients
Add in 2 egg yolks and 1 teaspoon of vanilla bean paste to your creamed mixture. Mix on medium speed until combined, allowing the batter to become airy and fluffy. This integration not only enhances the flavor but also enriches the texture, contributing to the gooey center of your cookies.
Step 5: Combine Mixtures
Gradually introduce the dry ingredients into the wet mixture, mixing just until combined. Avoid overmixing, as this can lead to dense cookies. A smooth, slightly thick dough should form, perfectly setting the stage for shaping your chocolate thumbprint cookies.
Step 6: Form Cookies
Using a cookie scoop, drop heaping tablespoons of dough onto the prepared baking sheets, spacing them about 2 inches apart. Roll each piece into a ball, then use a ¼ teaspoon to create an indent in the center of each cookie. This is where the silky ganache will nestle, so make sure your thumbprints are deep enough.
Step 7: Chill Dough
Refrigerate the indented cookies for at least 1 hour. Chilling helps the dough firm up, ensuring your chocolate thumbprint cookies retain their shape during baking. While the dough chills, you can prepare your oven and ganache ingredients for the next steps.
Step 8: Preheat Oven
Preheat your oven to 350°F (175°C). While it’s heating, enjoy the anticipation of those delicious chocolate thumbprint cookies to come. Ensuring your oven is at the right temperature will help achieve perfectly baked cookies.
Step 9: Bake Cookies
Once the oven is preheated, bake the cookies for 9–11 minutes, or until they are slightly firm to the touch. Be sure to press the centers lightly again with the ¼ teaspoon while they are warm to maintain the perfect indentation for filling.
Step 10: Cool and Prepare Ganache
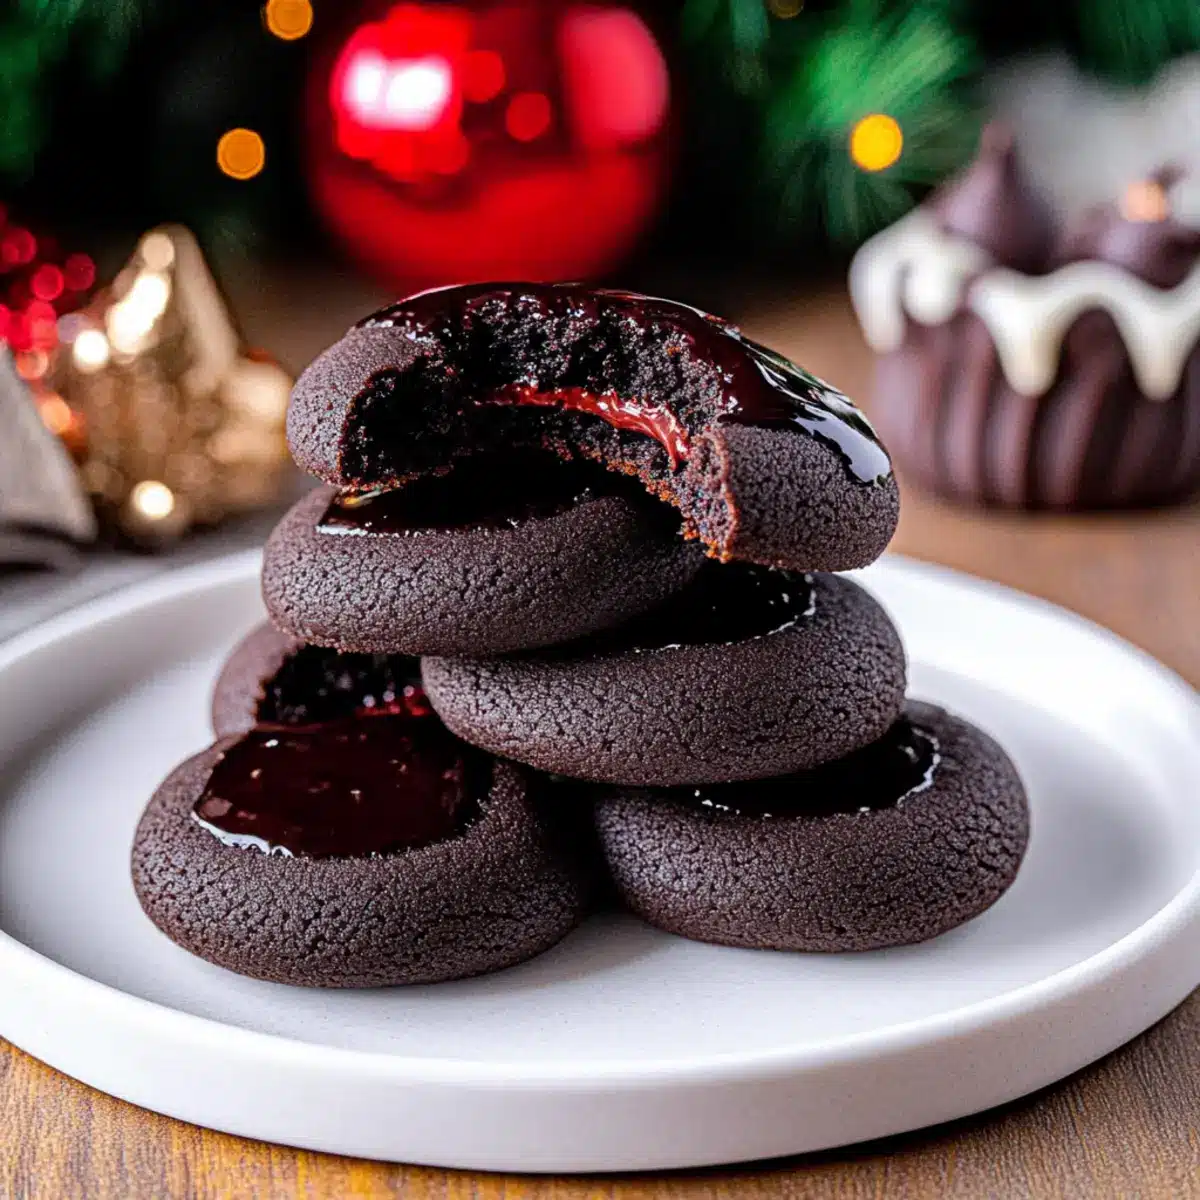
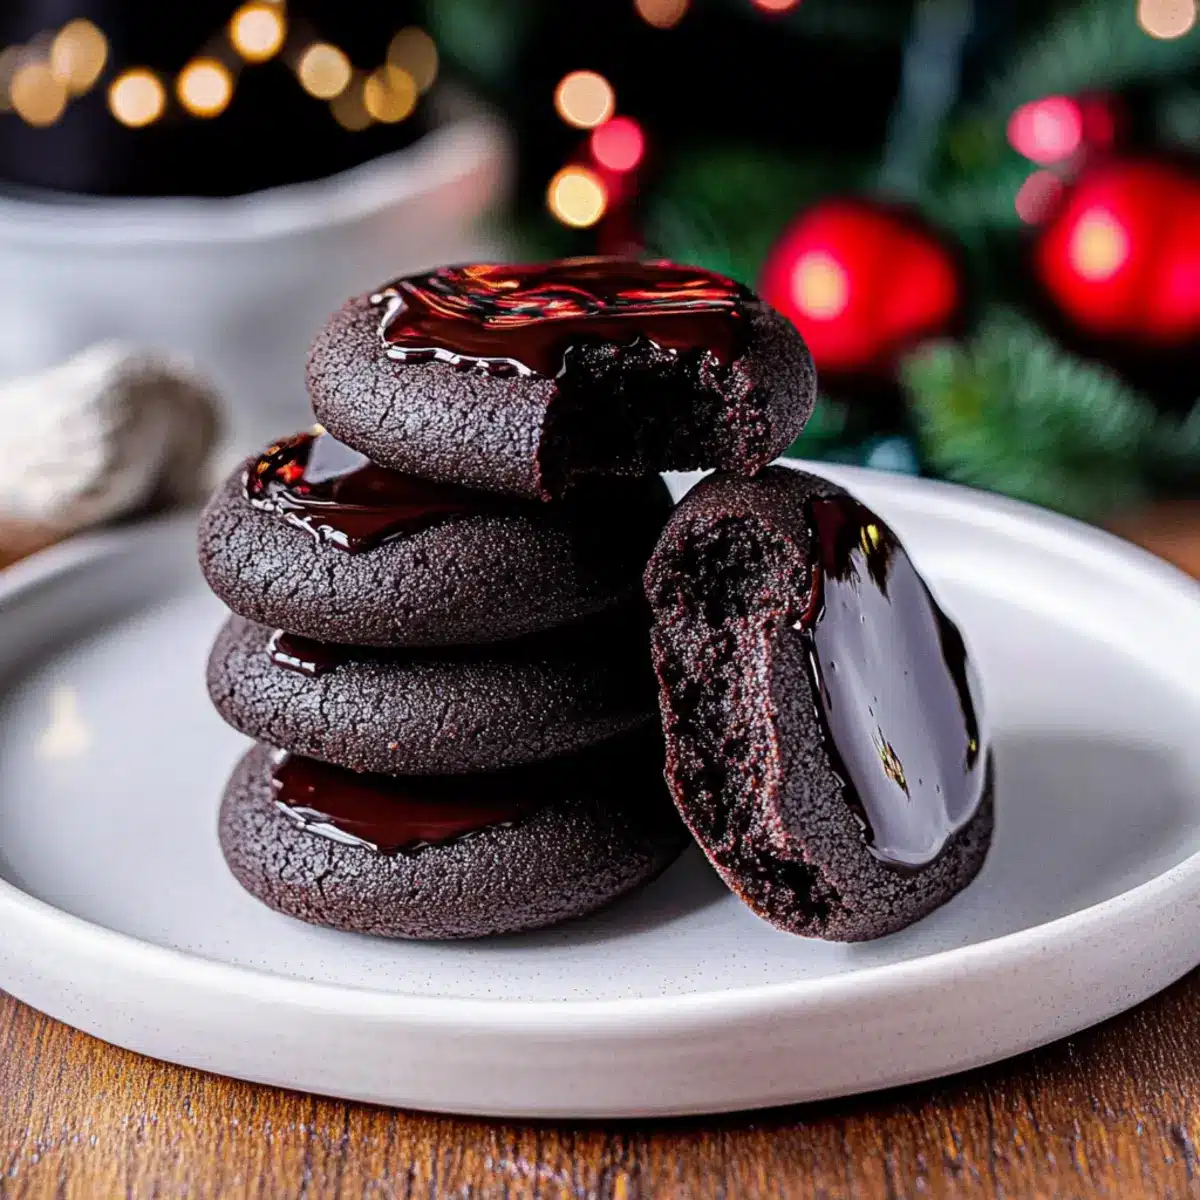
After baking, allow the cookies to cool on the baking sheets for 5 minutes before transferring them to a cooling rack. Meanwhile, heat ½ cup of heavy whipping cream in a small saucepan until it simmers, then pour it over 1 cup of semi-sweet chocolate chips in a bowl. Let the mixture sit for a minute before stirring until smooth for your ganache filling.
Step 11: Fill Cookies
Using a small spoon, fill the center of each thumbprint with about 1 teaspoon of the silky ganache. You can add a sprinkle of nonpareils on top for a festive touch, elevating the presentation of your chocolate thumbprint cookies to delight your guests.
Step 12: Set Ganache
Allow the ganache to set in the fridge for 10–15 minutes, giving it time to firm up without losing its luscious texture. This step is crucial for creating that perfect bite of rich chocolate when you take a bite of your thumbprint cookies.
Step 13: Store
Once the ganache is set, store any leftover chocolate thumbprint cookies in an airtight container at room temperature for up to three days. These delicious treats are perfect for sharing or saving for later, allowing everyone to enjoy the rich, chocolaty goodness!
What to Serve with Chewy Chocolate Thumbprint Cookies?
As you prepare to enjoy your rich, fudgy cookies, think about the delightful pairings that will elevate your experience to new heights.
-
Creamy Vanilla Ice Cream: The cool, creamy texture beautifully contrasts with the warm, chewy cookies, creating the ultimate indulgent dessert.
-
Fresh Berries: A burst of tartness from strawberries or raspberries complements the chocolate, refreshing your palate with each bite.
-
Rich Hot Chocolate: Embrace the chocolate theme! A cup of velvety hot cocoa rounds out the sweet experience, perfect for cozy gatherings.
-
Whipped Cream Topping: Light and fluffy, a dollop of whipped cream adds a delightful creaminess that pairs wonderfully with the ganache filling.
-
Fruit Salad: A medley of seasonal fruits provides a fresh touch, balancing the richness of your cookies while adding vibrant colors to your dessert table.
-
Nutty Coffee: A cup of freshly brewed coffee with a hint of nuttiness enhances the chocolate flavors, making each bite feel extra indulgent and sophisticated.
-
Coconut Macaroons: For a chewy texture contrast, these sweet coconut treats create a delightful synergy with your thumbprint cookies.
-
Festive Party Punch: A refreshing, fruity punch makes for a lively pairing, adding an element of fun to any holiday celebration.
These pairings will not only complement your Chewy Chocolate Thumbprint Cookies, but they’ll also create the perfect atmosphere for sharing the joy of homemade baking!
Make Ahead Options
These Chewy Chocolate Thumbprint Cookies are ideal for busy home cooks looking to save time! You can prepare the cookie dough up to 24 hours in advance, storing it in the refrigerator before baking. Simply mix the dry and wet ingredients, form the balls, and create the indents. Cover and refrigerate until you’re ready to bake. When the urge for fresh cookies strikes, just preheat your oven and bake as instructed. To maintain the cookies’ delightful texture, avoid overbaking; they should be slightly soft when pulled from the oven. Enjoy delicious homemade cookies with minimal effort, perfect for those hectic holiday days!
How to Store and Freeze Chocolate Thumbprint Cookies
Room Temperature: Store leftover chocolate thumbprint cookies in an airtight container at room temperature for up to 3 days to maintain their chewy texture.
Fridge: If you prefer, these cookies can also be kept in the refrigerator for up to a week. Just be sure they are well-wrapped to prevent them from drying out.
Freezer: Freeze baked chocolate thumbprint cookies for up to 2 weeks in a single layer in an airtight container or freezer bag. For best results, separate layers with parchment paper.
Reheating: To bring back that fresh-baked feel, reheat cookies in the oven at 300°F (150°C) for about 5-7 minutes, until warmed through and the ganache is silky again.
Chocolate Thumbprint Cookies Pairings
Ready to elevate your delightful cookie experience? Here are some fantastic ideas to complement your Chocolate Thumbprint Cookies!
-
Milk or Cream: A classic pairing with these rich cookies, a glass of cold milk or a splash of cream amplifies that irresistible chocolate flavor, making each bite feel like pure bliss.
-
Fresh Berries: Serve with a side of strawberries or raspberries; their tartness cuts through the sweetness, adding a refreshing balance. The juicy pop of the berries is an unexpected but delightful contrast to the fudgy texture.
-
Coffee or Espresso: Sip on a warm cup of brewed coffee or espresso. The bitterness of the coffee beautifully enhances the chocolate richness, creating a comforting moment reminiscent of a cozy café.
-
Vanilla Ice Cream: For a decadent treat, top a warm thumbprint cookie with a scoop of vanilla ice cream. The melting creaminess of the ice cream against the warm chocolate creates a dessert that feels like a hug!
-
Cheese Platter: If you’re feeling adventurous, pair your cookies with a small cheese platter. The creaminess of brie or the sharpness of aged cheddar can add an interesting twist, surprising your palate.
-
Hot Chocolate: Why not go all out with indulgence? Enjoy your cookies alongside a warm mug of hot chocolate. A sprinkle of marshmallows or whipped cream on top adds an extra layer of joy.
These chocolate thumbprint cookies are incredibly versatile—don’t hesitate to mix and match these pairings to discover your perfect taste combination. Happy baking!
Expert Tips for the Best Chocolate Thumbprint Cookies
- Chill Your Dough: Always refrigerate the dough before baking; it helps maintain the perfect shape and prevents spreading during baking.
- Indent Gently: When creating the thumbprint, use light pressure to ensure a deep enough indentation for the ganache, but avoid breaking the cookie.
- Check Baking Time: Keep an eye on your cookies as they bake; slight firmness at the edges is ideal. Underbaking slightly can enhance the chewy texture.
- Use High-Quality Chocolate: For the ganache, opt for high-quality semi-sweet chocolate chips to elevate the flavor of your chocolate thumbprint cookies significantly.
- Storage Tips: Make sure to store those cookies in an airtight container; they’ll stay fresh and chewy for up to three days!
Chocolate Thumbprint Cookies Recipe FAQs
How do I choose ripe ingredients for baking?
Absolutely! For the best chocolate thumbprint cookies, ensure your unsalted butter is at room temperature—soft enough to easily cream with sugars but not melted. Use fresh egg yolks from eggs, as old eggs can affect the texture and flavor. Lastly, choose high-quality cocoa powder for that rich chocolate taste.
What is the best way to store chocolate thumbprint cookies?
You can store your chocolate thumbprint cookies in an airtight container at room temperature for up to 3 days. If you’d prefer to keep them a bit longer, refrigerate them for up to a week in a well-wrapped container to prevent drying out and maintain their chewy goodness.
Can I freeze chocolate thumbprint cookies?
Absolutely! You can freeze baked chocolate thumbprint cookies for up to 2 weeks. Place them in a single layer in an airtight container or freezer bag, separated by parchment paper. When you’re ready, let them thaw at room temperature and reheat them briefly in the oven to get that fresh-baked feel!
What should I do if my cookies spread too much while baking?
If your chocolate thumbprint cookies spread too much, it’s likely the dough was too warm or not refrigerated long enough. Next time, try refrigerating the dough for a full hour, and pay attention to your oven temperature. Using a cookie scoop and keeping them spaced apart will also help maintain their shape.
Are these cookies suitable for people with allergies?
These chocolate thumbprint cookies contain common allergens such as gluten and dairy. If you or someone you’re baking for has allergies, consider substituting ingredients—like using gluten-free flour and dairy-free chocolate. Always double-check ingredient labels or consult your healthcare provider when baking for those with dietary restrictions.
What are some variations I can try with this recipe?
The more the merrier! You can switch semi-sweet chocolate chips with milk chocolate for a sweeter ganache or add mint extract for a refreshing twist. For festive flair, use crushed candy canes instead of nonpareils on top, or incorporate flavored extracts to experiment with different taste profiles.
Chewy Chocolate Thumbprint Cookies That Melt in Your Mouth
Ingredients
Equipment
Method
- Prepare Baking Sheets: Line two baking sheets with parchment paper.
- Mix Dry Ingredients: In a bowl, whisk flour, cocoa powder, salt, and baking powder.
- Cream Butter and Sugars: Cream butter, light brown sugar, and granulated sugar until fluffy.
- Incorporate Wet Ingredients: Add egg yolks and vanilla, and mix until combined.
- Combine Mixtures: Gradually mix dry ingredients into wet mixture until combined.
- Form Cookies: Scoop dough onto baking sheets and create indentations.
- Chill Dough: Refrigerate indented cookies for at least 1 hour.
- Preheat Oven: Preheat oven to 350°F (175°C).
- Bake Cookies: Bake for 9–11 minutes until slightly firm; recreate indentations if necessary.
- Cool and Prepare Ganache: Cool cookies and heat cream; pour over chocolate chips to create ganache.
- Fill Cookies: Fill centers of each cookie with ganache.
- Set Ganache: Chill filled cookies for 10–15 minutes.
- Store: Store leftovers in an airtight container.
Leave a Reply