
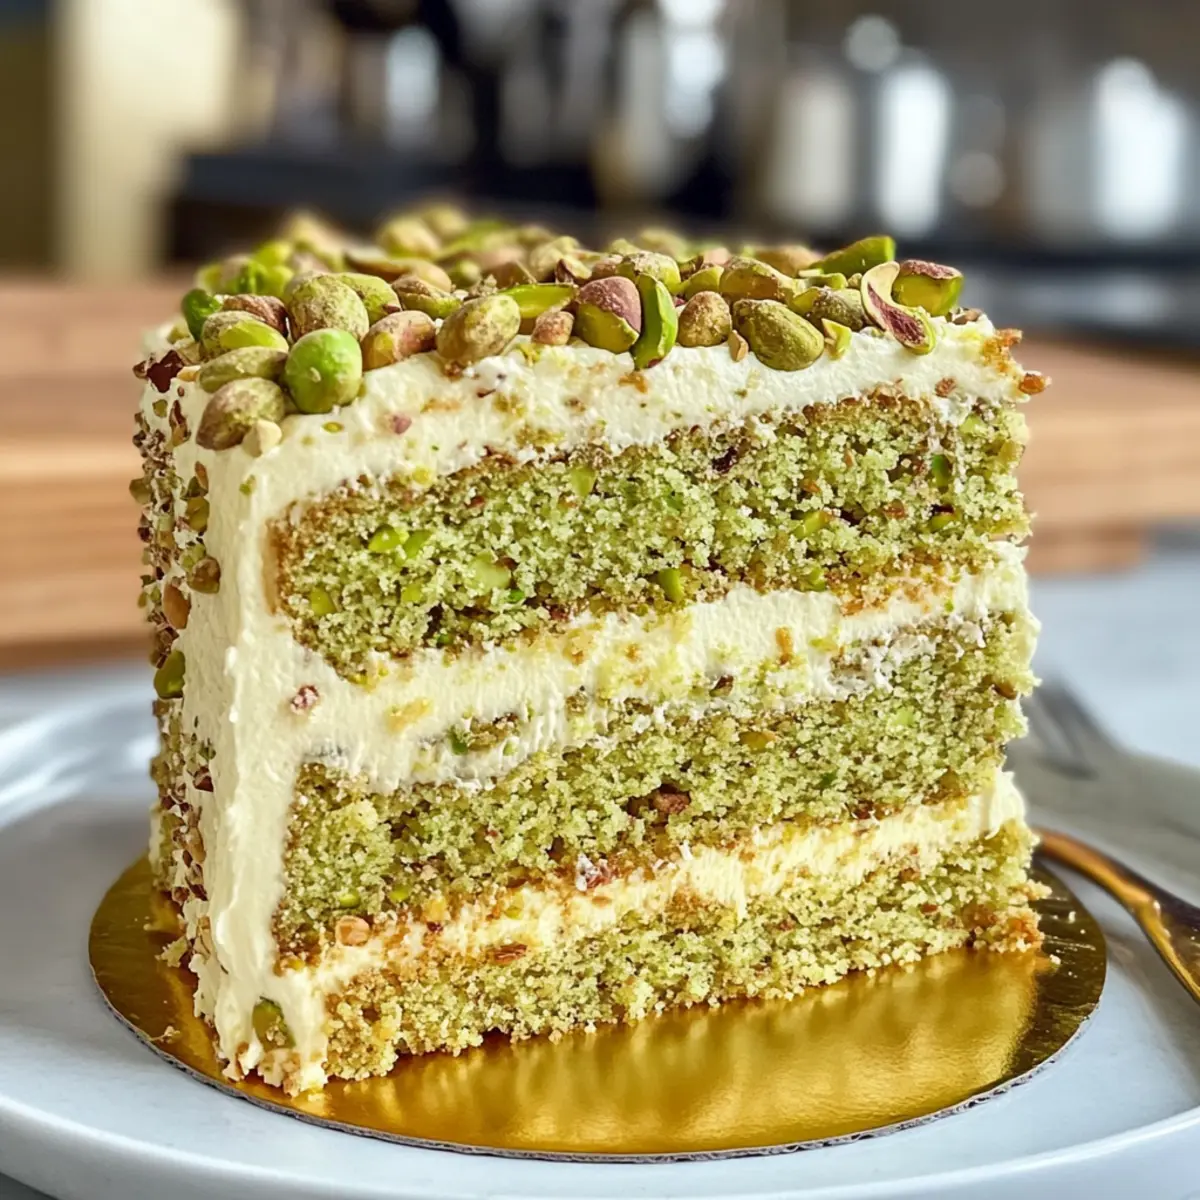
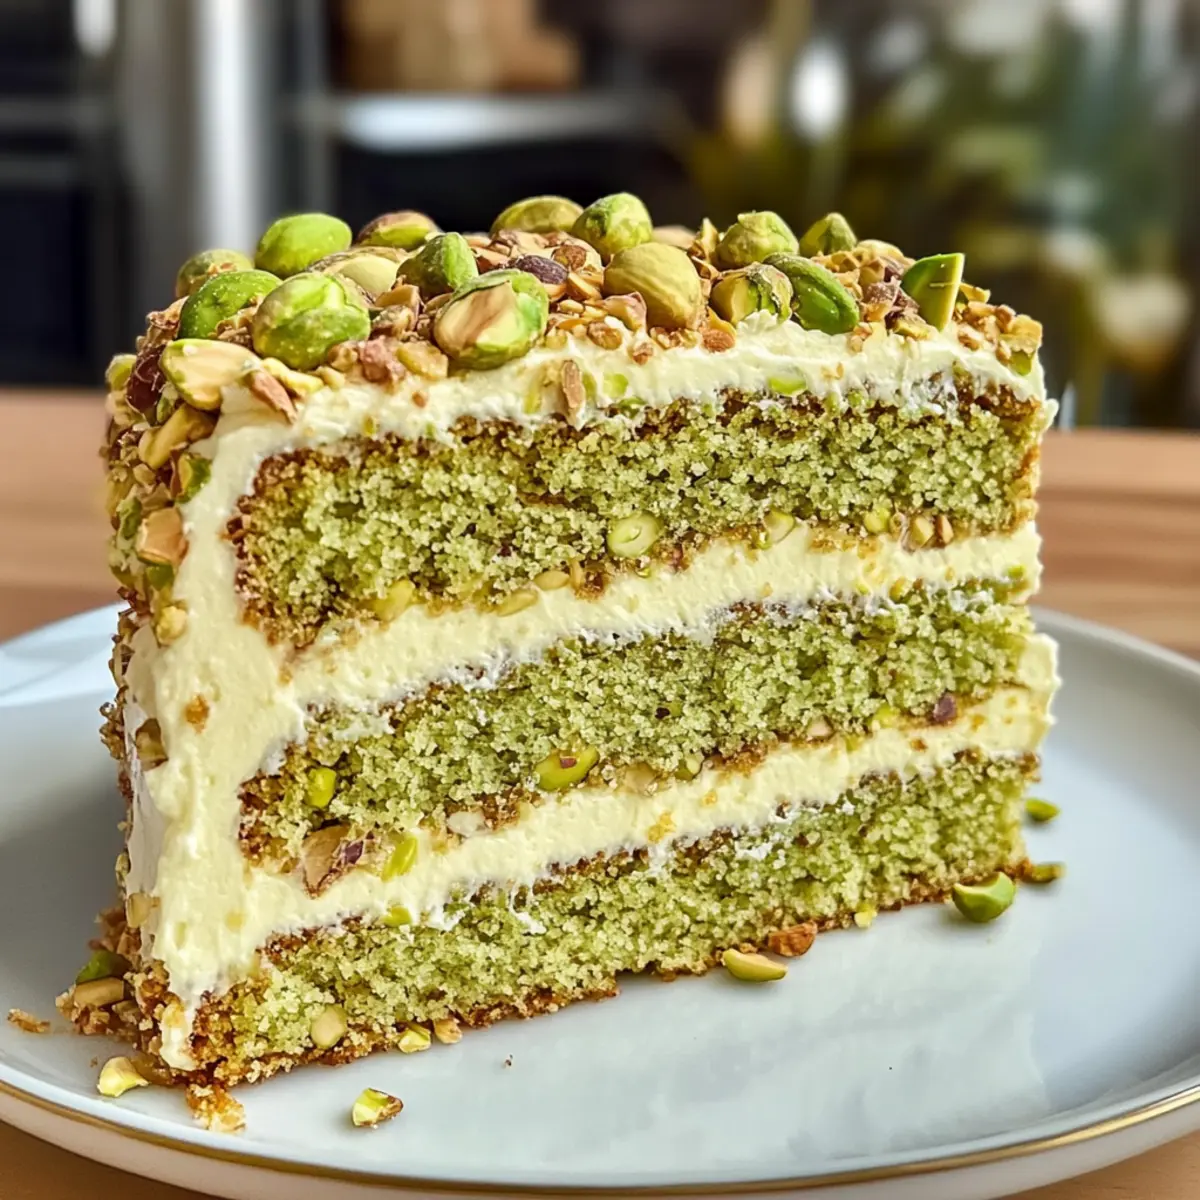
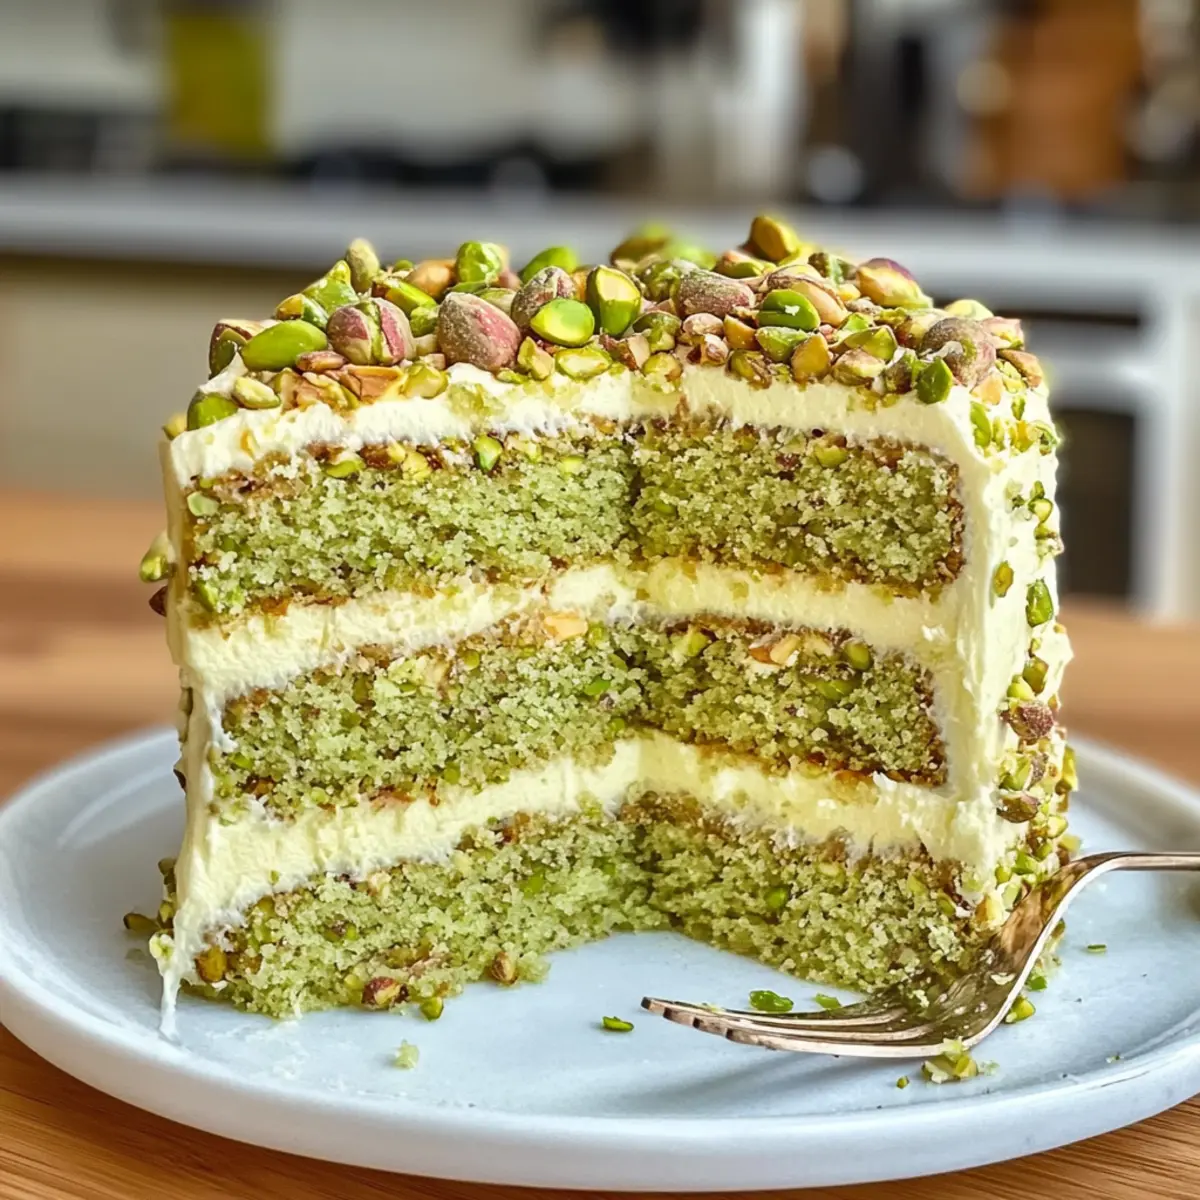
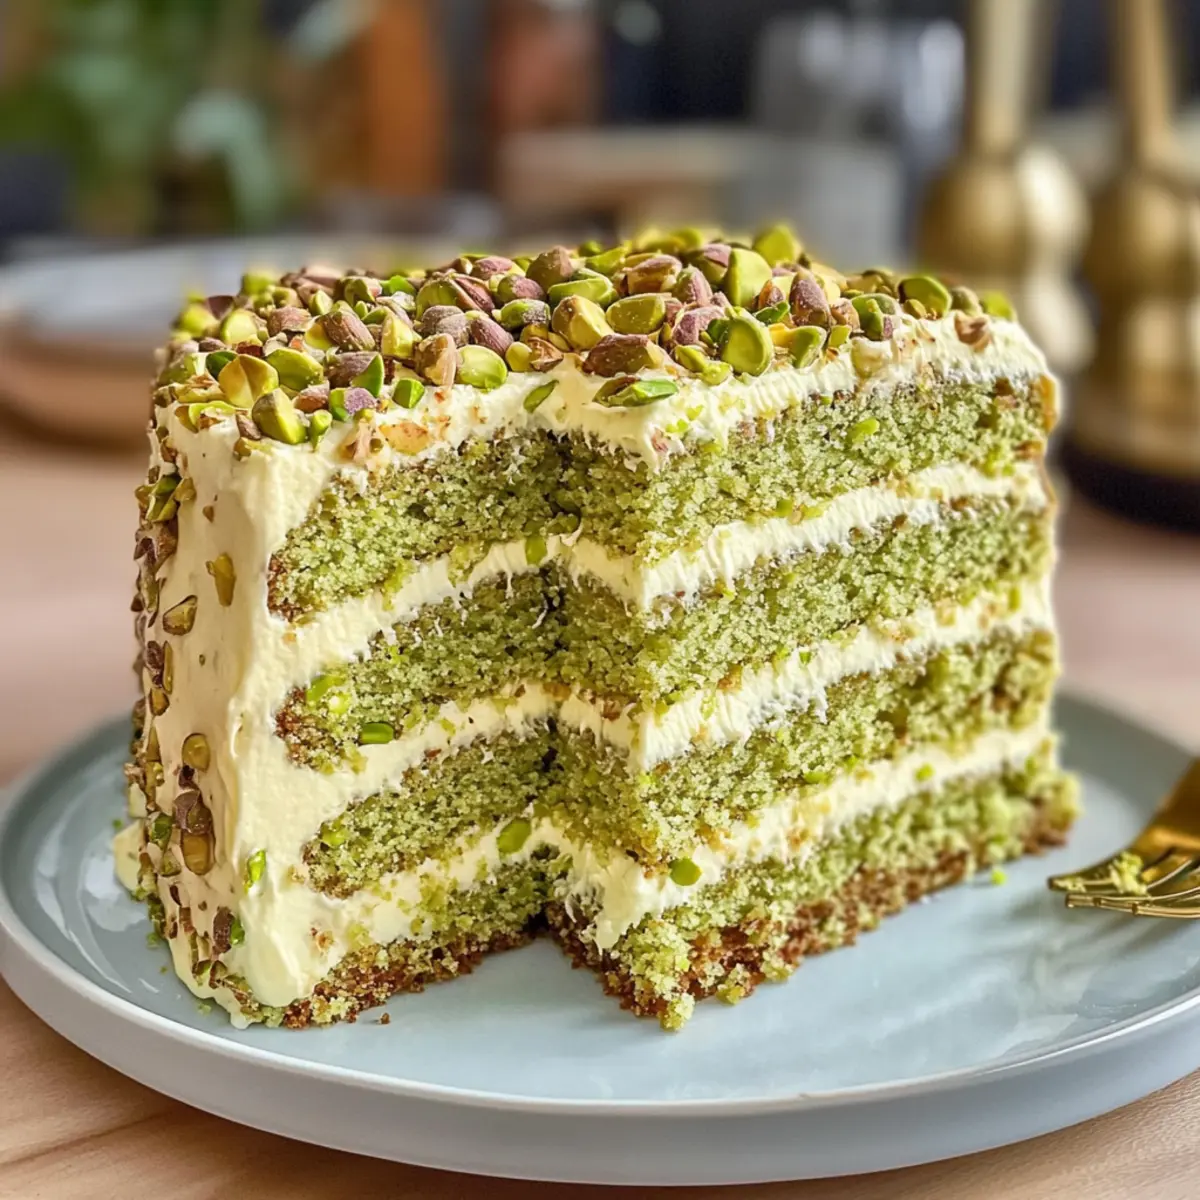
As I stood in my kitchen, the warm, nutty scent of ground pistachios enveloped me, igniting memories of celebratory gatherings and sweet surprises. This Pistachio Mascarpone Layer Cake isn’t just a dessert; it’s a delightful centerpiece for any occasion, combining airy layers of pistachio sponge with the creamy richness of mascarpone frosting. With its quick prep time and glamorous appearance, this vegetarian treat is sure to impress your family and friends, making it the perfect solution for anyone tired of ordinary desserts. Each slice offers a tender, moist bite accented by the crunch of pistachios, elevating your dessert game without the fuss. Are you ready to create something truly special? Let’s dive into the recipe!
Why is this cake a must-bake?
Irresistible Combination: The Pistachio Mascarpone Layer Cake offers a luxurious mix of flavors and textures that is sure to delight any dessert lover.
Ease of Preparation: With straightforward steps and minimal fuss, this recipe is perfect for bakers of all skill levels looking for a show-stopping treat.
Beautiful Presentation: Layers of rich green from pistachios contrasted with creamy white frosting make for a stunning centerpiece that will impress at any gathering.
Perfect for Any Occasion: Whether it’s a festive celebration or a cozy family dinner, this cake effortlessly fits the bill. Pair it with a light herbal tea or sparkling wine for an elegant touch.
Vegetarian-Friendly: This cake is not only indulgent but also accessible for those adhering to a vegetarian diet, ensuring everyone can enjoy a slice of heaven!
With its quick prep time and delightful indulgence, this recipe is sure to become a favorite. Perfect for those tired of the mundane, it’s a delectable way to elevate your baking game!
Pistachio Mascarpone Layer Cake Ingredients
For the Cake
- Shelled Pistachios – Adds a nutty richness and flavor; feel free to substitute with finely chopped almonds or walnuts for a different twist.
- All-Purpose Flour – Provides the structure necessary for a tall cake; consider a gluten-free blend if needed.
- Baking Powder – Acts as a leavening agent to give your cake lift; make sure it’s fresh for the best results.
- Salt – Enhances all the flavors; just a pinch will elevate your cake’s taste.
- Unsalted Butter – Infuses richness and moisture into the cake; vegan butter works well too for a dairy-free version.
- Granulated Sugar – The foundation of sweetness; substituting with brown sugar can add a hint of caramel flavor.
- Eggs – Binds everything together while providing structure; flax eggs can be used for an egg-free alternative.
- Whole Milk – Contributes to the cake’s moistness; any plant-based milk can replace it for a dairy-free option.
- Vegetable Oil – Ensures extra moisture in the cake; melted coconut oil is a great substitute.
- Vanilla Extract – Adds warmth and depth; using pure vanilla extract enhances the overall flavor profile.
- Almond Extract – An optional flavor booster; feel free to omit or magnify the vanilla instead.
For the Mascarpone Cream
- Heavy Cream – Whipped into a fluffy frosting; coconut cream serves well as a dairy-free alternative.
- Powdered Sugar – Sweetens the mascarpone cream; it’s best not to substitute this for texture purposes.
- Mascarpone Cheese – The star of the frosting, providing a creamy texture; cream cheese mixed with heavy cream is an alternative, though the taste will differ.
Each ingredient helps make this delightful Pistachio Mascarpone Layer Cake a true masterpiece. Get ready to amaze your guests with a slice of this gorgeous and delicious treat!
Step‑by‑Step Instructions for Pistachio Mascarpone Layer Cake
Step 1: Prepare Pistachios
Begin by grinding shelled pistachios in a food processor until they reach a fine consistency, similar to almond flour. This should take about 1-2 minutes. Remember, the goal is to create a smooth base that will infuse your Pistachio Mascarpone Layer Cake with that rich, nutty flavor we adore.
Step 2: Make Flour Mixture
In a large mixing bowl, combine the finely ground pistachios with all-purpose flour, baking powder, and a pinch of salt. Whisk these dry ingredients together for about 1 minute until well mixed. This creates a flavor-packed flour mixture that will add both structure and depth to the cake layers.
Step 3: Cream Butter and Sugar
In a separate bowl, use a hand mixer or stand mixer to beat the softened unsalted butter and granulated sugar together on medium speed for approximately 3 minutes. The mixture should appear light and fluffy, which indicates that it’s ready to integrate into your moist Pistachio Mascarpone Layer Cake batter.
Step 4: Incorporate Eggs & Wet Ingredients
Add the eggs one at a time, mixing well after each inclusion to ensure thorough blending. Next, pour in the whole milk, vegetable oil, and vanilla extract. Continue mixing until combined, about 1-2 minutes, permitting all those luscious, creamy ingredients to harmonize beautifully.
Step 5: Combine Ingredients
Gently fold the dry flour mixture into the wet batter using a spatula. Do this until just combined, being careful not to overmix, as this can lead to a dense cake. You want a light batter that will yield airy layers in your Pistachio Mascarpone Layer Cake.
Step 6: Bake Layers
Divide the batter evenly among three greased 8-inch round cake pans lined with parchment paper. Bake in a preheated oven at 175°C (350°F) for 22-25 minutes, or until a toothpick inserted into the center comes out clean. While baking, enjoy the enticing aroma wafting through your kitchen!
Step 7: Cool Cake Layers
Once baked, remove the cake layers from the oven and allow them to cool in the pans for about 10 minutes. After that, transfer each layer to a wire rack to cool completely. This step is crucial, as it prevents sogginess and prepares them for the delightful mascarpone frosting.
Step 8: Whip Mascarpone Cream
In a chilled mixing bowl, whip the heavy cream using a hand mixer until soft peaks form, which should take approximately 3 minutes. Next, add the mascarpone cheese, powdered sugar, and vanilla extract, then whip for an additional 2-3 minutes until thick and creamy. The result will be a light and airy mascarpone cream that perfectly compliments your cake.
Step 9: Assemble Cake
On your serving plate, place one cooled cake layer and generously spread a layer of mascarpone cream on top. Repeat this process with the second layer, then place the final layer on top. Use the remaining cream to frost the top and sides of the entire cake, ensuring a beautiful finish that highlights the elegance of this Pistachio Mascarpone Layer Cake.
Step 10: Chill Before Serving
To allow the flavors to meld beautifully, refrigerate the assembled cake for a minimum of 2 hours before serving. This cooling period enhances both texture and taste, leading to a delightful dessert experience that everyone will love when they take that first bite.
How to Store and Freeze Pistachio Mascarpone Layer Cake
-
Room Temperature: Your cake is best enjoyed fresh, but it can sit at room temperature for up to 2 hours before serving. If left out longer, be sure to refrigerate to maintain quality.
-
Fridge: Store the leftover cake in an airtight container in the fridge for up to 3 days. This helps keep the cake moist and the mascarpone cream fluffy while preserving its delightful flavors.
-
Freezer: For longer storage, wrap the cake layers tightly in plastic wrap and then in foil before placing them in the freezer. They can be frozen for up to 2 months; thaw in the fridge overnight before assembling.
-
Reheating: If you prefer to enjoy the cake warm, gently reheat individual slices in the microwave for about 10-15 seconds. This will refresh the texture without affecting the flavors of the lovely Pistachio Mascarpone Layer Cake.
What to Serve with Pistachio Mascarpone Layer Cake
Imagine the smiles of your loved ones as they gather around a beautifully crafted cake, wanting nothing more than to pair it with delightful accompaniments.
-
Fresh Berries:
Juicy raspberries or blueberries add a burst of brightness, complementing the rich flavors of the cake perfectly. The tartness balances the sweetness, elevating each bite. -
Vanilla Ice Cream:
A scoop of creamy vanilla ice cream creates an indulgent and luscious experience with each slice. The cold creaminess harmonizes beautifully with the airy mascarpone layers. -
Coffee or Espresso:
A cup of freshly brewed coffee or a shot of espresso enhances the nutty flavors of the cake, providing a warm and inviting contrast with the cold frosting. -
Herbal Tea:
A calming chamomile or refreshing mint tea serves as a light counterpart, aiding digestion while allowing the cake’s flavors to shine without overwhelming them. -
Whipped Cream:
Extra whipped cream can add a delightful lightness alongside your slice, making the texture even more velvety and luxurious for a truly decadent treat. -
Sparkling Wine:
Toast with a glass of bubbly; the effervescence cuts through the richness of the cake, creating an elegant and celebratory atmosphere perfect for special occasions. -
Chocolate Ganache Drizzle:
A warm drizzle of chocolate ganache can be the ultimate finishing touch, adding a rich touch of indulgence that takes this already stunning cake to new heights.
Pistachio Mascarpone Layer Cake Variations
Feel free to explore and personalize your Pistachio Mascarpone Layer Cake with these delightful twists that will tickle your taste buds!
-
Nutty Alternatives: Swap shelled pistachios for finely chopped almonds or walnuts for a unique flavor profile. Each nut adds its distinct character while still delivering a delicious treat.
-
Gluten-Free Option: Substitute all-purpose flour with a gluten-free flour blend to accommodate friends with dietary restrictions. You still receive a lovely texture and taste that everyone will enjoy!
-
Dairy-Free Delight: Use vegan butter and coconut cream instead of traditional butter and heavy cream to create a fully dairy-free masterpiece. It retains that rich, creamy essence while being friendly for those avoiding dairy.
-
Citrus Zest: For a refreshing twist, incorporate lemon or orange zest into the cake batter. This infusion of citrus will brighten the cake, balancing the nuttiness perfectly.
-
Berry Boost: Layer fresh raspberries or strawberries between the cake and mascarpone cream for a fruity burst. The tartness beautifully complements the sweetness of the frosting, adding an impressive flair.
-
Chocolate Drizzle: Make it indulgent by drizzling melted dark chocolate over the top before serving. Not only does it enhance the aesthetics, but it also introduces a decadent chocolate contrast.
-
Spice it Up: Add a pinch of cinnamon or cardamom to the cake batter for a warm, aromatic hint. These spices elevate the flavor while adding an unexpected depth.
-
Layered Surprise: For an eye-catching presentation, alternate cake layers with different flavors, like chocolate using the base from our Chocolate Tuxedo Cake. This not only adds visual interest but also mouthwatering flavor variations.
These variations invite you to get creative in the kitchen and impress your loved ones with your own personalized take on this charming confection. Whether a subtle twist or a bold addition, your Pistachio Mascarpone Layer Cake will surely delight!
Expert Tips for Pistachio Mascarpone Layer Cake
-
Avoid Overmixing: Gently fold wet and dry ingredients together to prevent a dense cake. You want a light, airy texture in your Pistachio Mascarpone Layer Cake.
-
Fresh Ingredients: Always check the freshness of your baking powder to ensure optimal rising. Expired ingredients can lead to disappointing results.
-
Chill Your Mixing Bowl: For the lightest mascarpone cream, chill your mixing bowl before whipping the heavy cream. This helps achieve soft peaks more easily.
-
Texture Check: Be sure not to overwhip the mascarpone cream; stop once it’s thick and creamy to maintain that light, fluffy mouthfeel everyone loves.
-
Proper Cooling: Allow the cake layers to cool completely before frosting. This prevents melting and creates a clean, beautiful finish for your cake.
Make Ahead Options
These Pistachio Mascarpone Layer Cake components are perfect for busy cooks looking to save time! You can prepare the cake layers up to 24 hours in advance; simply wrap them tightly in plastic wrap and refrigerate to maintain moisture. The mascarpone cream can be whipped and stored in the fridge for up to 3 days in an airtight container, ensuring it’s just as delicious when you’re ready to assemble. When you’re set to serve, layer the cream between the cooled cake layers, frost the top and sides, and chill the assembled cake for at least 2 hours before serving. This way, you’ll enjoy a stunning dessert with minimal last-minute effort!
Pistachio Mascarpone Layer Cake Recipe FAQs
How do I choose the best pistachios for this cake?
Absolutely! When selecting shelled pistachios for your Pistachio Mascarpone Layer Cake, look for nuts that are bright green, which indicates freshness and quality. Avoid any that have dark spots all over or appear stale. If you can find unsalted varieties, these will allow you to control the saltiness of your cake better.
How should I store leftovers of the cake?
Leftover Pistachio Mascarpone Layer Cake can be stored in an airtight container in the fridge for up to 3 days. This preserves its moistness and maintains the light texture of the mascarpone cream. Wrap each slice individually or use a cake dome for best results if you’re concerned about odors or moisture loss.
Can I freeze the cake layers?
Yes, you can freeze the cake layers! First, allow the layers to cool completely. Then, wrap each layer tightly in plastic wrap, followed by aluminum foil to prevent freezer burn. They’ll keep well for up to 3 months. When ready to use, transfer them to the fridge to thaw overnight. Once thawed, you can layer with the mascarpone cream for a fresh treat.
What if my cake layers turn out dense?
No worries! If your Pistachio Mascarpone Layer Cake ends up dense, it could be due to overmixing the batter or not enough leavening agent. Always fold the dry ingredients into the wet just until combined. To improve the texture next time, check the freshness of your baking powder and ensure you’re not overbeating the batter after adding the eggs.
Is this cake suitable for people with nut allergies?
Unfortunately, this cake is not suitable for those with nut allergies due to the presence of pistachios. However, if you want an alternative, consider a different flavor profile entirely, possibly using a lemon or vanilla cake base, while maintaining the mascarpone cream for sweetness and creaminess. Just remember to swap in a nut-free flour blend!
Decadent Pistachio Mascarpone Layer Cake You’ll Love to Bake
Ingredients
Equipment
Method
- Grind shelled pistachios in a food processor until they reach a fine consistency, about 1-2 minutes.
- In a large mixing bowl, combine ground pistachios, all-purpose flour, baking powder, and salt. Whisk for about 1 minute.
- In a separate bowl, cream together unsalted butter and granulated sugar for approximately 3 minutes until light and fluffy.
- Add eggs one at a time, mixing well after each. Pour in whole milk, vegetable oil, and vanilla extract and mix until combined, about 1-2 minutes.
- Fold the dry flour mixture into the wet batter using a spatula until just combined.
- Grease three 8-inch round cake pans and divide the batter evenly between them. Bake at 175°C (350°F) for 22-25 minutes.
- Allow cake layers to cool in the pans for about 10 minutes before transferring to a wire rack to cool completely.
- Whip the heavy cream until soft peaks form, then add mascarpone cheese, powdered sugar, and vanilla extract and whip until thick and creamy.
- On a serving plate, place one cooled cake layer, spread mascarpone cream, repeat with the second layer, then frost the top and sides of the cake.
- Refrigerate the finished cake for a minimum of 2 hours before serving to enhance flavors.
Leave a Reply