
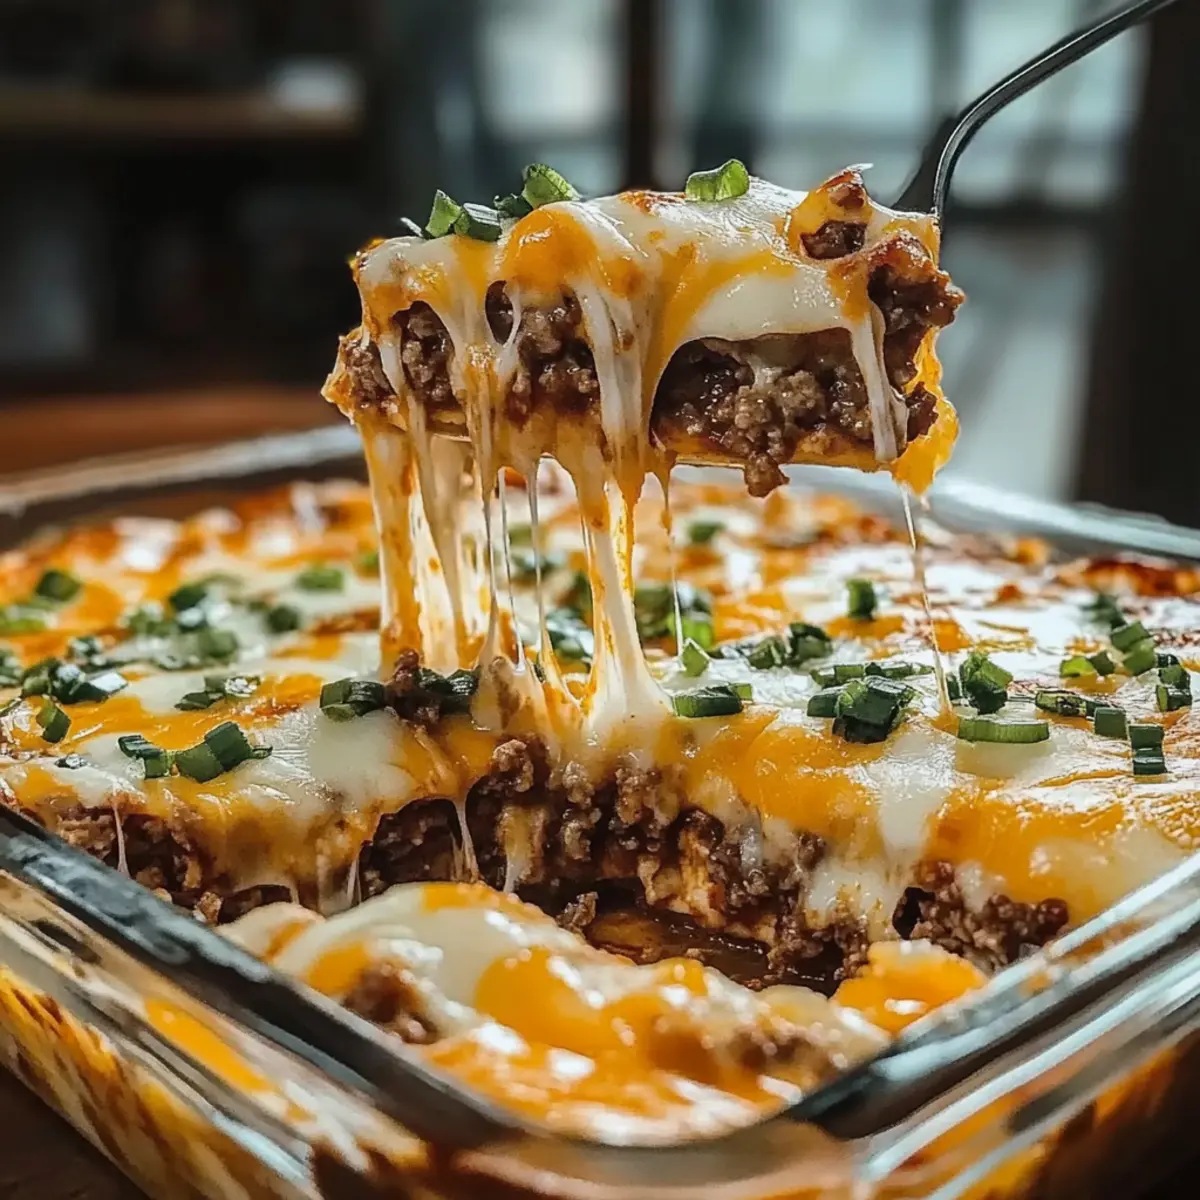
In the heart of cowboy culture lies a rugged yet inviting dish that always warms the spirit: Cattle Drive Casserole. When I first stumbled upon this casserole, I was captivated by its ability to transform humble ingredients into a hearty family feast. This recipe not only embodies comforting flavors but is also incredibly customizable, making it easy to cater to both meat lovers and vegetarians alike. Packed with layers of seasoned ground beef, potatoes, and vibrant veggies, this casserole is what I like to call ‘cowboy cuisine at its finest.’ With quick prep time and the option to swap ingredients for gluten-free or lighter variations, it’s a crowd-pleasing dish perfect for gatherings or cozy nights in. Ready to dive into this culinary adventure and discover how this delightful meal can bring everyone together? Let’s get cooking!
Why is Cattle Drive Casserole so appealing?
Comfort: This dish provides a hearty and filling meal that warms the soul on chilly evenings.
Customizable: Easily adapt it for vegetarian or gluten-free diets, ensuring everyone at your table can enjoy this delicious comfort food.
Quick Prep: With a simple layering technique, you can whip up this casserole in no time—perfect for busy weeknights or unexpected guests.
Crowd-Pleaser: Whether it’s a family gathering or a party, the rich flavors and textures will leave everyone asking for seconds! For additional variations, check out the Crazy Good Casserole for more ideas.
Hearty Ingredients: Featuring ground beef, veggies, and cheese, it’s a complete meal that satisfies cravings and keeps everyone coming back for more!
Don’t miss out on making this dish your own; the Cattle Drive Casserole is bound to become a staple at your home!
Cattle Drive Casserole Ingredients
For the Casserole Base
• Lean Ground Beef – Main protein source providing heartiness; substitute with plant-based meat for a vegetarian version.
• Red Bell Pepper – Adds sweetness and color; can be replaced with green bell pepper or omitted for fewer vegetables.
• Yellow Onion – Provides flavor base; substitute with shallots for a milder taste.
• Taco Seasoning Mix – Seasoning for depth; use homemade spice mix to control flavors and sodium.
For the Biscuit Layer
• Biscuit Mix (like Bisquick) – Acts as a binding agent and adds structure; can replace with gluten-free biscuit mix for a gluten-free option.
• Water – Hydrates the biscuit mix; adjust based on desired consistency.
• Cooking Spray (like Pam) – Prevents sticking during baking; can omit if using non-stick cookware.
For the Creamy Filling
• Sour Cream – Adds creaminess and tang; substitute with Greek yogurt for a lighter alternative.
• Mayonnaise – Integrates creaminess; can be replaced with more sour cream or omitted.
• Diced Green Chiles – Adds flavor and slight spice; substitute with jalapeños for heat or omit for a milder dish.
For the Topping
• Cheddar Cheese (Fiesta Blend) – Primary cheese for richness and flavor; use Mexican cheese blend for a different taste.
• Garlic Powder – Enhances overall flavor; fresh garlic can be used as a substitute.
• Salsa (mild) – Integrates moisture and flavor; swap for tomato sauce if desired.
Each layer of the Cattle Drive Casserole contributes to a delightful balance of flavors, making this dish a true comfort food delight!
Step‑by‑Step Instructions for Cattle Drive Casserole
Step 1: Preheat the Oven
Begin by preheating your oven to 350°F (175°C). This temperature ensures that your Cattle Drive Casserole bakes evenly and achieves that delightful golden brown finish. While the oven warms up, you can prep the other ingredients, setting the stage for a delicious meal.
Step 2: Brown the Meat and Vegetables
In a large skillet over medium heat, add the lean ground beef along with chopped yellow onion and red bell pepper. Sauté the mixture for about 7-10 minutes, stirring occasionally, until the beef is fully cooked and the vegetables are soft and fragrant. Drain any excess fat to keep the casserole from being greasy, then add taco seasoning, mixing well to coat everything.
Step 3: Prepare the Biscuit Mixture
In a separate mixing bowl, combine the biscuit mix with water, stirring gently until just mixed. The consistency should be slightly lumpy—don’t overwork the dough! This biscuit layer adds a hearty base to your Cattle Drive Casserole, so set aside your mixing bowl while you prepare to assemble the layers.
Step 4: Assemble the First Layer
Spray a casserole dish with cooking spray to prevent sticking. Spread half of the biscuit mixture on the bottom of the dish, pressing down gently with a spatula to create an even layer. Next, spoon the beef and vegetable mixture over the biscuit layer, creating the first hearty foundation of flavor for your casserole.
Step 5: Add the Creamy Filling
In a small bowl, mix sour cream, mayonnaise, and diced green chiles together until smooth. Spread this creamy filling evenly over the beef layer, ensuring that every bite of your Cattle Drive Casserole will be rich and flavorful. The creaminess perfectly complements the robust flavors beneath.
Step 6: Top with Remaining Biscuit Mixture
Now it’s time to add the remaining biscuit mixture. Gently dollop it over the creamy filling, smoothing it out for a nice cover. This layer will puff up beautifully during baking. Once spread evenly, sprinkle shredded cheddar cheese generously on top for that irresistible melty finish.
Step 7: Bake the Casserole
Place your assembled Cattle Drive Casserole in the preheated oven and bake for 25-30 minutes. Keep an eye on it until the top is golden brown and bubbly, signaling that it’s ready. The aroma will fill your kitchen, making it hard to resist diving into this comforting dish.
Step 8: Cool Before Serving
After baking, remove the casserole from the oven and let it cool for about 10 minutes. This resting time not only allows the dish to set, preventing messy servings, but it enhances the flavors as well. Once cooled, slice up your scrumptious Cattle Drive Casserole and serve warm, ready for everyone to enjoy!
How to Store and Freeze Cattle Drive Casserole
Fridge: Store leftover Cattle Drive Casserole in an airtight container for up to 3 days. Reheat individual portions in the microwave or bake in the oven for a bubbly finish.
Freezer: To freeze, wrap the casserole tightly with plastic wrap or aluminum foil before baking. Enjoy it for up to 3 months. Thaw in the fridge overnight before baking.
Make-Ahead: Assemble the casserole a day ahead and refrigerate it before baking. This allows the flavors to meld beautifully, enhancing the overall taste.
Reheating: When ready to serve, cover with foil and bake at 350°F (175°C) for about 20-25 minutes until heated through. Remove the foil for the last few minutes to crisp up the top.
Expert Tips for Cattle Drive Casserole
- Perfect Layering: Ensure each layer is evenly spread out to get balanced flavors and texture throughout the casserole; uneven layers can lead to sogginess.
- Control the Moisture: Be cautious with the liquid content; too much can make your Cattle Drive Casserole watery. Stick to the provided measurements for best results.
- Use Quality Cheese: High-quality cheese melts better and adds more flavor; opt for block cheese over pre-shredded for creaminess and taste.
- Chill Before Serving: Let the casserole cool slightly after baking for easier slicing and enhanced flavor melding.
- Experiment with Seasoning: Customize the taco seasoning to your liking; homemade blends can add unique touches and control sodium.
Make Ahead Options
These Cattle Drive Casserole is perfect for busy home cooks looking to save time during the week! You can prep all the layers up to 24 hours ahead by assembling the casserole, then covering it tightly and refrigerating. To maintain quality, avoid adding the cheese topping until just before baking, as this will ensure the cheese remains fresh and melts beautifully. When you’re ready to serve, simply preheat your oven and bake the casserole for 25-30 minutes until golden and bubbly. This way, you’ll have a hearty, comforting meal that makes family dinner planning stress-free and delicious!
What to Serve with Hearty Cattle Drive Casserole?
When you bring this comforting casserole to the table, pairing it with complementary sides elevates the meal to new heights.
-
Creamy Mashed Potatoes: Their rich texture perfectly matches the casserole’s heartiness, creating a filling and satisfying experience.
-
Savory Cornbread: This sweet yet savory bread adds a delightful crunch and warmth, balancing the flavors of the casserole beautifully.
-
Refreshing Side Salad: A crunchy, crisp salad made with mixed greens and a zesty vinaigrette brings a burst of freshness that cuts through the richness.
-
Roasted Asparagus: Tender, lightly seasoned asparagus brightens the plate, providing a healthy, vibrant contrast to the casserole’s creamy layers.
-
Sautéed Green Beans: Crisp-tender green beans add a satisfying crunch without stealing the spotlight, making them a perfect sidekick.
-
Spicy Salsa & Tortilla Chips: For a lively appetizer, serve salsa with crunchy chips to awaken the taste buds before indulging in the comfort of the casserole.
-
Fizzy Lemonade or Iced Tea: A refreshing drink rounds out your meal, offering a light and citrusy splash that complements the bold flavors of the casserole.
-
Chocolate Chip Cookies: As a sweet finish, these warm cookies provide a simple yet delicious end to your comforting meal, perfect for satisfying that sweet tooth.
Cattle Drive Casserole Variations & Substitutions
Feel free to mix and match ingredients for a unique take on your Cattle Drive Casserole, tantalizing taste buds across the table!
- Vegetarian: Substitute ground beef with lentils or black beans to make this dish plant-based friendly. Lentils provide a hearty texture that complements the remaining ingredients beautifully.
- Gluten-Free: Switch out the biscuit mix for a gluten-free variety, ensuring everyone can enjoy a slice of comfort. It still holds that delightful fluffiness!
- Spicy Southwestern: Incorporate jalapeños and corn for a zesty flavor boost. This will add a kick and a sweet crunch that enhances the classic recipe.
- Extra Veggies: Roast zucchini, spinach, or carrots and toss them in for added nutrition and color. It’s a great way to sneak in more veggies for those picky eaters!
- Creamy Twist: Use a combination of sour cream and cream cheese for an even richer filling. This will make every bite melt in your mouth with creaminess.
- Cheesy Variation: Try different cheese blends, like pepper jack or gouda, for a flavor twist that’ll make your taste buds dance. Each cheese brings a unique character to the dish.
- Taco Night Inspired: Add crushed tortilla chips on top before baking for an extra crunchy layer. It’s like a fiesta in every bite! For more inspiration on layering, take a look at the Crazy Good Casserole.
- Herb Infusion: Fresh herbs like cilantro or parsley can brighten the flavors. Mix them into the creamy filling for a fresh and aromatic enhancement.
Experiment and let your creativity shine in this cozy casserole. Each variation offers a new spin on a classic beloved and is sure to gather warmth and laughter around your table!
Cattle Drive Casserole Recipe FAQs
What is the best way to choose ripe vegetables for the casserole?
Absolutely! For the freshest flavor, select vibrant vegetables that are firm to the touch. Specifically, look for bell peppers with smooth skin and no dark spots, and choose onions that are dry and heavy for their size. This ensures your Cattle Drive Casserole will be loaded with texture and taste.
How should I store leftovers of the Cattle Drive Casserole?
Store any leftover Cattle Drive Casserole in an airtight container in the fridge for up to 3 days. When you’re ready to enjoy it again, simply reheat individual portions in the microwave for convenience, or bake in the oven until bubbly for that fresh-out-of-the-oven experience.
Can I freeze Cattle Drive Casserole?
Yes! To freeze your Cattle Drive Casserole, wrap it tightly with plastic wrap or aluminum foil before baking. It can be frozen for up to 3 months. When you’re ready to enjoy it, thaw in the fridge overnight and bake as instructed for a delightful meal, ensuring perfect texture upon serving.
What if my casserole turns out too soggy?
Very often! If you find that your casserole is soggy, the most common culprit is excess moisture. To prevent this, make sure to drain any excess fat from the beef and avoid adding too much liquid to the biscuit layer. If you notice it becoming watery during the cooking process, consider baking it uncovered for a bit longer to allow some of the moisture to evaporate.
Are there any dietary considerations to keep in mind for this dish?
Definitely! For those with gluten sensitivities, you can easily substitute the biscuit mix with a gluten-free version. If you’re accommodating vegetarian guests, consider swapping the ground beef with plant-based meat. Be sure to check that any additional ingredients—like taco seasoning—also fit dietary restrictions, and adjust accordingly!
How can I make this casserole spicier?
To add a kick to your Cattle Drive Casserole, incorporate diced jalapeños into the meat mixture, or opt for a spicier salsa for added flavor. You might also spice up your seasoning mix by adding cayenne pepper or smoked paprika. Spice levels can always be adjusted to suit your taste preference!
Cattle Drive Casserole: Hearty Comfort for Any Gathering
Ingredients
Equipment
Method
- Preheat your oven to 350°F (175°C).
- In a large skillet over medium heat, brown the ground beef with chopped yellow onion and red bell pepper for 7-10 minutes. Drain excess fat and add taco seasoning.
- In a mixing bowl, combine the biscuit mix with water until slightly lumpy. Do not overwork the dough.
- Spray a casserole dish with cooking spray. Spread half of the biscuit mixture in the dish, then layer with the beef and vegetable mixture.
- Mix together sour cream, mayonnaise, and diced green chiles. Spread this creamy filling over the beef layer.
- Dollop remaining biscuit mixture over the creamy filling and smooth it out. Top with shredded cheddar cheese.
- Bake for 25-30 minutes until golden brown and bubbly.
- Let the casserole cool for about 10 minutes before serving.
Leave a Reply