
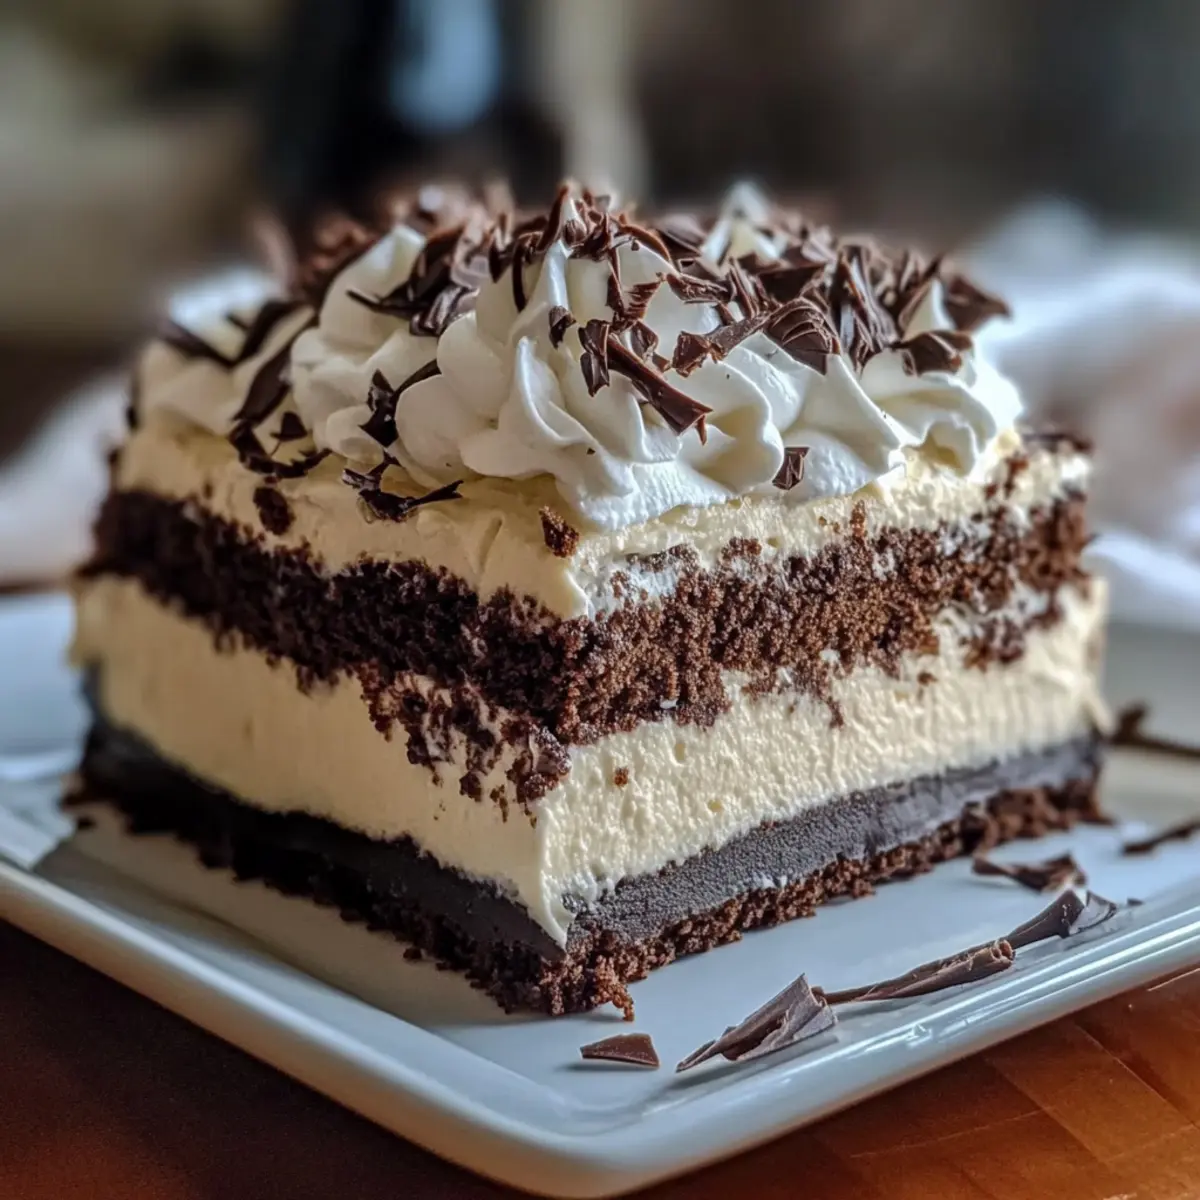
The kitchen buzzed with the excitement of a shared secret as I flipped through an old family cookbook, my heart racing at the discovery. I stumbled upon a gem: the Brownie Refrigerator Cake—an effortless no-bake layered dessert that has the power to charm any chocolate lover. With a rich brownie base, luscious cream cheese layers, and fluffy whipped topping, this treat is the perfect crowd-pleaser for gatherings or a cozy night in. What truly makes this cake irresistible is its make-ahead appeal; prep it in advance and let the flavors meld together beautifully as it chills in the fridge. Plus, there are gluten-free options to accommodate everyone’s dietary needs. Ready to impress your friends and family with this delightful dessert? Scroll down and let’s get baking!
Why is this Brownie Refrigerator Cake special?
Irresistible flavor combinations: The fudgy brownie base perfectly contrasts the creamy pudding and fluffy topping.
No-Bake Convenience: Enjoy a delicious layered dessert without the hassle of turning on the oven.
Crowd-Pleasing Appeal: It’s a guaranteed hit at parties, making it the perfect addition to your gatherings.
Dietary Friendly Options: Easily adapt for gluten-free or dairy-free diets without compromising taste! Try pairing it with fresh berries for a burst of flavor or serve with a scoop of vanilla ice cream for that extra indulgence. You’ll want to check out these Gingerbread Brownies Cozy for another sweet treat!
Make-Ahead Magic: Create it a day in advance, allowing flavors to deepen—simply sit back, chill, and enjoy!
Brownie Refrigerator Cake Ingredients
• Get ready to bake without heat!
For the Brownie Base
- Brownie Mix – Provides the rich, fudgy foundation; swap it for gluten-free brownie mix to cater to dietary needs.
For the Creamy Layer
- Cream Cheese – Adds a creamy, cheesecake-like layer; for a dairy-free twist, use dairy-free cream cheese.
- Vanilla Extract – Enhances the cake’s flavor; consider almond extract for a delightful change.
For the Filling
- Pudding Mix – Creates a smooth, rich filling; you can replace it with butterscotch or caramel pudding for a unique flavor.
- Milk – Essential for making the pudding; you can use any plant-based milk for a dairy-free option.
For the Topping
- Whipped Topping – Offers a light, airy finish; use coconut-based whipped topping for a dairy-free alternative.
Get ready to indulge in this delectable Brownie Refrigerator Cake that’s not only easy to prepare but also a treat for everyone at the table!
Step‑by‑Step Instructions for Brownie Refrigerator Cake
Step 1: Prepare Brownie Base
Start by preheating your oven according to the brownie mix package instructions. Once ready, prepare the brownie mix as directed and pour it into a greased baking pan. Bake for 20-25 minutes, or until a toothpick inserted into the center comes out with moist crumbs. Once baked, set the pan aside to cool for at least an hour.
Step 2: Cream Cheese Layer
While the brownie base cools, take a mixing bowl and beat the cream cheese with a handheld mixer until smooth and creamy, about 2-3 minutes. Add a splash of vanilla extract to boost flavor. Once the brownie base is completely cooled, spread the cream cheese mixture evenly over the top using a spatula, smoothing it out as you go.
Step 3: Pudding Layer
In a separate bowl, whisk together the pudding mix and milk until fully combined, and allow it to thicken for about 2-5 minutes. As it thickens, keep stirring to avoid lumps. Once ready, gently spread the pudding layer over the cream cheese, smoothing it out for an even finish and ensuring it covers the entire surface.
Step 4: Whipped Topping
Now it’s time to add the final touch! Retrieve the whipped topping and, using a spatula, dollop it over the pudding layer. Carefully spread the topping to create a smooth, fluffy layer on top. Make sure it’s even and covers the entire cake, creating a delightful creamy finish for your Brownie Refrigerator Cake.
Step 5: Chill
Cover the Brownie Refrigerator Cake with plastic wrap or foil and place it in the refrigerator. Allow it to chill for at least 2 hours, though overnight is best for flavors to meld and layers to set properly. This chilling step is crucial for the cake to hold its structure when cut.
Step 6: Serve
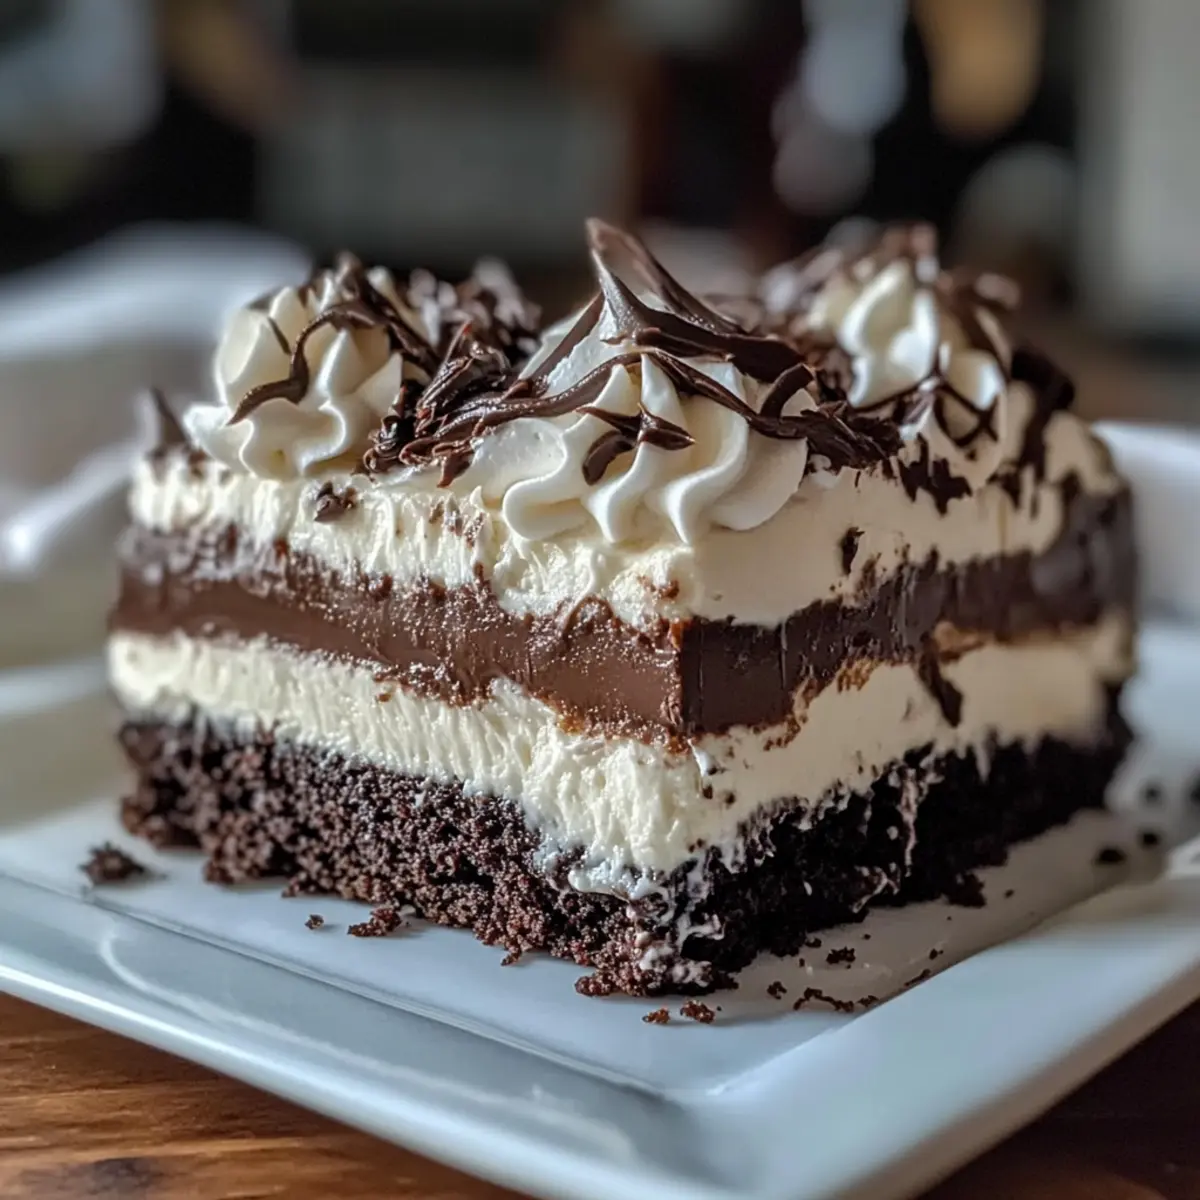
When ready to serve, remove the cake from the refrigerator and slice it with a sharp knife. To ensure clean cuts, wipe the knife between slices. Each bite will reveal the delectable layers of brownie, cream cheese, pudding, and whipped topping, making for an irresistible dessert at your next gathering!
Make Ahead Options
The Brownie Refrigerator Cake is ideal for meal prep, allowing you to save valuable time on busy days! You can prepare the brownie base up to 24 hours in advance, letting it cool completely before adding the cream cheese and pudding layers. Both these layers can also be spread on the brownie base and stored in the refrigerator for up to 3 days. To maintain the best quality, cover the cake tightly with plastic wrap to prevent it from absorbing other flavors in the fridge. When you’re ready to serve, simply add the whipped topping right before enjoying this delicious treat, ensuring that every bite is just as delightful as the first!
What to Serve with Decadent No-Bake Brownie Refrigerator Cake
Transform your dessert experience by crafting a delightful spread to accompany your luscious layered cake.
-
Fresh Berries: Juicy strawberries or raspberries add a refreshing burst of flavor and a beautiful contrast to the rich cake.
-
Vanilla Ice Cream: A scoop of creamy vanilla ice cream complements the chocolatey layers, creating a blissful combination for every bite.
-
Chocolate Sauce: Drizzle warm chocolate sauce over the cake for an indulgent touch that elevates the sweetness of the dessert.
-
Coconut Whipped Cream: For a tropical flair, serve alongside coconut whipped cream, enhancing the cake’s rich, creamy texture.
-
Coffee or Espresso: A rich cup of coffee balances the sweetness, making it the perfect pairing to enjoy with every slice of cake.
-
Milkshake: A chocolate or vanilla milkshake makes for a fun twist, turning dessert into an exciting treat that’s sure to delight.
-
Nutty Caramel Drizzle: A drizzle of caramel sauce infused with crushed nuts adds an unexpected crunch, blending textures beautifully with the smooth cake.
-
Mint Leaves: Garnish with fresh mint leaves not only for a pop of color but also for a bright, refreshing finish that enhances flavors.
Storage Tips for Brownie Refrigerator Cake
Fridge: Store any leftover Brownie Refrigerator Cake in an airtight container in the refrigerator for up to 5 days to keep it fresh and delicious.
Freezer: For longer storage, you can freeze the cake for up to 2 months. Wrap it tightly in plastic wrap and then in aluminum foil to prevent freezer burn.
Thawing: When ready to enjoy, move the frozen cake to the refrigerator to thaw overnight before serving. This helps retain its creamy texture.
Serving After Storage: If the cake has been frozen, ensure it chills in the fridge for at least a couple of hours to regain its ideal consistency before slicing and serving.
Brownie Refrigerator Cake Variations
Feel free to personalize your Brownie Refrigerator Cake with these delightful twists that will tantalize your taste buds!
- Gluten-Free: Swap the regular brownie mix with a gluten-free version for a cake everyone can enjoy. Your gluten-free friends will appreciate the thoughtful gesture!
- Dairy-Free Creamy Layer: Use dairy-free cream cheese to keep it creamy without dairy. The texture remains wonderfully smooth, ensuring no one misses out!
- Flavor-Filled Pudding: Experiment with butterscotch or caramel pudding mix for a sweet surprise that adds a whole new flavor dimension. It’s all about crafting your perfect cake!
- Nutty Crunch: Incorporate crushed pecans or almonds into the brownie batter for added texture. The crunchy bits will give each bite a delightful surprise!
- Berry Bliss: Top your cake with fresh strawberries or raspberries before serving to not only elevate presentation but also add a fruity freshness.
- Caramel Drizzle: Drizzle homemade caramel sauce on top for an irresistible finishing touch that adds richness and flavor contrast.
- Chocolate Lovers Delight: Stir in chocolate chips into the brownie mix for an extra chocolatey experience. You can never have too much chocolate!
- Almond Extract Twist: Replace vanilla extract with almond extract in the cream cheese layer for a subtle, nutty explosion of flavor that complements the chocolate perfectly.
For a similar level of indulgence, you might also want to try these Moist Carrot Cake when you crave something a little different. Each option allows you to tailor the recipe and share your unique version with family and friends!
Expert Tips for Brownie Refrigerator Cake
Cooling Is Key: Allow brownies to cool completely to avoid melting the cream cheese layer, preserving the perfect texture.
Chill, Chill, Chill: Don’t skip the chilling step. This is essential for ensuring your Brownie Refrigerator Cake holds its shape when sliced.
Spread with Care: Allow the whipped topping to thaw slightly for easier spreading over the pudding layer, ensuring a smoother finish.
Slice Like a Pro: Chill the cake an extra hour before slicing for cleaner cuts, which beautifully showcase the layered perfection of your dessert.
Flavor Flexibility: Experiment with different pudding flavors to create unique spins on your Brownie Refrigerator Cake, and make it your own!
Brownie Refrigerator Cake Recipe FAQs
What type of brownie mix should I use for the Brownie Refrigerator Cake?
Absolutely! You can use any regular brownie mix as your base for this fabulous cake. If you need a gluten-free option, look for a certified gluten-free brownie mix—plenty of delicious brands are available that deliver great taste without compromising texture.
How long can I store leftovers of the Brownie Refrigerator Cake?
Very! You can store your leftover Brownie Refrigerator Cake in an airtight container in the refrigerator for up to 5 days. Just be sure to cover it well to maintain its freshness and creamy layers. The longer it sits, the more the flavors mingle, making it even tastier!
Can I freeze the Brownie Refrigerator Cake?
Of course! You can freeze your Brownie Refrigerator Cake for up to 2 months. Wrap it tightly in plastic wrap, followed by aluminum foil to prevent freezer burn. When you’re ready to enjoy it, simply transfer it to the refrigerator overnight to thaw. This method retains its creamy texture beautifully.
What should I do if my pudding layer isn’t thickening properly?
If your pudding layer isn’t thickening as expected, make sure you whisk the pudding mix and milk together thoroughly, allowing it to sit for about 2-5 minutes while stirring continuously to eliminate lumps. If it still seems too runny, try adding a little more pudding mix to the mixture or letting it sit a bit longer before spreading it over your cake layers—it often helps to give it that perfect thickness!
Can I make the Brownie Refrigerator Cake dairy-free?
Absolutely! You can make this dessert dairy-free without sacrificing taste. Substitute the cream cheese with dairy-free cream cheese and the whipped topping with a coconut-based option. For the pudding, use almond milk or another plant-based milk and select a dairy-free pudding mix. Enjoy all the indulgence with none of the dairy!
Is it better to make the Brownie Refrigerator Cake the day before serving?
Definitely! Making the Brownie Refrigerator Cake a day in advance is ideal. This allows the flavors to develop beautifully as the layers chill together in the refrigerator. Just remember to leave it to chill for at least 2 hours, or overnight for the best results—trust me, the wait is worth it!
Irresistible Brownie Refrigerator Cake with No-Bake Layers
Ingredients
Equipment
Method
- Preheat your oven according to the brownie mix package instructions. Prepare brownie mix as directed and pour into a greased baking pan. Bake for 20-25 minutes, or until a toothpick inserted into the center comes out with moist crumbs. Allow to cool for at least an hour.
- In a mixing bowl, beat the cream cheese until smooth and creamy, about 2-3 minutes. Add vanilla extract.
- Once cooled, spread the cream cheese mixture over the brownie base.
- In a separate bowl, whisk together the pudding mix and milk until fully combined. Allow to thicken for 2-5 minutes, then spread evenly over the cream cheese layer.
- Dollop the whipped topping over the pudding layer and spread it to create a smooth, fluffy finish.
- Cover with plastic wrap or foil and refrigerate for at least 2 hours, preferably overnight.
- Slice with a sharp knife when ready to serve, wiping the knife between slices.
Leave a Reply