
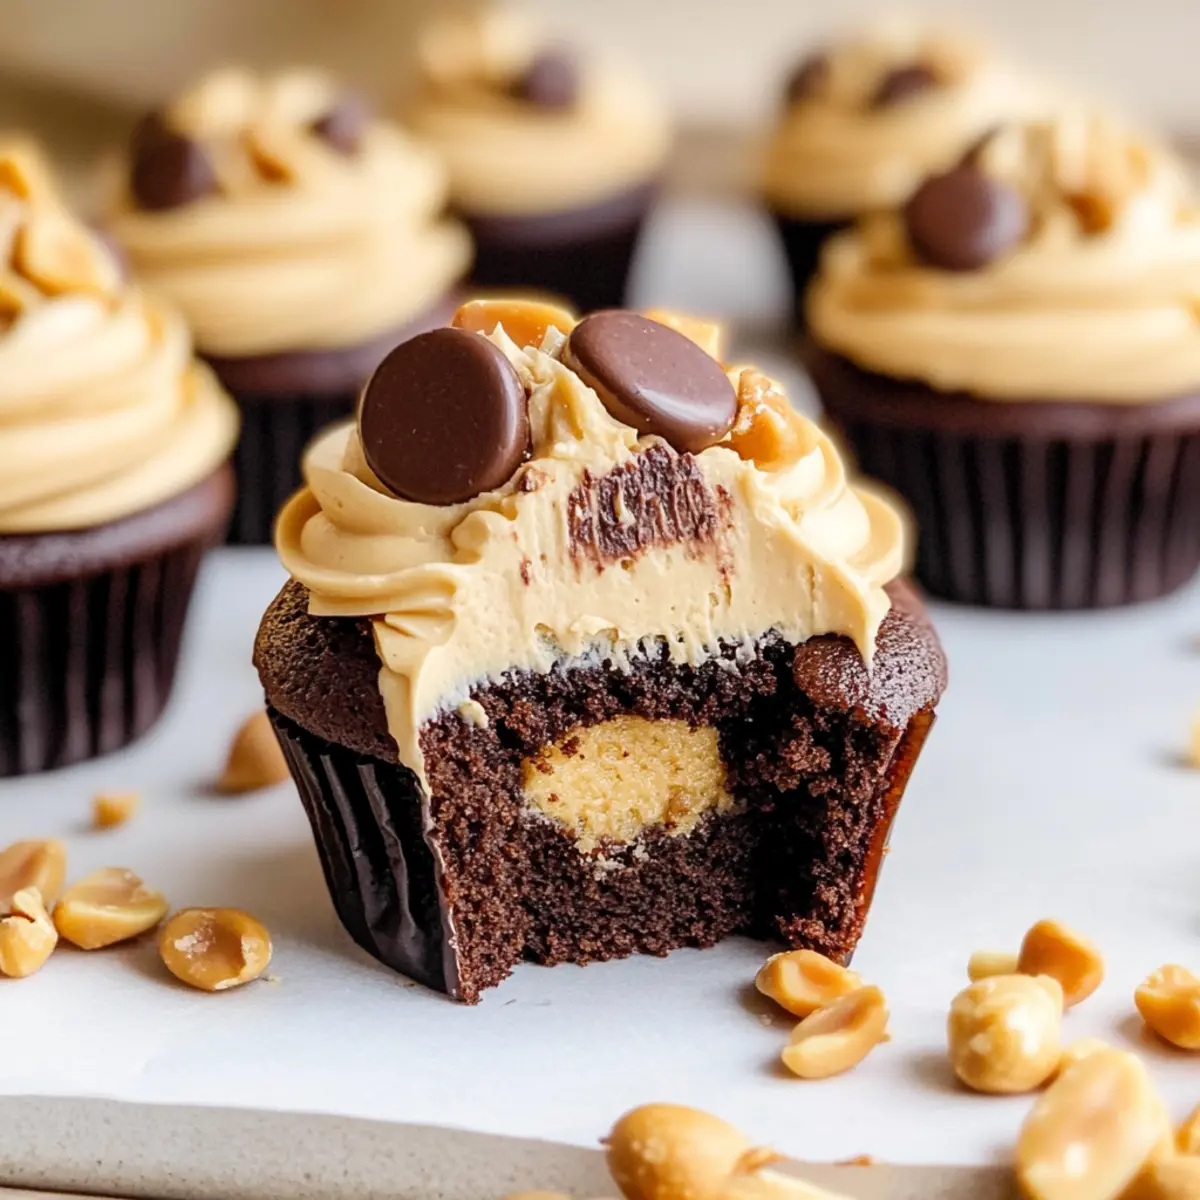
As the delightful aroma of peanut butter and chocolate wafts through my kitchen, I’m transported to a moment where decadence meets nostalgia. These Peanut Butter Chocolate Cupcakes are not just a treat; they’re a celebration of flavors that dance merrily on your palate. With their incredibly soft and moist texture, every bite reveals a hidden core of creamy peanut butter, while the luscious peanut butter buttercream on top is pure indulgence. What’s more, these cupcakes are a breeze to whip up, making them the perfect go-to dessert for gatherings or cozy nights in. Whether you’re a seasoned home chef or simply love homemade food, this recipe promises to be a crowd-pleaser that’s sure to banish any cravings for fast food. Ready to dive into this delicious journey? Let’s get baking!
Why Make Peanut Butter Chocolate Cupcakes?
Decadent Indulgence: These cupcakes perfectly blend rich chocolate and creamy peanut butter, creating a flavorsome experience that will leave your taste buds dancing.
Easy to Prepare: With simple ingredients and straightforward instructions, you can whip these up in no time — the perfect choice for busy weekdays!
Impressive Presentation: Topped with smooth peanut butter buttercream and crunchy treats, they look as good as they taste and are sure to impress your guests.
Nostalgic Delight: Each bite evokes the comforting nostalgia of your favorite sweets, reminding you of joyful moments from the past.
Versatile and Fun: Get creative! Add chocolate chips or try a chocolate ganache frosting. These cupcakes adapt easily to your cravings, making them a fabulous treat for any occasion.
Perfect for Sharing: Whether it’s a family gathering or a casual dinner party, these cupcakes are bound to be a hit, providing everyone with a slice of blissful chocolate-peanut butter goodness!
Peanut Butter Chocolate Cupcake Ingredients
-
For the Cupcakes
• Boiling Water – Adds moisture to the cupcake batter and helps bloom cocoa; substitute with hot coffee for enhanced chocolate flavor.
• Granulated Sugar – Provides sweetness and contributes to the cupcake’s structure; no direct substitutions recommended.
• Unsweetened Dutch Cocoa Powder – Gives the chocolate flavor; for a different taste profile, use natural cocoa powder or carob powder.
• All-Purpose Flour – Provides structure to the cupcakes; can be substituted with gluten-free flour, but texture may vary.
• Instant Espresso Powder – Intensifies the chocolate flavor without adding coffee notes; omit if unavailable; results will be slightly dulled.
• Baking Powder & Baking Soda – Leavening agents that help the cupcakes rise; ensure they are fresh for optimal results.
• Salt – Balances sweetness and enhances flavor; no substitutes required.
• Sour Cream – Ensures moistness and tender texture; plain yogurt can serve as a substitute.
• Vegetable Oil – Keeps the cupcakes moist and adds richness; can be swapped with melted coconut oil or melted butter.
• Large Eggs – Binds ingredients and leavens the batter; aquafaba can be used as a vegan substitute (3 tablespoons = 1 egg).
• Vanilla Extract – Adds flavor complexity; use pure vanilla extract for best results. -
For the Peanut Butter Buttercream
• Butter – Acts as the base for frosting; contributes flavor and texture; vegan butter works for a dairy-free option.
• Creamy Peanut Butter – Forms the main flavor profile in the frosting; almond or sunbutter can substitute for different flavors.
• Powdered Sugar – Provides sweetness and aids in achieving a smooth frosting; use granulated sugar blended to powder in a pinch.
• Milk – Adjusts the consistency of the frosting; non-dairy milk could be used for lactose-free versions. -
For Decoration
• Reese’s Mini Peanut Butter Cups & Peanuts – Decorative items for topping cupcakes, adding a fun and delightful crunch.
Embrace the joy of baking these Peanut Butter Chocolate Cupcakes and let each scrumptious bite elevate your dessert experience!
Step‑by‑Step Instructions for Peanut Butter Chocolate Cupcakes
Step 1: Preheat the Oven
Begin by preheating your oven to 160ºC (320ºF). This ensures that your Peanut Butter Chocolate Cupcakes bake evenly. While the oven heats, line a standard 12-cup muffin tin with cupcake liners, ready to hold the delicious batter you’ll soon prepare.
Step 2: Mix the Dry Ingredients
In a large mixing bowl, sift together all the dry ingredients: flour, cocoa powder, baking powder, baking soda, and salt. Whisk these gently until well combined, creating a light and airy mixture. The visual cue for readiness is a uniform color without clumps, ensuring the chocolate flavor will shine through in every bite.
Step 3: Combine Wet Ingredients
In another bowl, mix your wet ingredients, including granulated sugar, eggs, vegetable oil, vanilla extract, and sour cream. Once these are combined, add the boiling water slowly, mixing well to create a smooth batter. The heat from the water will help bloom the cocoa, enhancing that rich chocolate flavor in your Peanut Butter Chocolate Cupcakes.
Step 4: Blend Dry and Wet Ingredients
Gradually pour the wet mixture into the dry ingredients, stirring with a spatula just until combined. It’s important to mix gently to avoid overworking the batter, which can lead to dense cupcakes. Aim for a few small lumps if necessary; this will result in the perfectly soft texture you desire.
Step 5: Fill Cupcake Liners
Carefully spoon the batter into the prepared cupcake liners, filling each about two-thirds full. This allows them to rise beautifully while baking. Use an ice cream scoop for even distribution, ensuring uniform baking and perfect cupcake shapes that look fantastic when served.
Step 6: Bake the Cupcakes
Place the muffin tin in the preheated oven and bake for 20-23 minutes. Your Peanut Butter Chocolate Cupcakes are done when a toothpick inserted into the center comes out clean. Once baked, remove them from the oven and allow them to cool in the pan for 5 minutes before transferring them to a wire rack to cool completely.
Step 7: Prepare the Peanut Butter Buttercream
In a mixing bowl, beat softened butter and creamy peanut butter until smooth and fluffy. Gradually add powdered sugar while continuing to mix, followed by vanilla extract and a splash of milk. Adjust the consistency by adding more sugar or milk, aiming for a spreadable yet thick buttercream that will perfectly crown your cupcakes.
Step 8: Core and Fill Your Cupcakes
Once your cupcakes are cool, use a small knife or a cupcake corer to remove a small portion from the center of each cupcake. This creates a cavity for the creamy peanut butter filling. Spoon some peanut butter into each cavity, ensuring they are filled generously for unexpected bursts of flavor.
Step 9: Frost and Decorate
Now it’s time to frost your cooled cupcakes! Use a piping bag fitted with your favorite tip to apply a generous swirl of peanut butter buttercream on top of each cupcake. For a fun touch, decorate with mini Reese’s Peanut Butter Cups and a sprinkle of chopped peanuts, creating an appealing texture contrast.
Step 10: Let Them Set and Serve
Allow the frosted Peanut Butter Chocolate Cupcakes to set for a short while, giving the buttercream time to firm up slightly. After this, they’re ready to be served! Present these delightful treats at your next gathering and watch everyone enjoy this decadent combination of peanut butter and chocolate.
Make Ahead Options
These Peanut Butter Chocolate Cupcakes are perfect for busy home cooks looking to save time! You can prepare the cupcake batter up to 24 hours in advance and refrigerate it until you’re ready to bake. Just remember to bring the batter to room temperature before filling the liners and baking for best results. The cupcakes themselves can also be made ahead and stored in an airtight container for up to 3 days. For the frosting, whip that up a day ahead as well and store it in the fridge; just give it a quick stir before piping onto the cooled cupcakes. Follow these steps, and you’ll enjoy deliciously fresh cupcakes with minimal day-of effort!
Expert Tips for Peanut Butter Chocolate Cupcakes
- Room Temperature Eggs: Ensure your eggs are at room temperature for the best emulsification, resulting in fluffier cupcakes.
- Gentle Mixing: Mix your batter gently until just combined—over mixing can create tough, dense cupcakes. Aim for a few lumps!
- Consistent Baking: Use an ice cream scoop to fill cupcake liners to ensure even baking and uniform cupcakes.
- Frosting Consistency: If your peanut butter buttercream is too runny, add more powdered sugar until you achieve the desired thick consistency.
- Cooling Time: Allow cupcakes to cool completely before frosting; this helps the buttercream maintain its shape and texture.
- Flavor Variations: Feel free to experiment by adding chocolate chips or changing the frosting to chocolate ganache for a fun twist on these Peanut Butter Chocolate Cupcakes!
Peanut Butter Chocolate Cupcakes Variations
Feel free to get creative with these delicious cupcakes and customize them to your heart’s content!
-
Nut Butter Swap: Use almond butter instead of peanut butter for a unique flavor twist that adds an extra nuttiness.
Consider how this change transforms the taste — it might just become your new favorite! -
Chocolate Chips: Fold in some chocolate chips into the batter for a delightful burst of melted chocolate in every bite.
This twist will surely make every cupcake a decadent surprise! -
Gluten-Free Option: Substitute all-purpose flour for a gluten-free blend to accommodate dietary needs without sacrificing taste.
Your gluten-sensitive friends will appreciate this thoughtful gesture! -
Flavored Frosting: Swap the peanut butter buttercream for chocolate ganache or whipped cream for a different but equally scrumptious topping.
Experimenting with flavors can lead to exciting new favorites! -
Spice It Up: Add a pinch of cinnamon or a dash of cayenne pepper to the batter for an unexpected flavor boost.
This subtle heat can elevate your traditional cupcake to an entirely new level of excitement. -
Mini Cupcakes: Make bite-sized versions of these cupcakes for an adorable party treat that everyone can enjoy guilt-free.
You can serve them at celebrations like a birthday or a holiday get-together. -
Topping Alternatives: Try using crushed pretzels or toffee bits on top instead of Reese’s for a fun crunch and sweet-salty contrast.
Your creativity in decorating will not go unnoticed! -
Fillings Galore: Experiment with different fillings like jam, Nutella, or even cream cheese to surprise your taste buds.
Each filling offers an exciting flavor profile just waiting to be discovered!
Before diving into your baking adventure, check out my other delicious desserts like Peanut Butter Pie or Triple Chocolate Mousse for more tasty inspiration!
How to Store and Freeze Peanut Butter Chocolate Cupcakes
Room Temperature: Keep unfrosted cupcakes in an airtight container for up to 3 days. This helps preserve their moistness without compromising flavor.
Fridge: For frosted cupcakes, store them in the fridge for up to a week. Ensure they’re in a well-sealed container to prevent the buttercream from drying out.
Freezer: To freeze, wrap unfrosted cupcakes individually in plastic wrap, then place them in a freezer-safe bag. They can last up to 3 months. Frost once thawed for best results.
Reheating: If desired, gently warm a cupcake in the microwave for about 10-15 seconds. This enhances the soft texture and brings the chocolate-peanut butter flavors back to life!
What to Serve with Peanut Butter Chocolate Cupcakes?
As you slice into these heavenly treats, it’s time to round out the experience with delightful accompaniments that elevate every bite.
-
Velvety Ice Cream: A scoop of vanilla or chocolate ice cream contrasts beautifully with the rich flavors, creating a creamy balance.
-
Fresh Berries: Juicy strawberries or raspberries add a tart brightness that cuts through the sweetness, refreshing your palate.
-
Whipped Cream: Light and airy whipped cream provides an additional layer of creaminess, perfect for dolloping on top of your cupcakes.
-
Cold Brew Coffee: The smooth richness of cold brew enhances the chocolate notes, making it an excellent choice for coffee enthusiasts.
-
Homemade Chocolate Sauce: Drizzling warm chocolate sauce adds a luscious touch, transforming cupcakes into an over-the-top dessert experience.
-
Peanut Butter Dip: Serve a small bowl of creamy peanut butter for dipping; it enhances the peanut flavor while being fun and interactive.
These pairings not only complement the decadent Peanut Butter Chocolate Cupcakes but also create a memorable dessert spread for any occasion!
Peanut Butter Chocolate Cupcakes Recipe FAQs
What type of peanut butter is best for the frosting?
For the frosting, I recommend using creamy peanut butter for a smooth texture. While chunky peanut butter can add fun crunch, it may result in a less homogeneous frosting. If you’re looking for a nut-free option, sunbutter is a wonderful alternative that still gives you that rich flavor profile.
How should I store my leftover cupcakes?
Absolutely! If you have unfrosted cupcakes, store them in an airtight container at room temperature for up to 3 days. For frosted cupcakes, transfer them to the fridge and keep them in a well-sealed container; they will stay fresh for about a week. To maintain that wonderful creamy frosting, make sure to keep them well-covered!
Can I freeze Peanut Butter Chocolate Cupcakes?
Yes, you can! For best results, wrap each unfrosted cupcake tightly in plastic wrap and place them in a freezer-safe bag. They’ll hold up beautifully in the freezer for up to 3 months. When you’re ready to enjoy them, simply thaw at room temperature and then frost with your peanut butter buttercream to revive their deliciousness.
Why are my cupcakes dense even after following the recipe?
That can be a common issue! Dense cupcakes can occur if the batter is overmixed, which develops the gluten in the flour. It’s crucial to mix just until combined; a few lumps are perfectly fine! Additionally, make sure your leavening agents, like baking powder and baking soda, are fresh. Check the expiration dates, as old baking agents may not produce the desired rise.
Is there a nut-free alternative I can use for the cupcakes?
Absolutely! For a nut-free version, you can substitute the creamy peanut butter with sunbutter or almond butter, ensuring that allergies are taken into consideration. Additionally, be sure to use dairy-free substitutes for butter and milk to accommodate any dietary restrictions for those with dairy allergies.
How do I know when the cupcakes are done baking?
You’ll know your Peanut Butter Chocolate Cupcakes are done when a toothpick inserted into the center comes out clean, with just a few crumbs attached. Also, the edges of the cupcakes should pull away slightly from the pan. For best results, set a timer for 20 minutes and check in periodically until they reach that perfect state!
Peanut Butter Chocolate Cupcakes That Melt in Your Mouth
Ingredients
Equipment
Method
- Preheat your oven to 160ºC (320ºF). Line a 12-cup muffin tin with cupcake liners.
- Sift dry ingredients: flour, cocoa powder, baking powder, baking soda, and salt in a bowl.
- Mix wet ingredients: granulated sugar, eggs, vegetable oil, vanilla extract, and sour cream. Slowly add boiling water.
- Gradually combine wet and dry mixtures, mixing gently until just combined.
- Spoon batter into cupcake liners, filling each about two-thirds full.
- Bake for 20-23 minutes, removing once a toothpick comes out clean. Cool in the pan for 5 minutes before transferring to a wire rack.
- Beat softened butter and creamy peanut butter until smooth. Gradually add powdered sugar, then vanilla and splash of milk.
- Adjust consistency of buttercream by adding more sugar or milk as needed.
- Core each cooled cupcake and fill with peanut butter.
- Frost with peanut butter buttercream and decorate with mini Reese's and chopped peanuts.
- Allow cupcakes to set before serving.
Leave a Reply